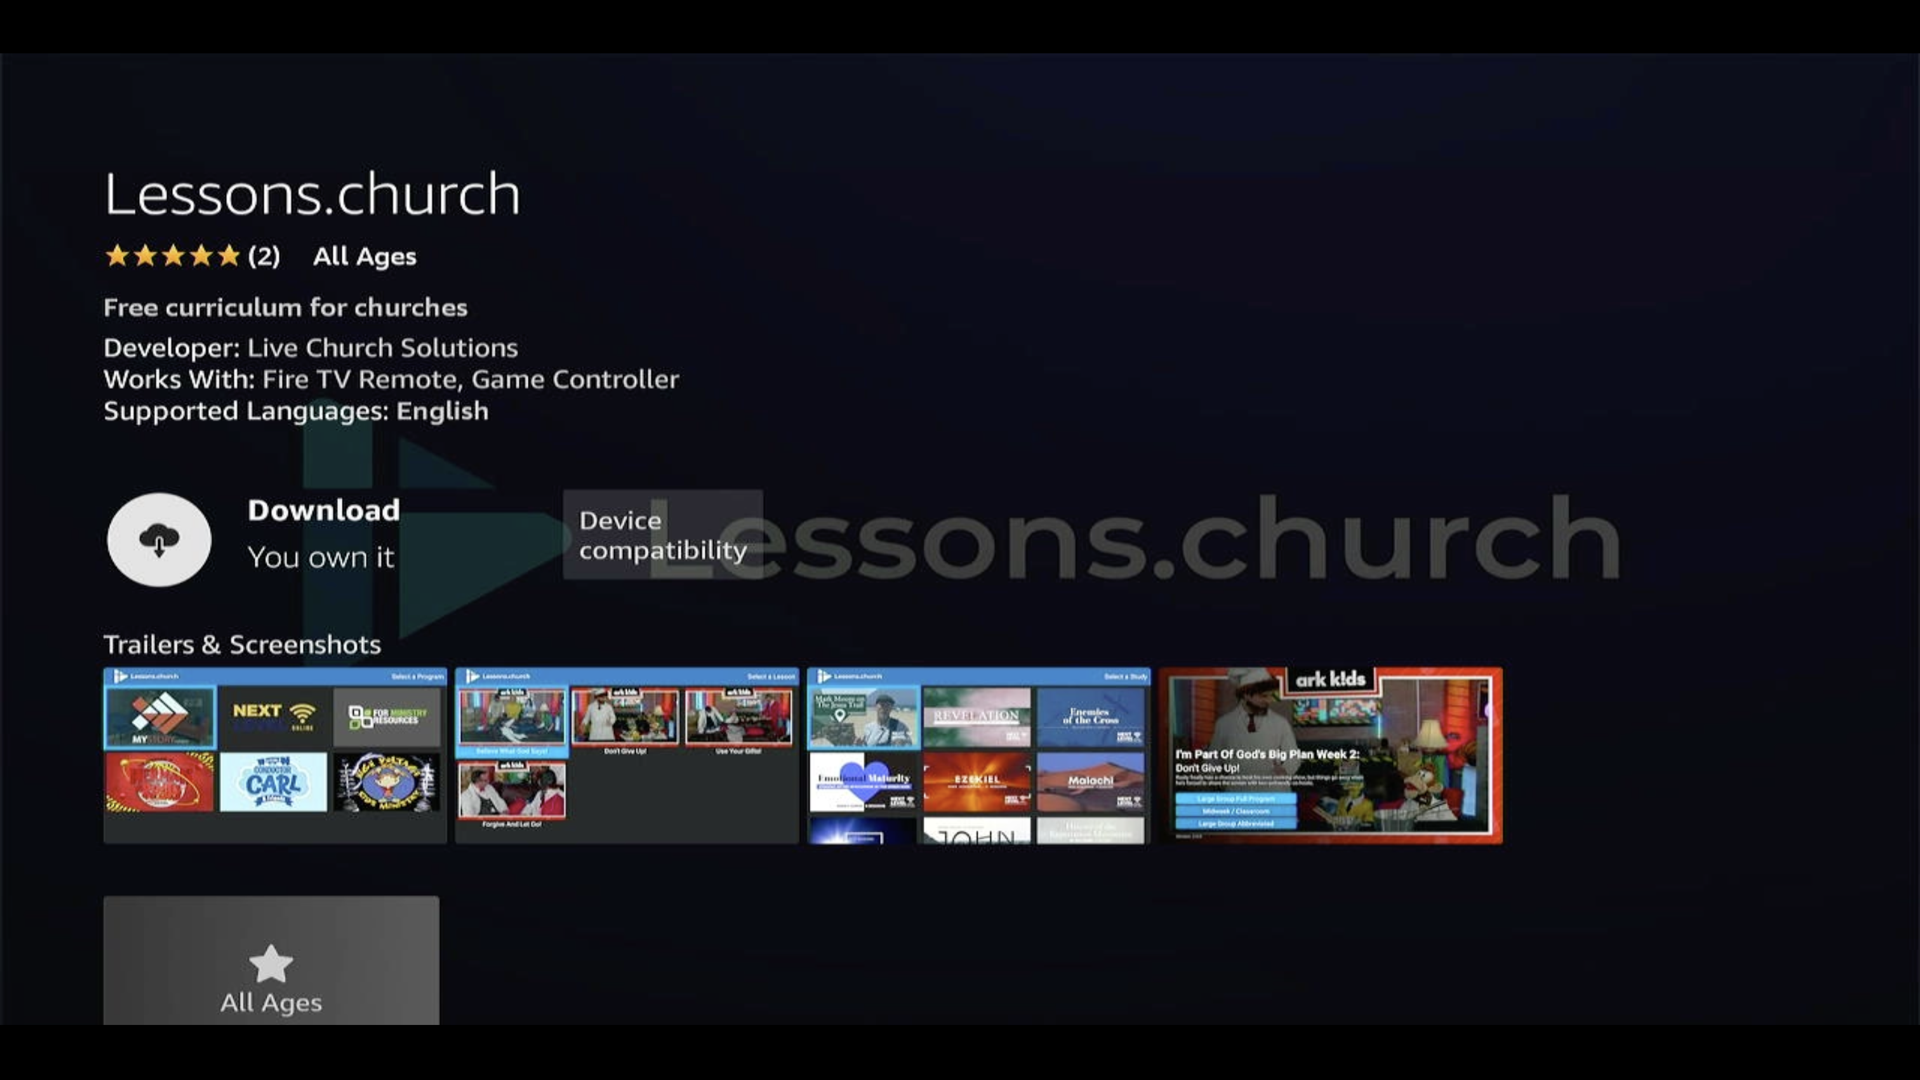
Lessons.church
Setting up Lessons.Church
🚀 Coming Soon
Lessons.Church Admin is Moving to B1.church!
Get ready for an amazing upgrade! We're bringing Lessons.church directly into B1.church Admin for a seamless experience.
✨ What's New?
- Schedule lessons right in B1Admin - No more switching between apps!
- New TV Player Coming - Better than ever with improved performance
- Seamless Integration - Everything in one place
📅 Start Scheduling Now! You can begin scheduling your lessons in B1Admin today. The new TV player app will be available soon to present your scheduled lessons.
Watch: How to Schedule Lessons.church Content in B1Admin
Steps
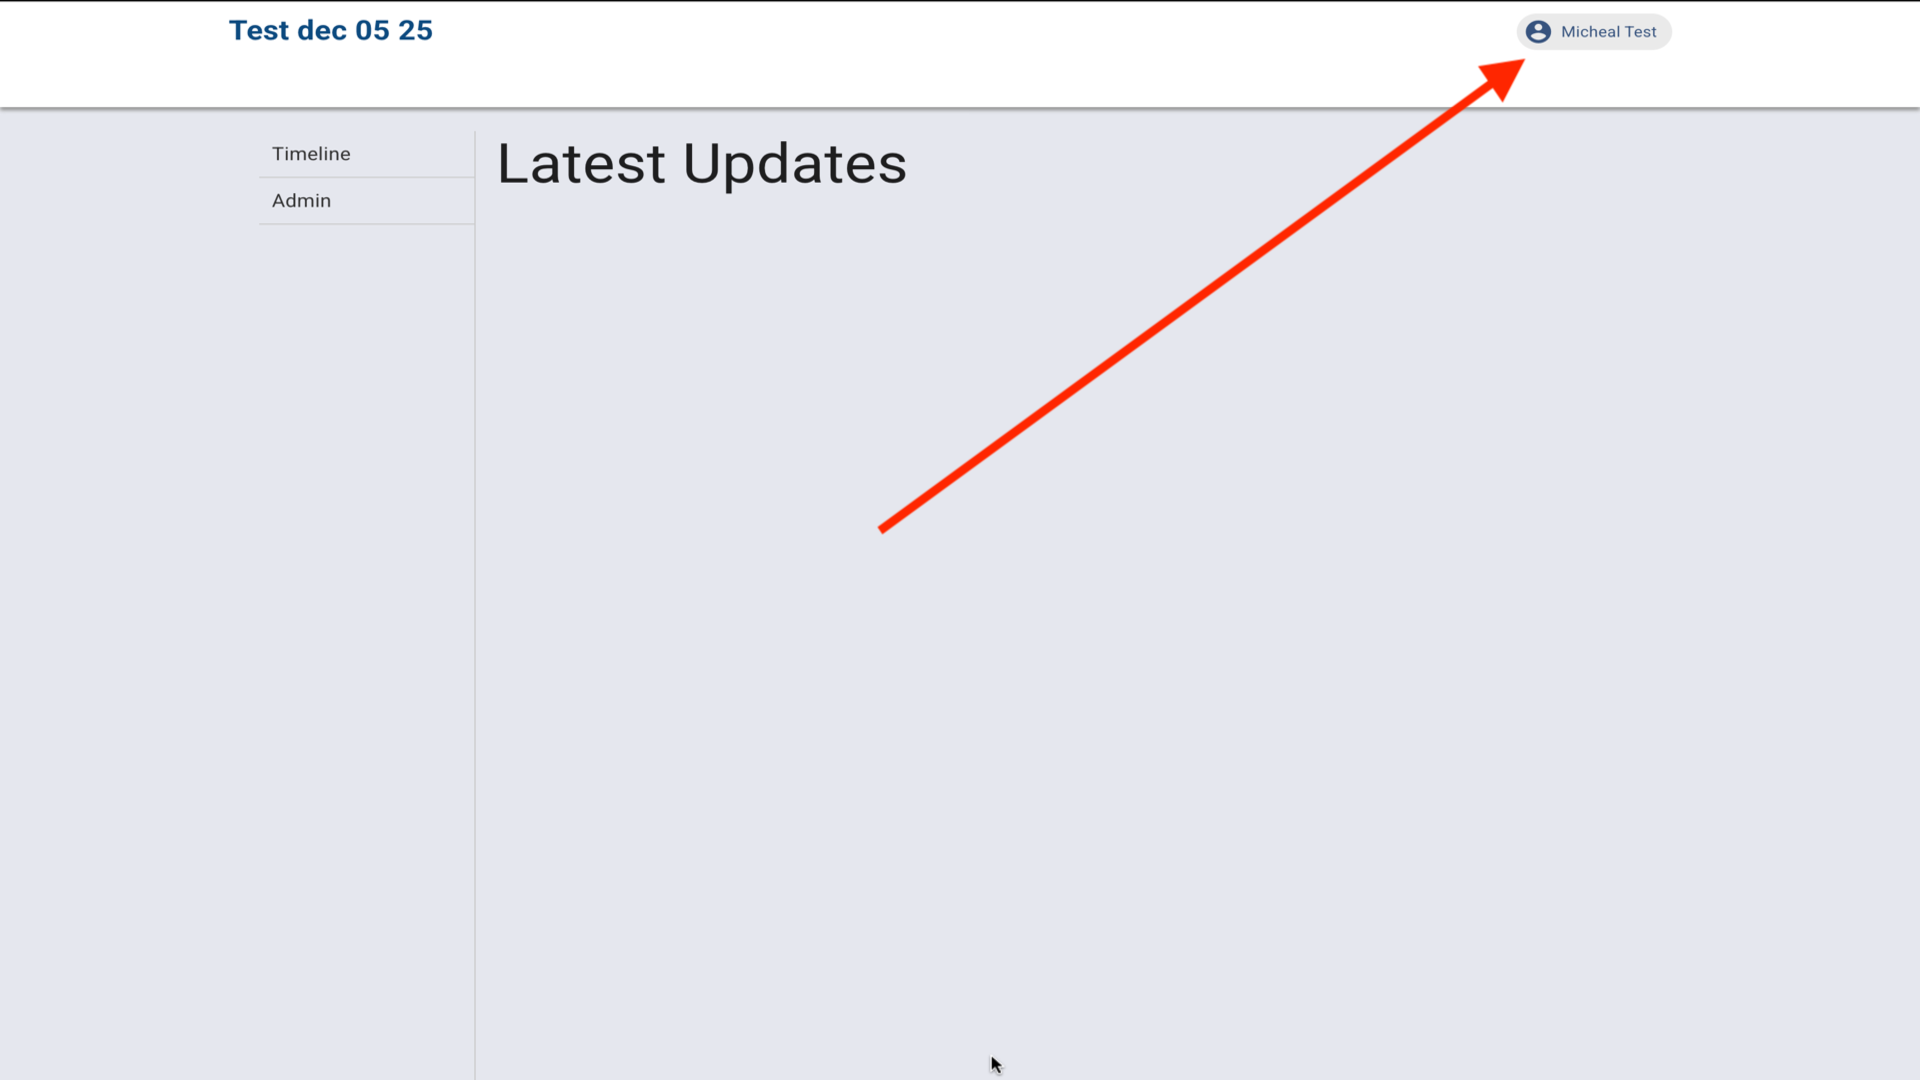
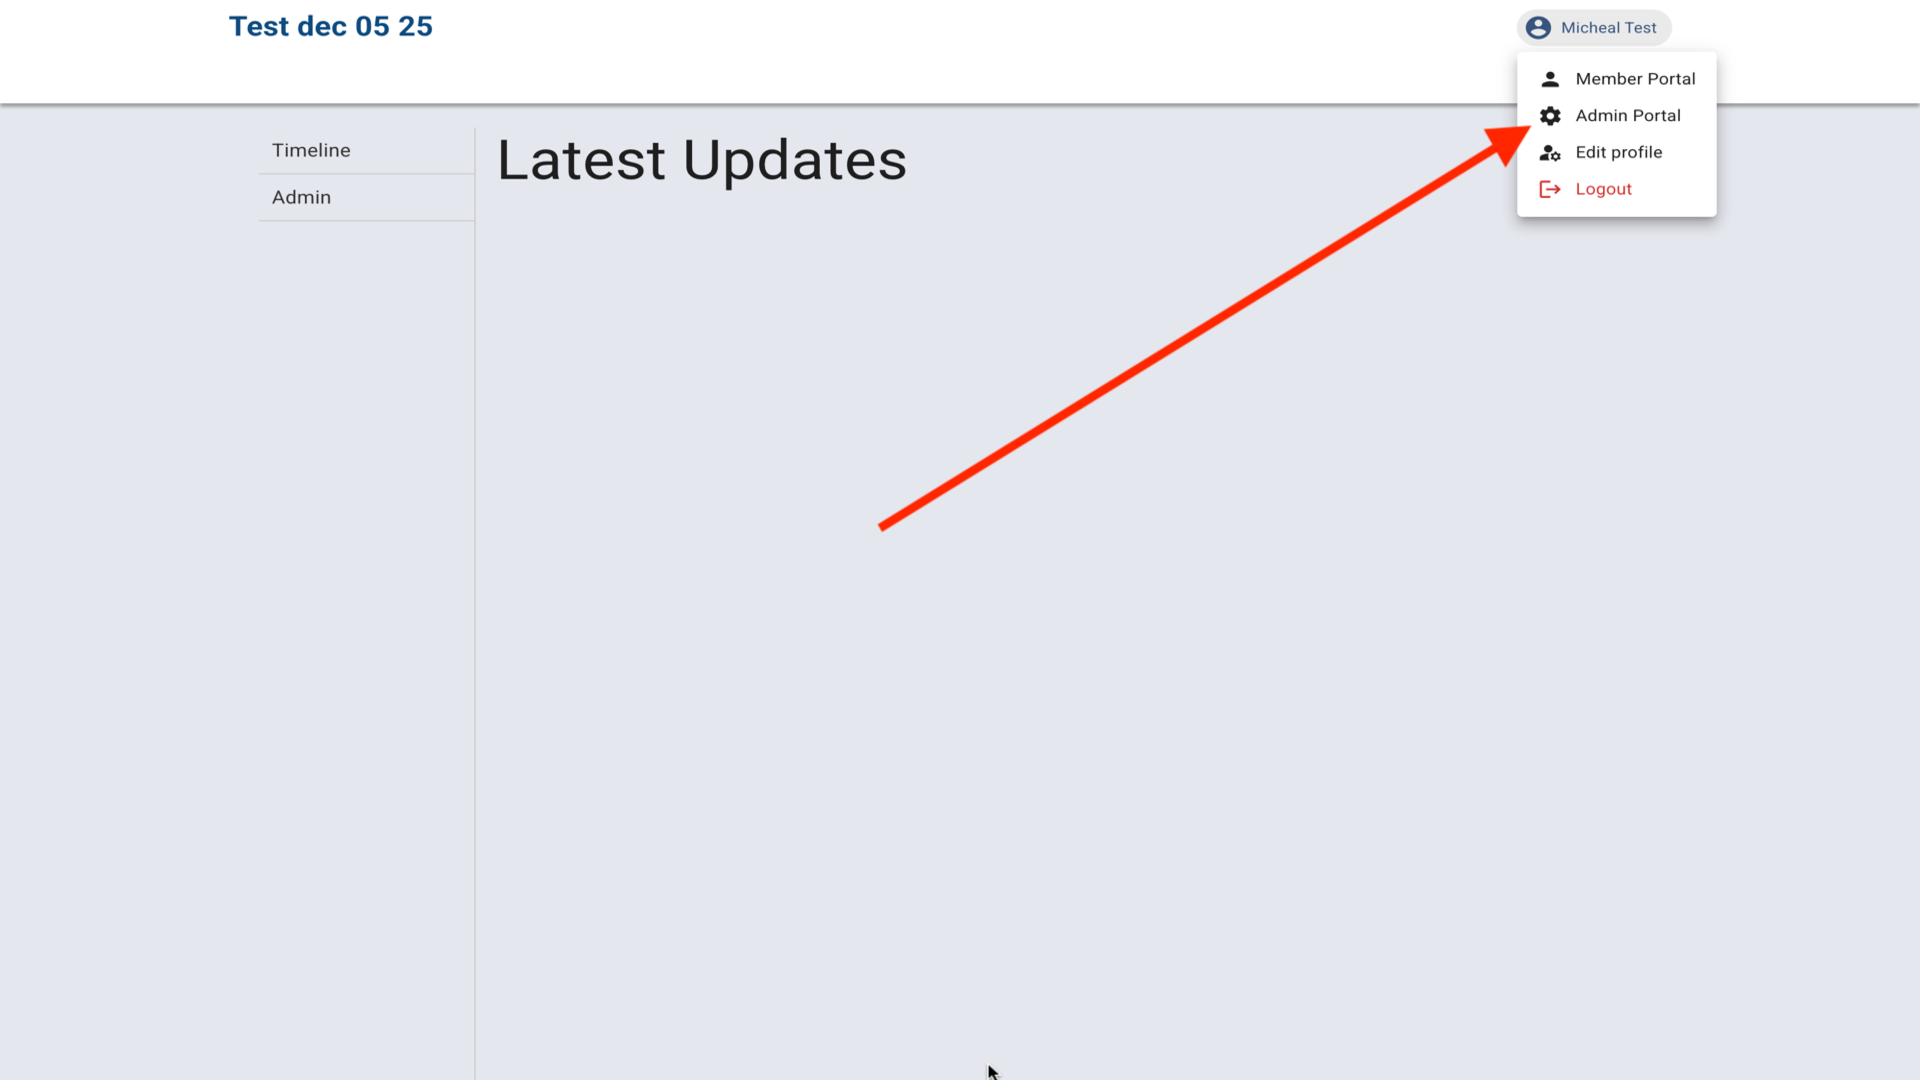
1.Click your profile icon in the top right▼
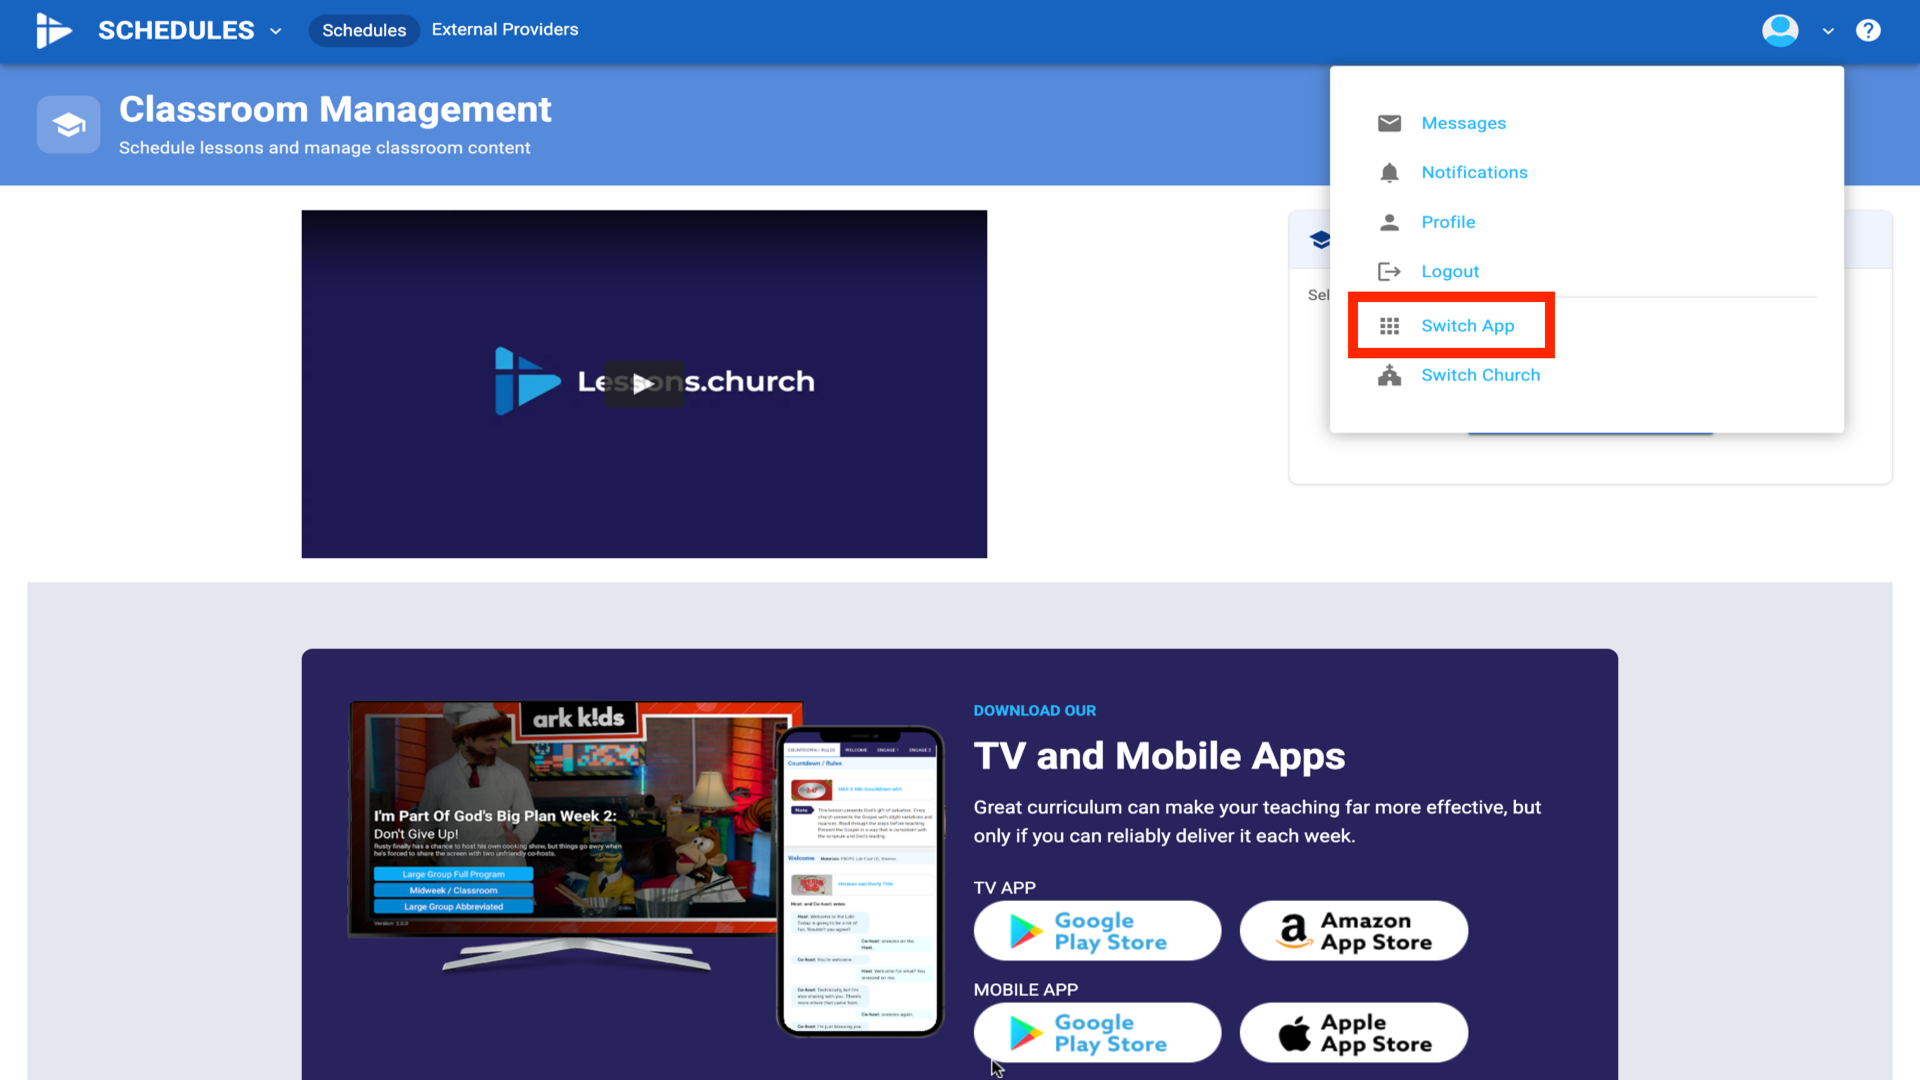
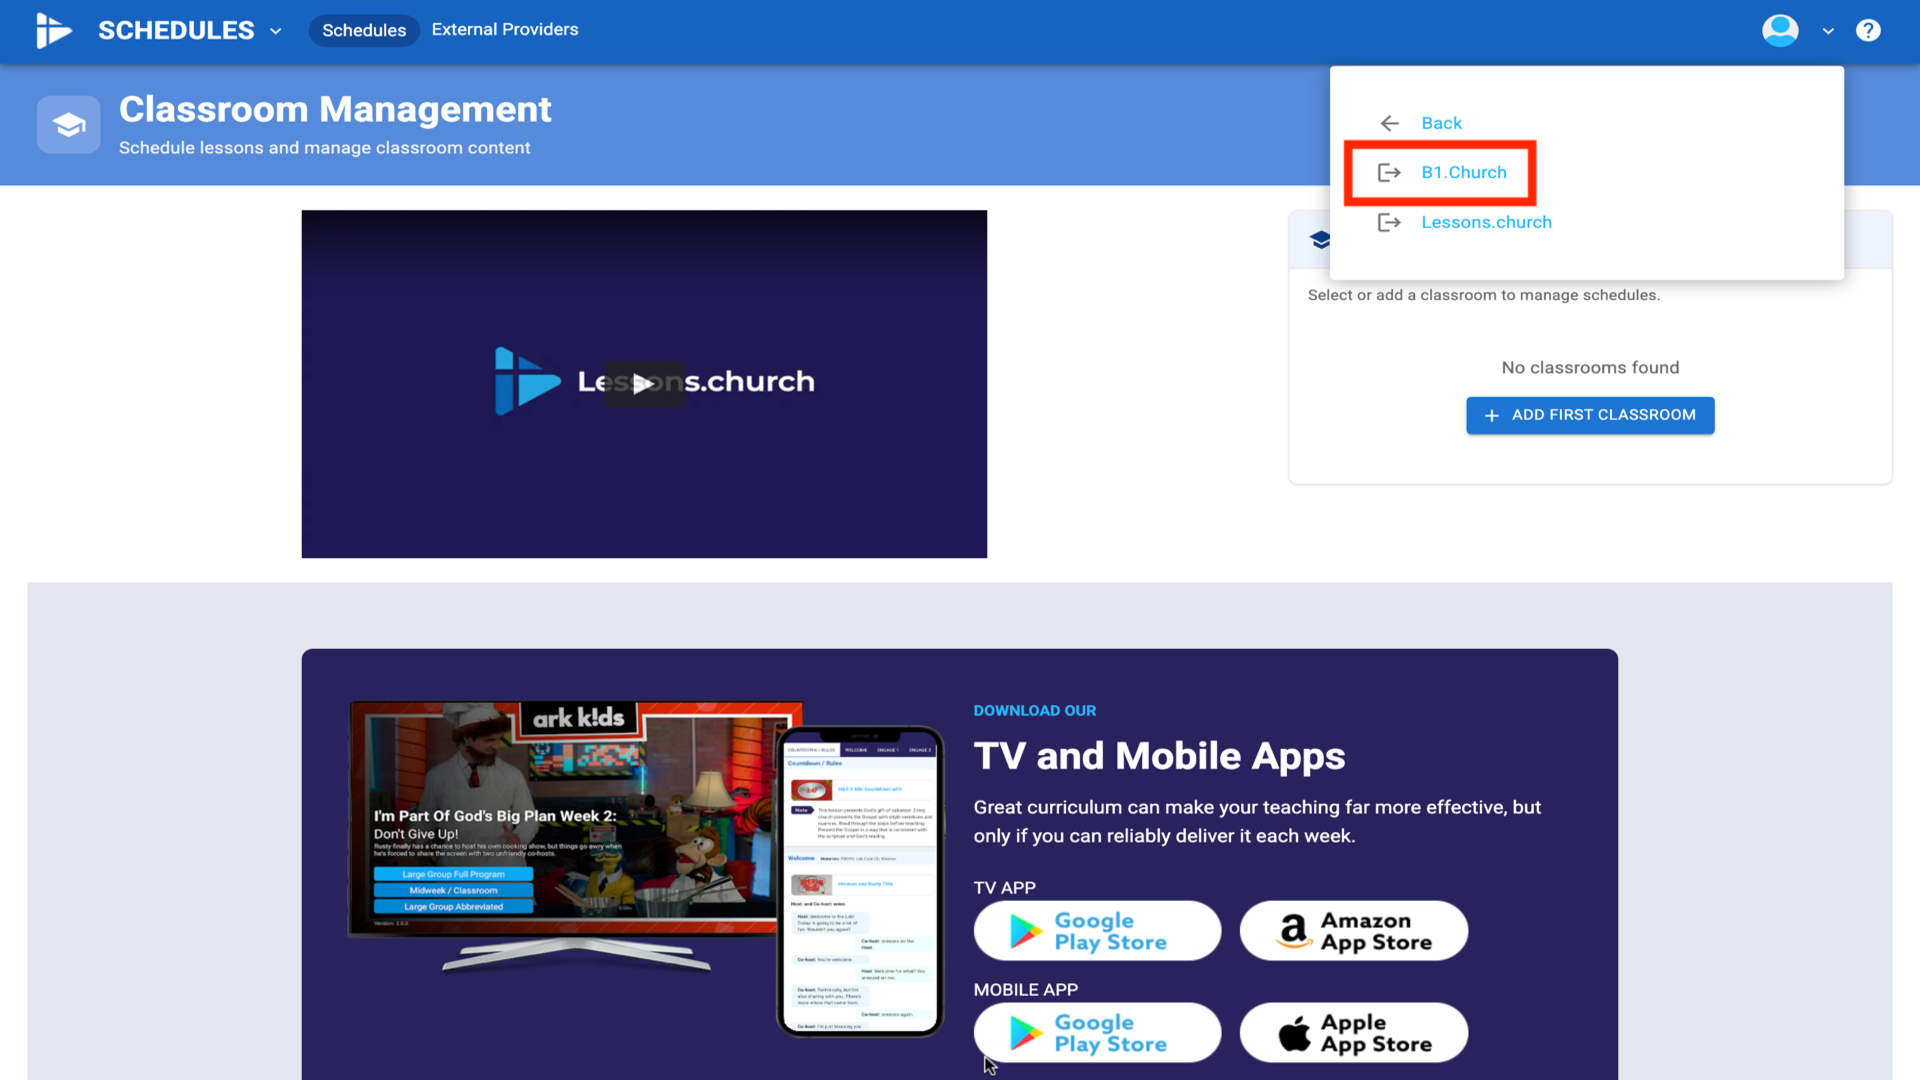
2.Click Switch App, then select B1.church▼
3.Click your name in the Member Portal▼
4.Select Admin Portal▼
5.This is the B1.church Dashboard▼
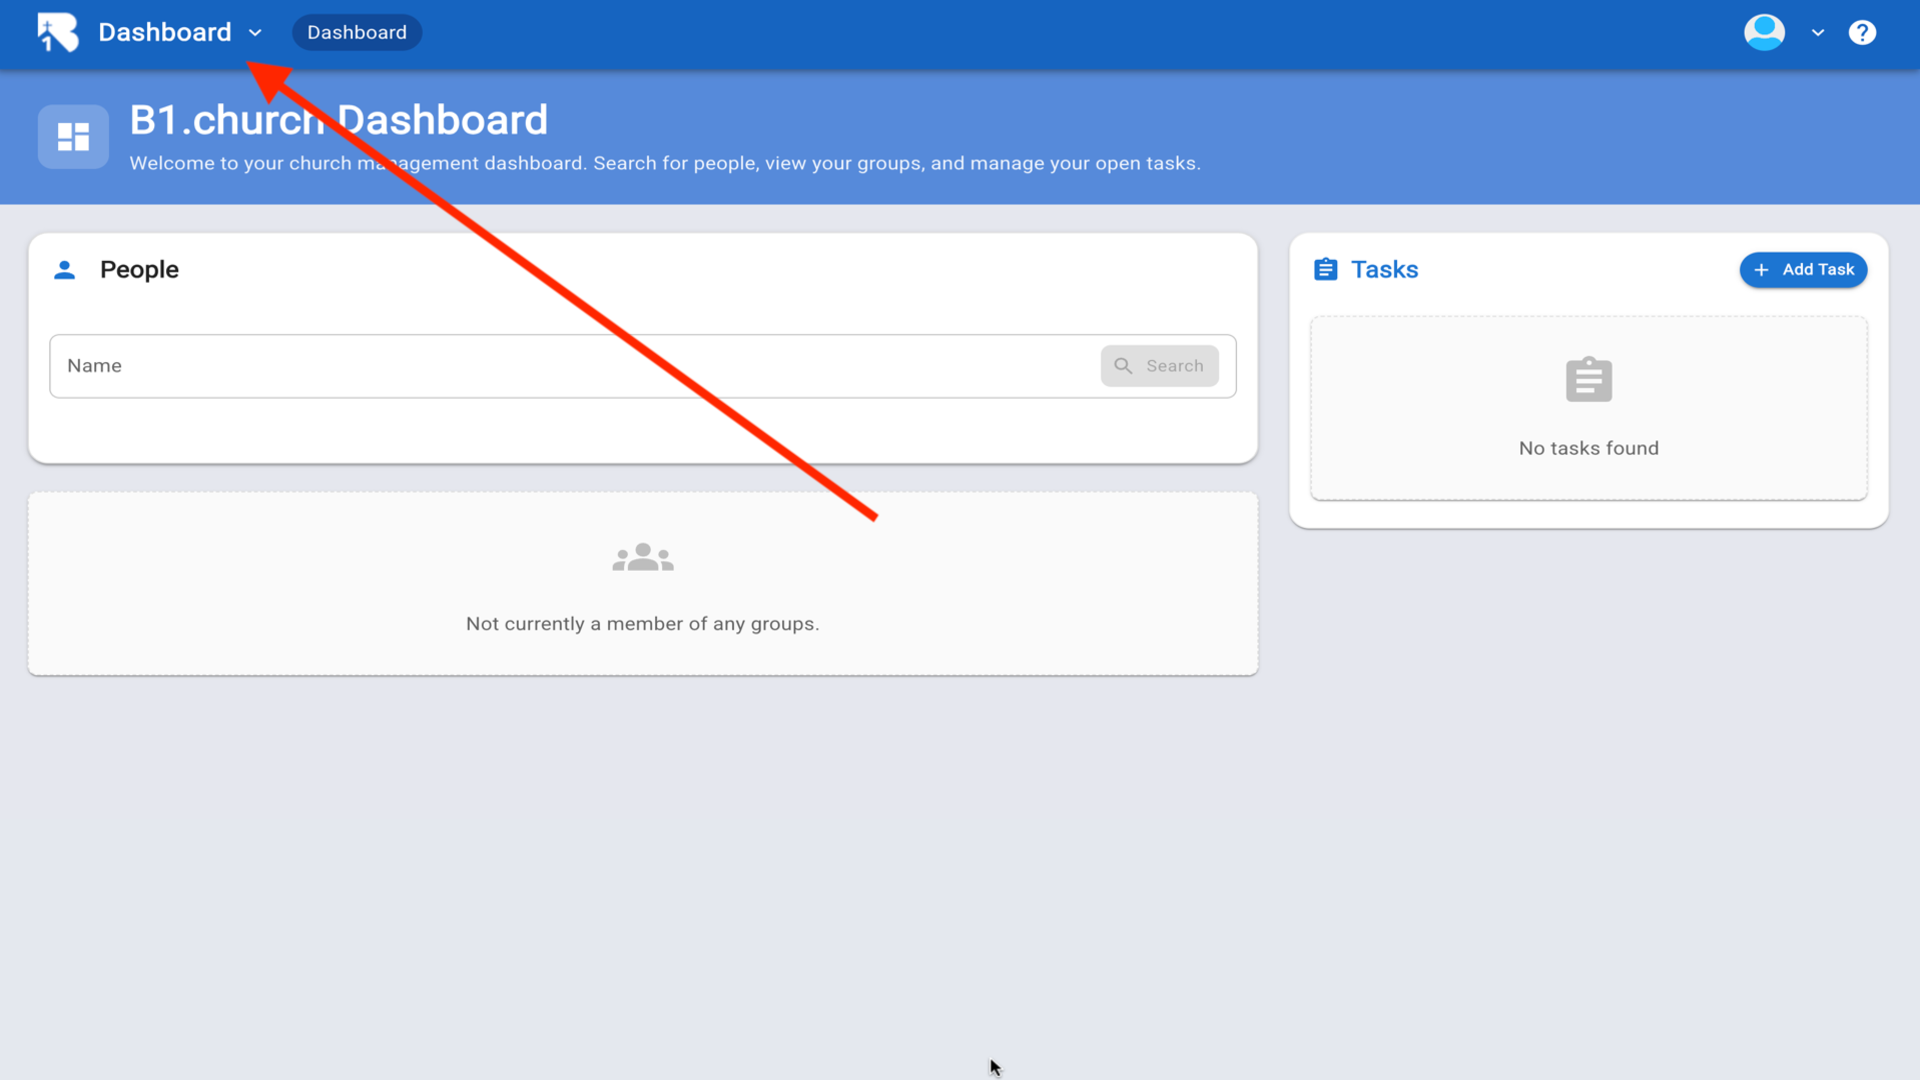
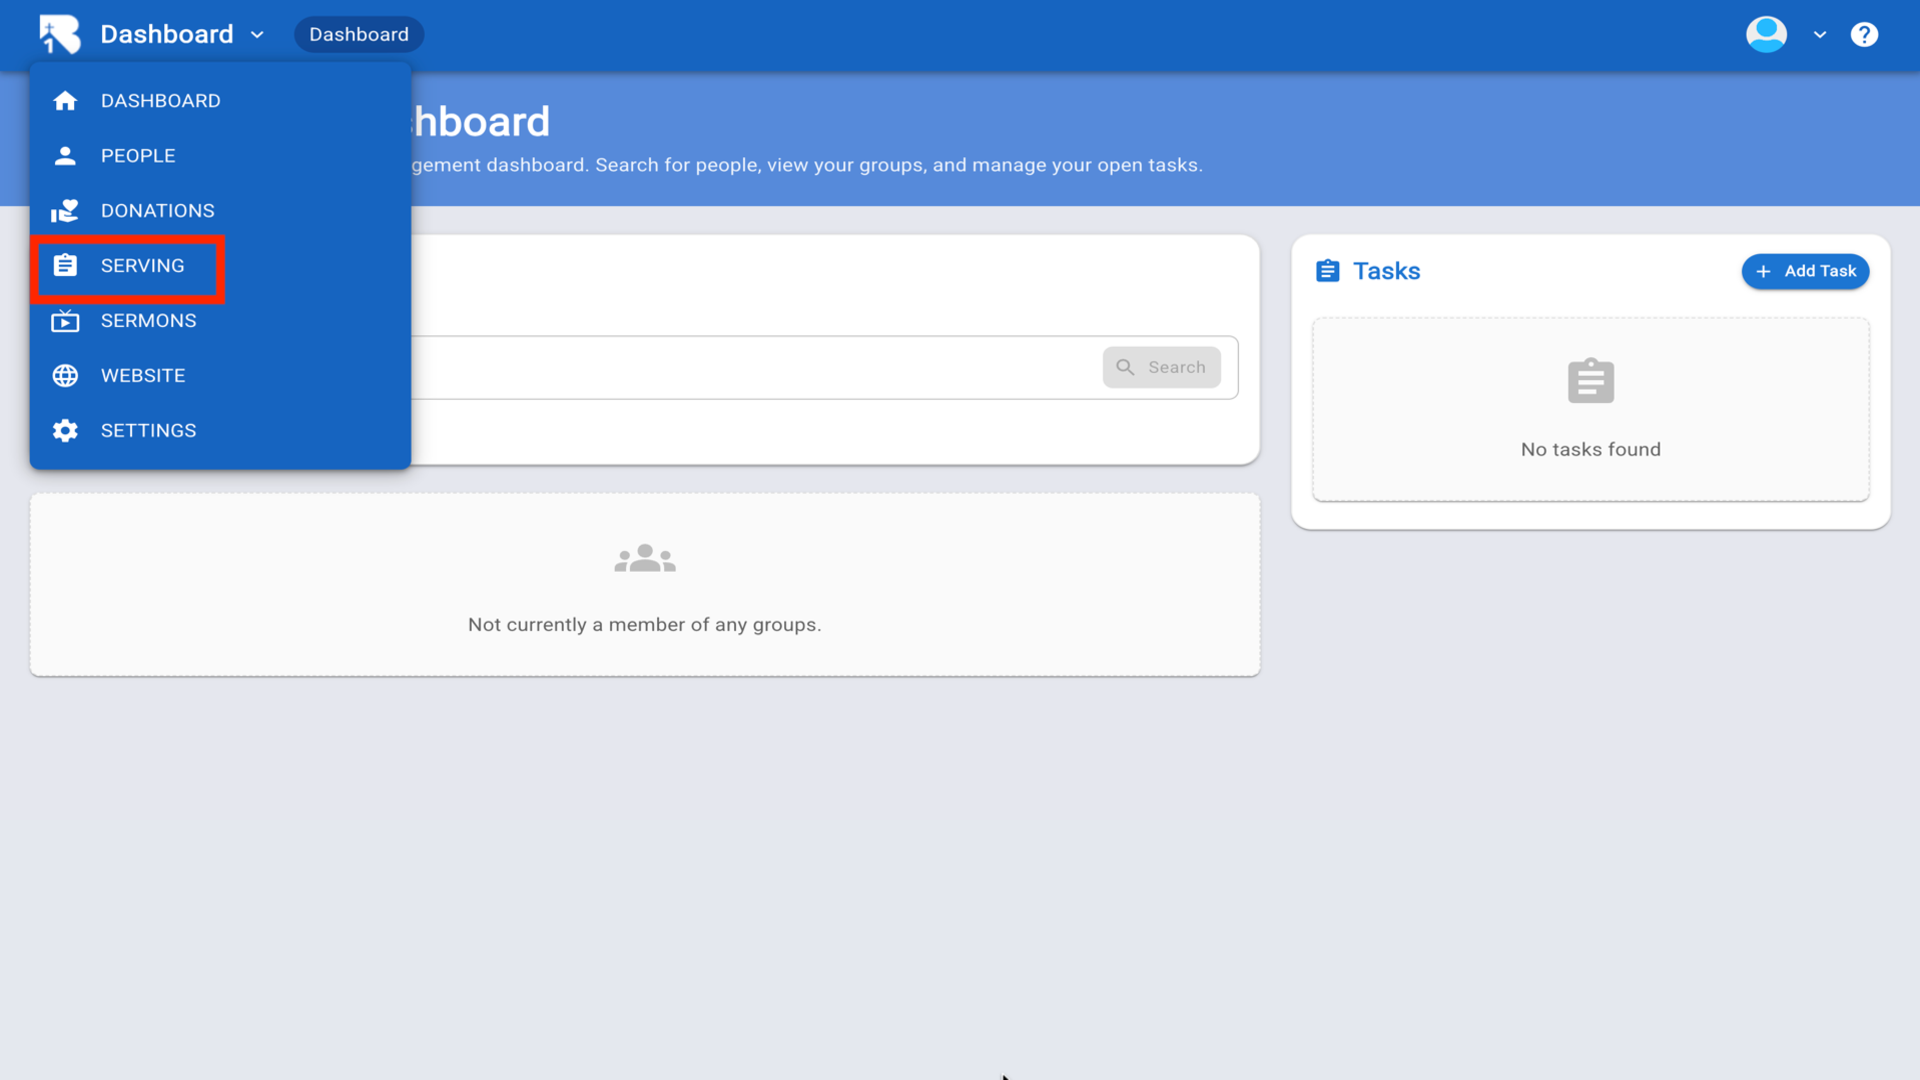
6.Click Dashboard dropdown and select Serving▼
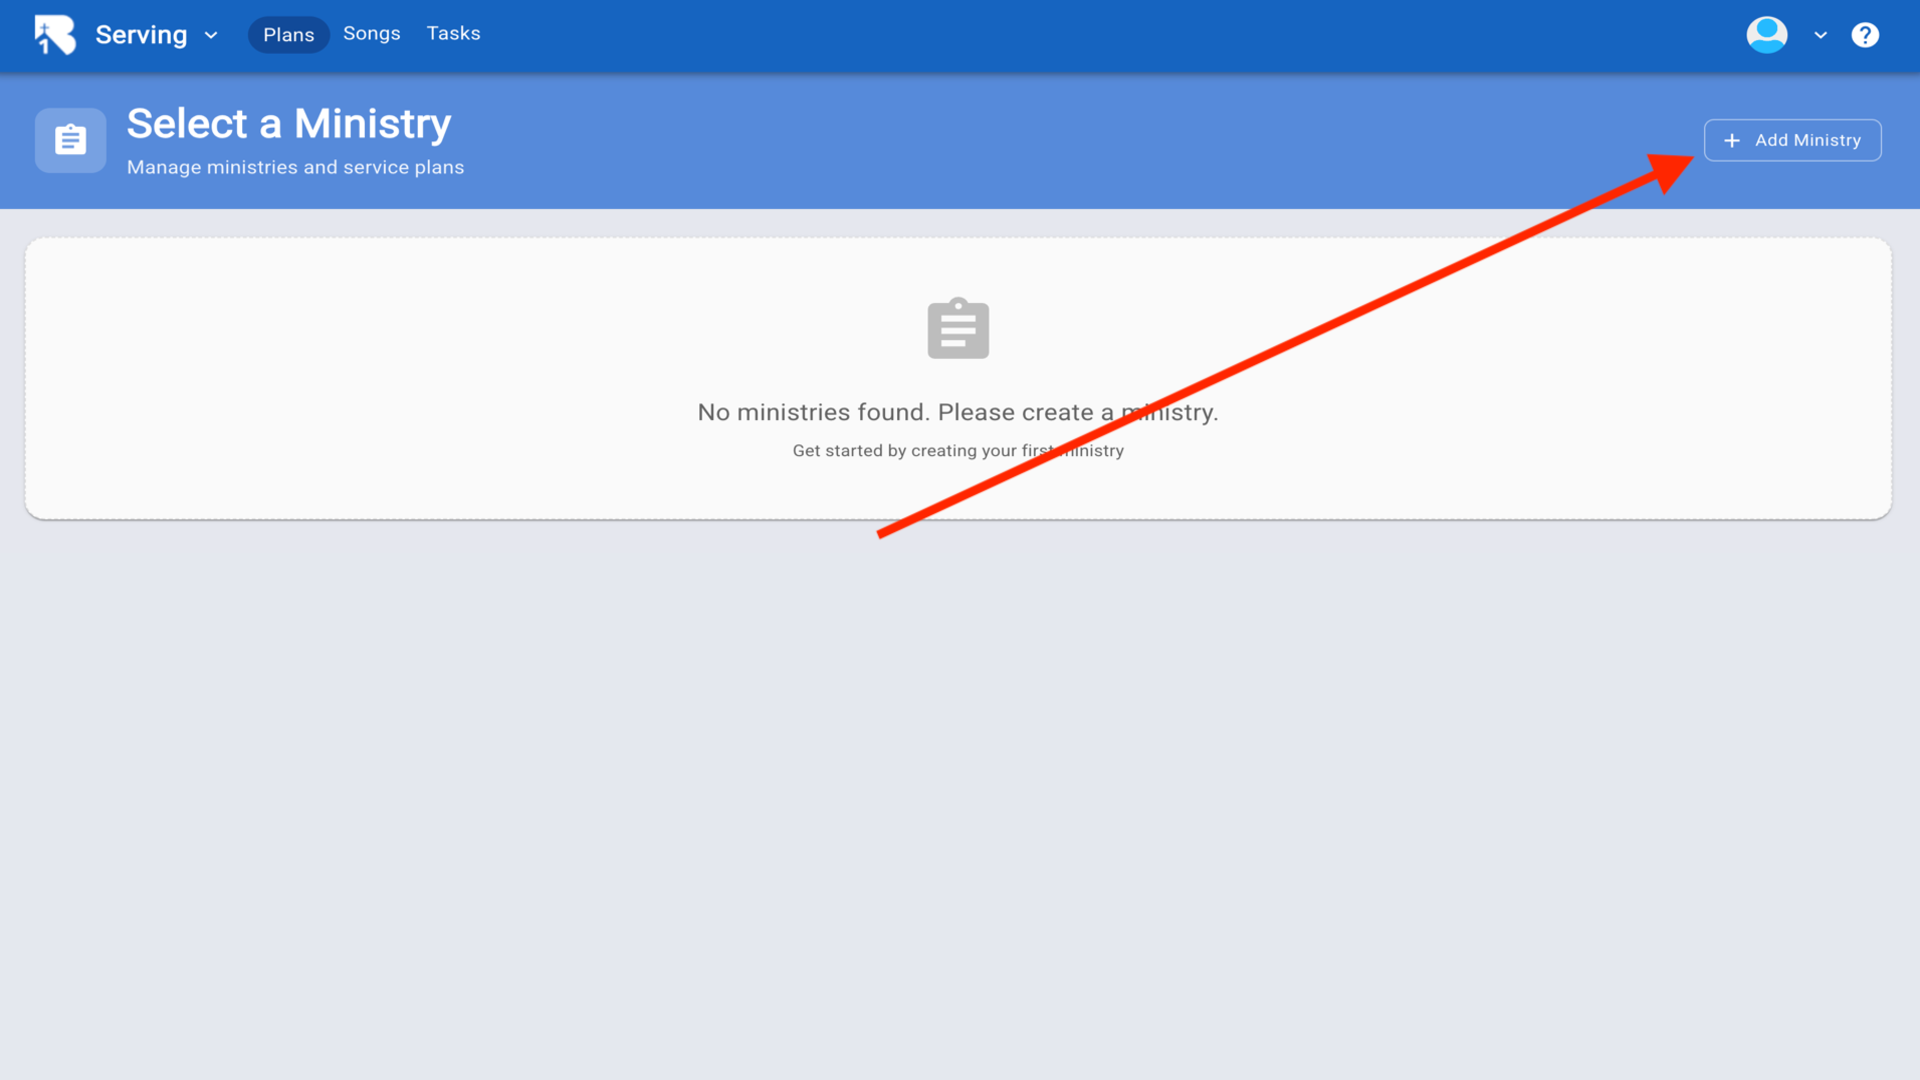
7.Click Add Ministry▼
8.Enter a name for your ministry▼
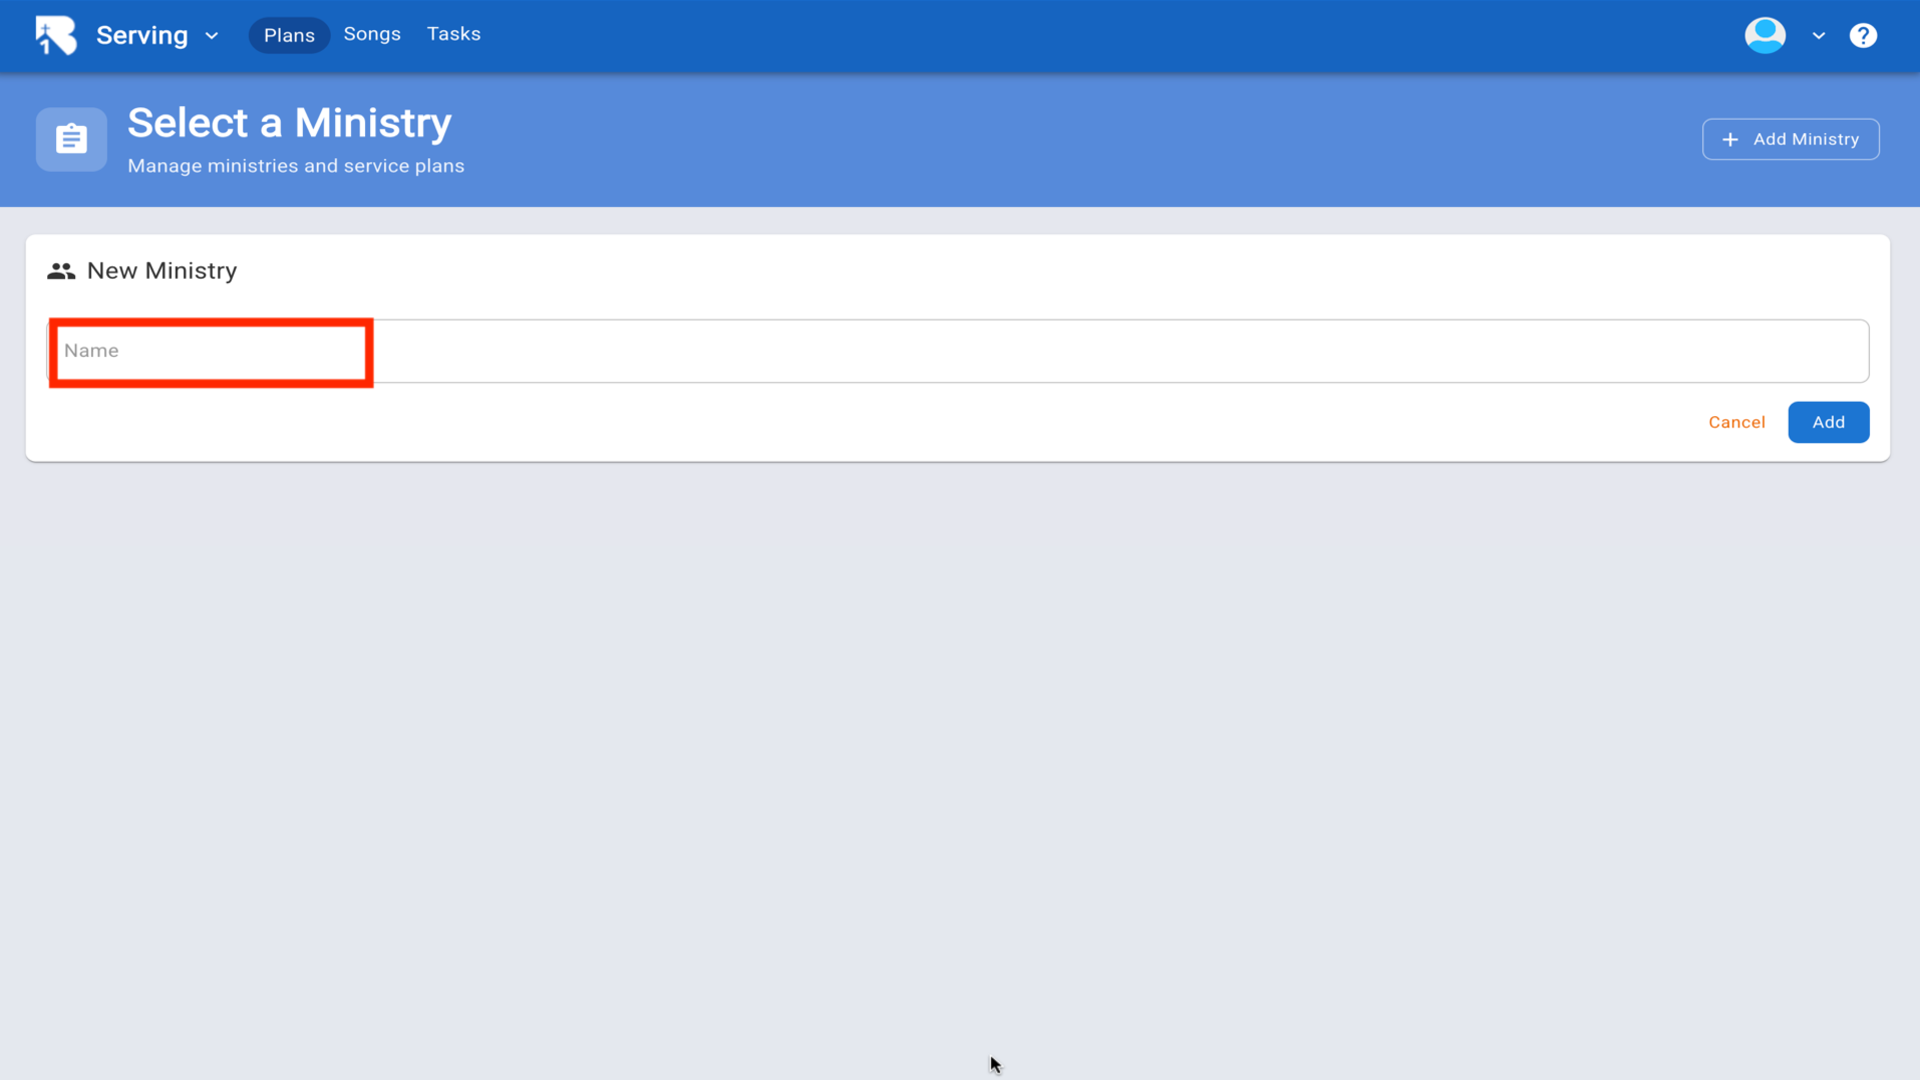
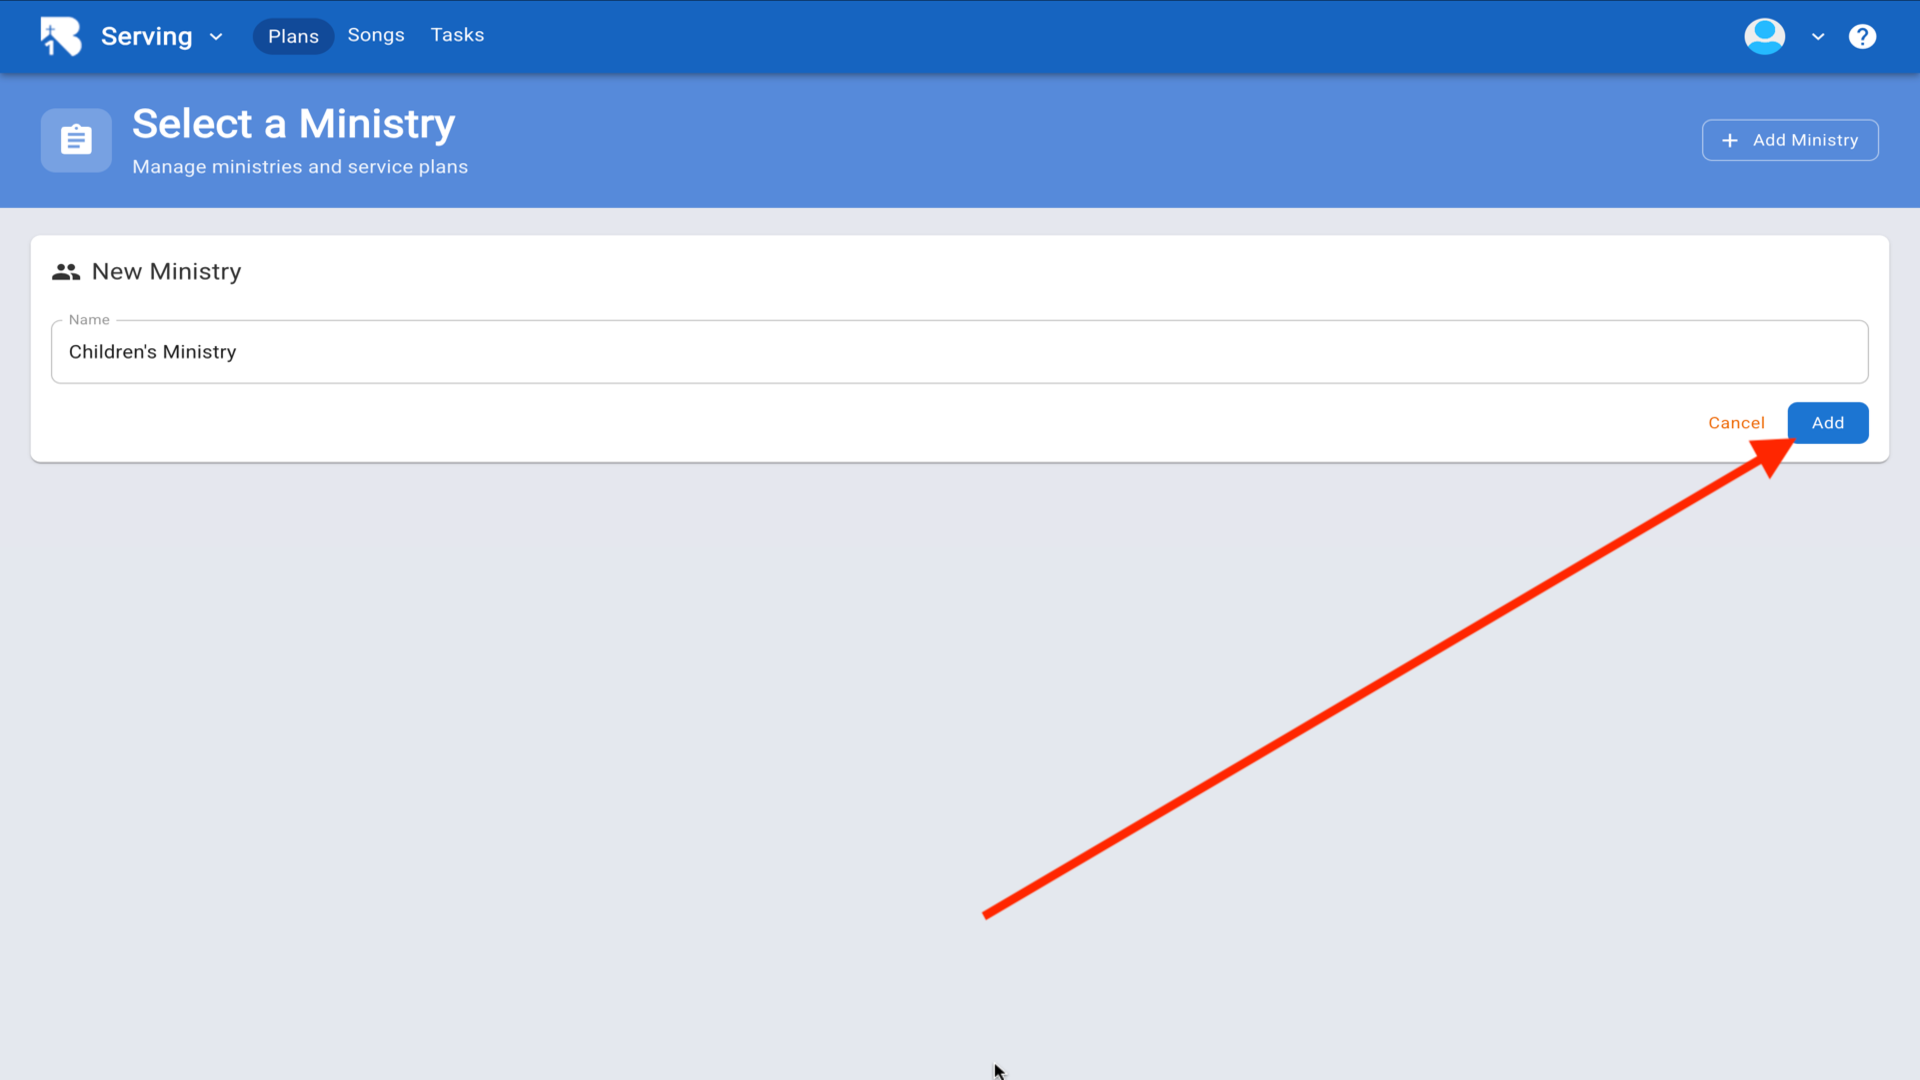
9.Type Children's Ministry and click Add▼
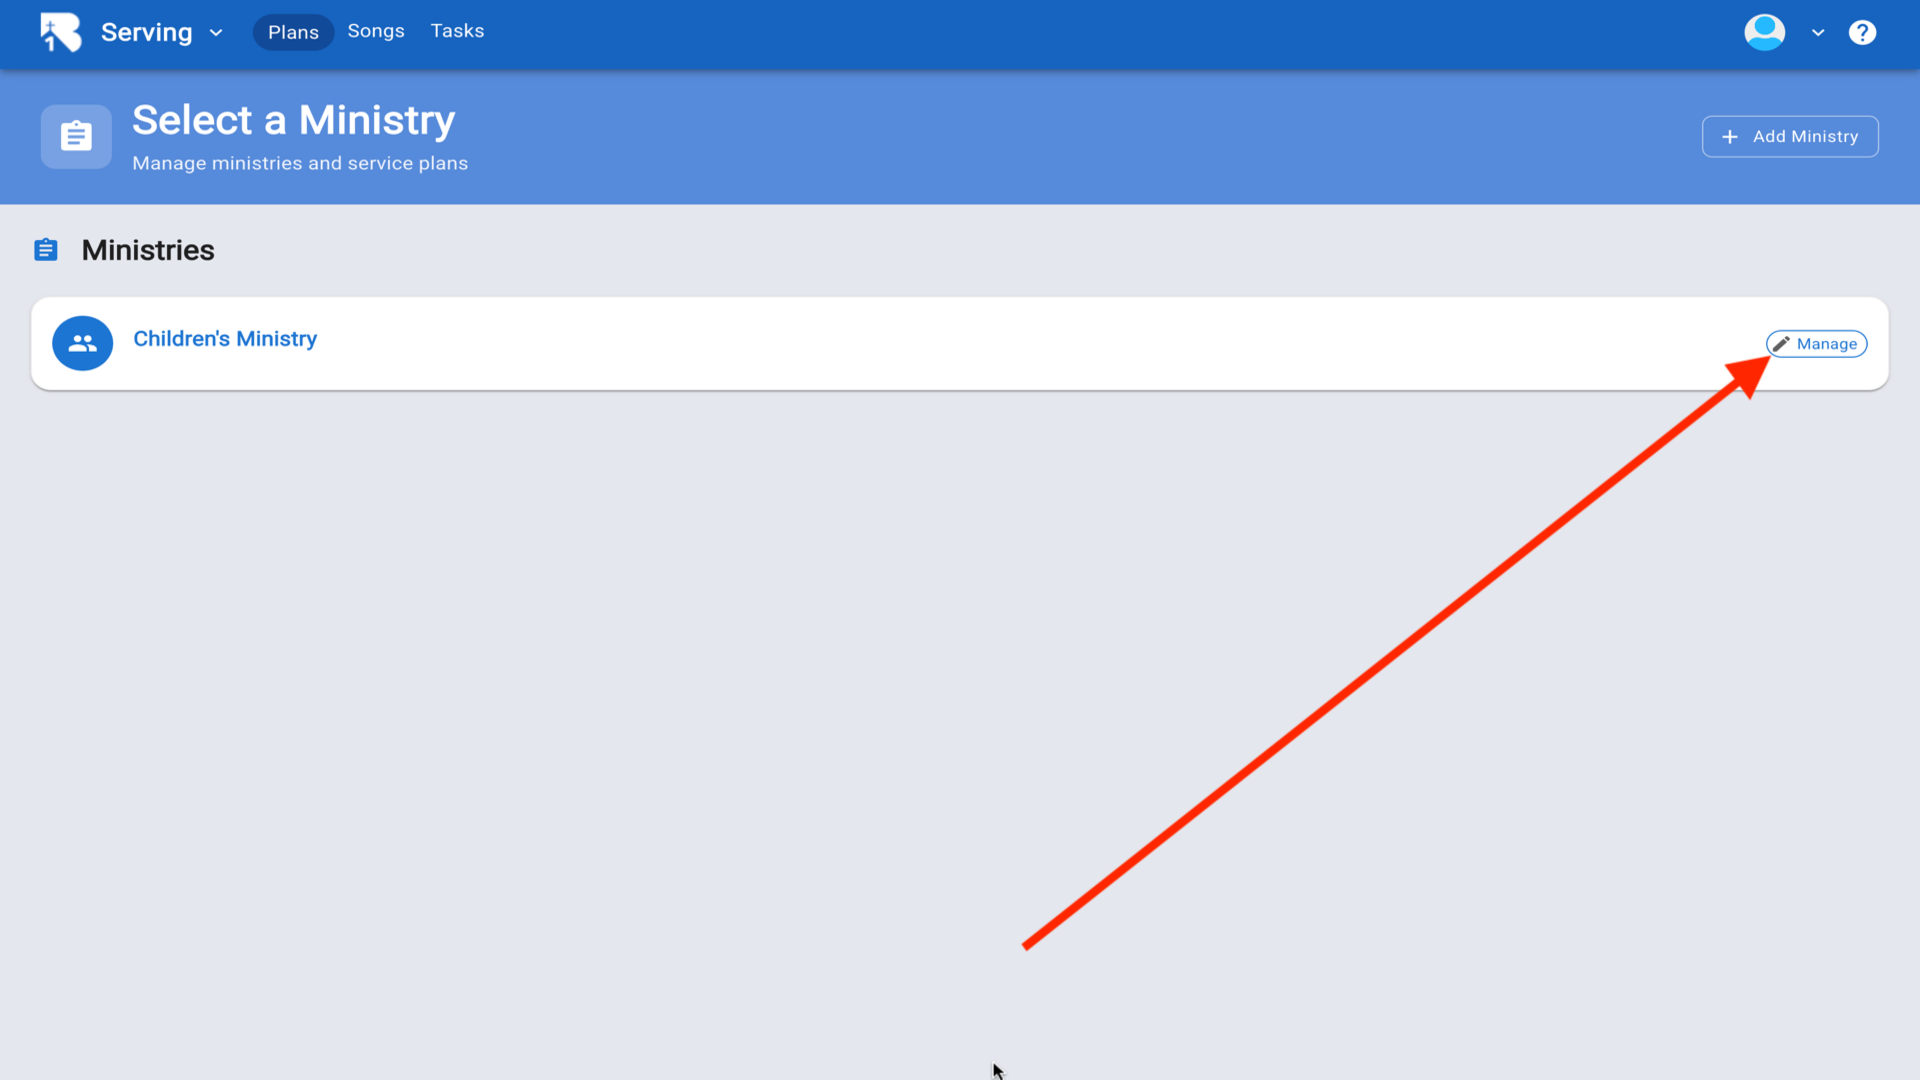
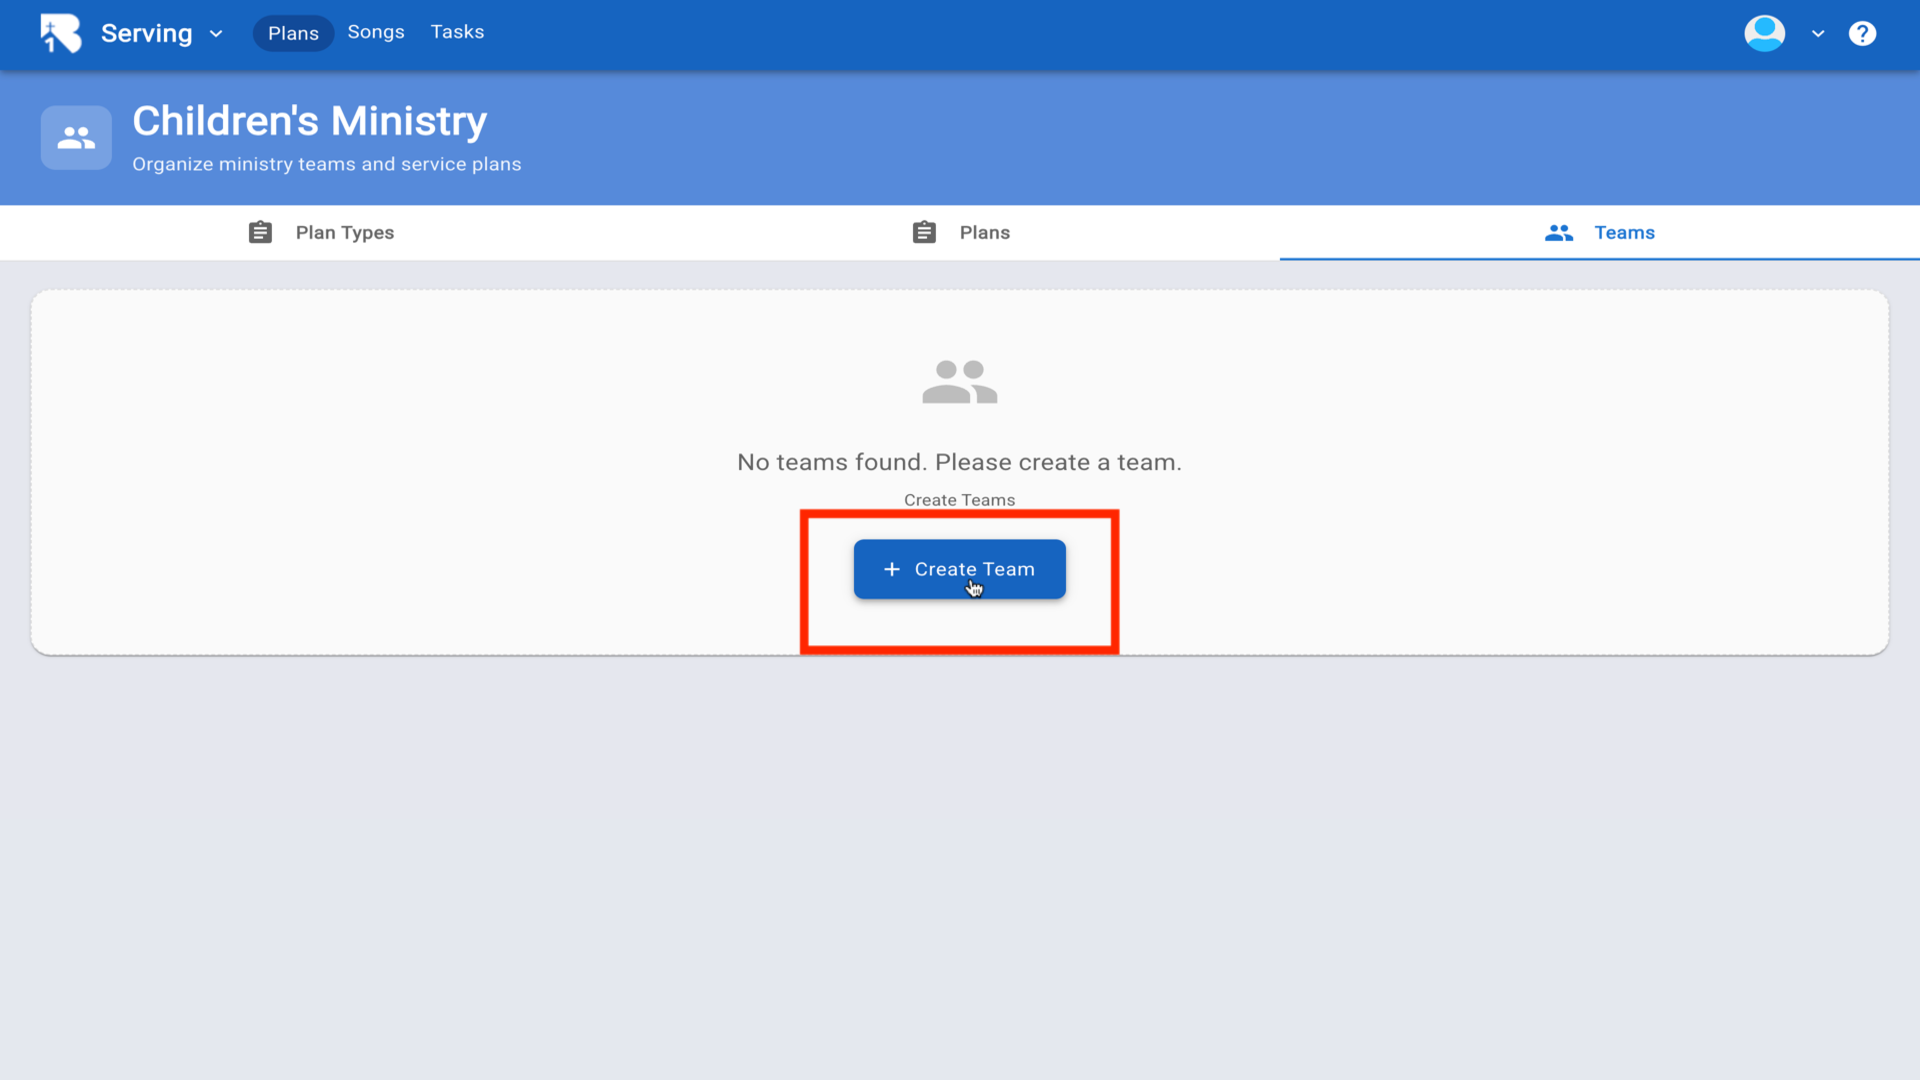
10.Click Manage to configure your ministry▼
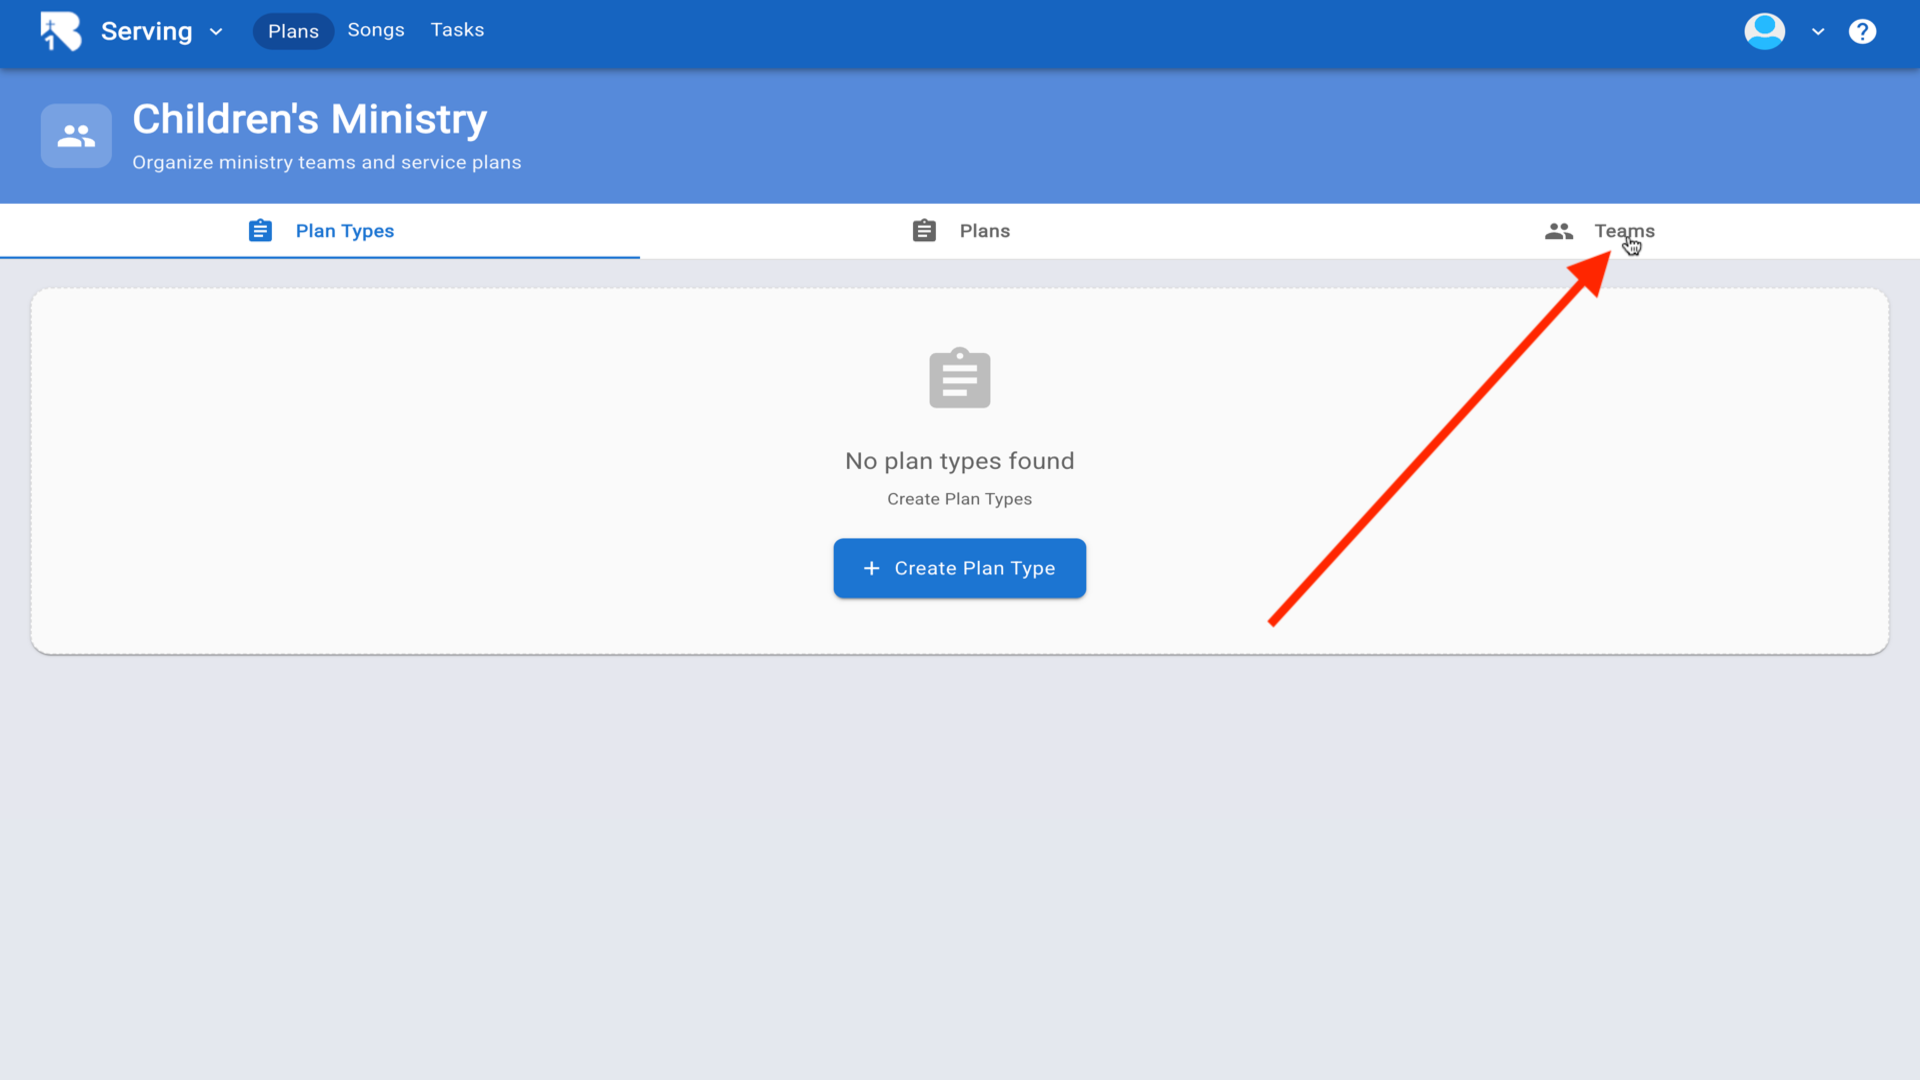
11.Click the Teams tab▼
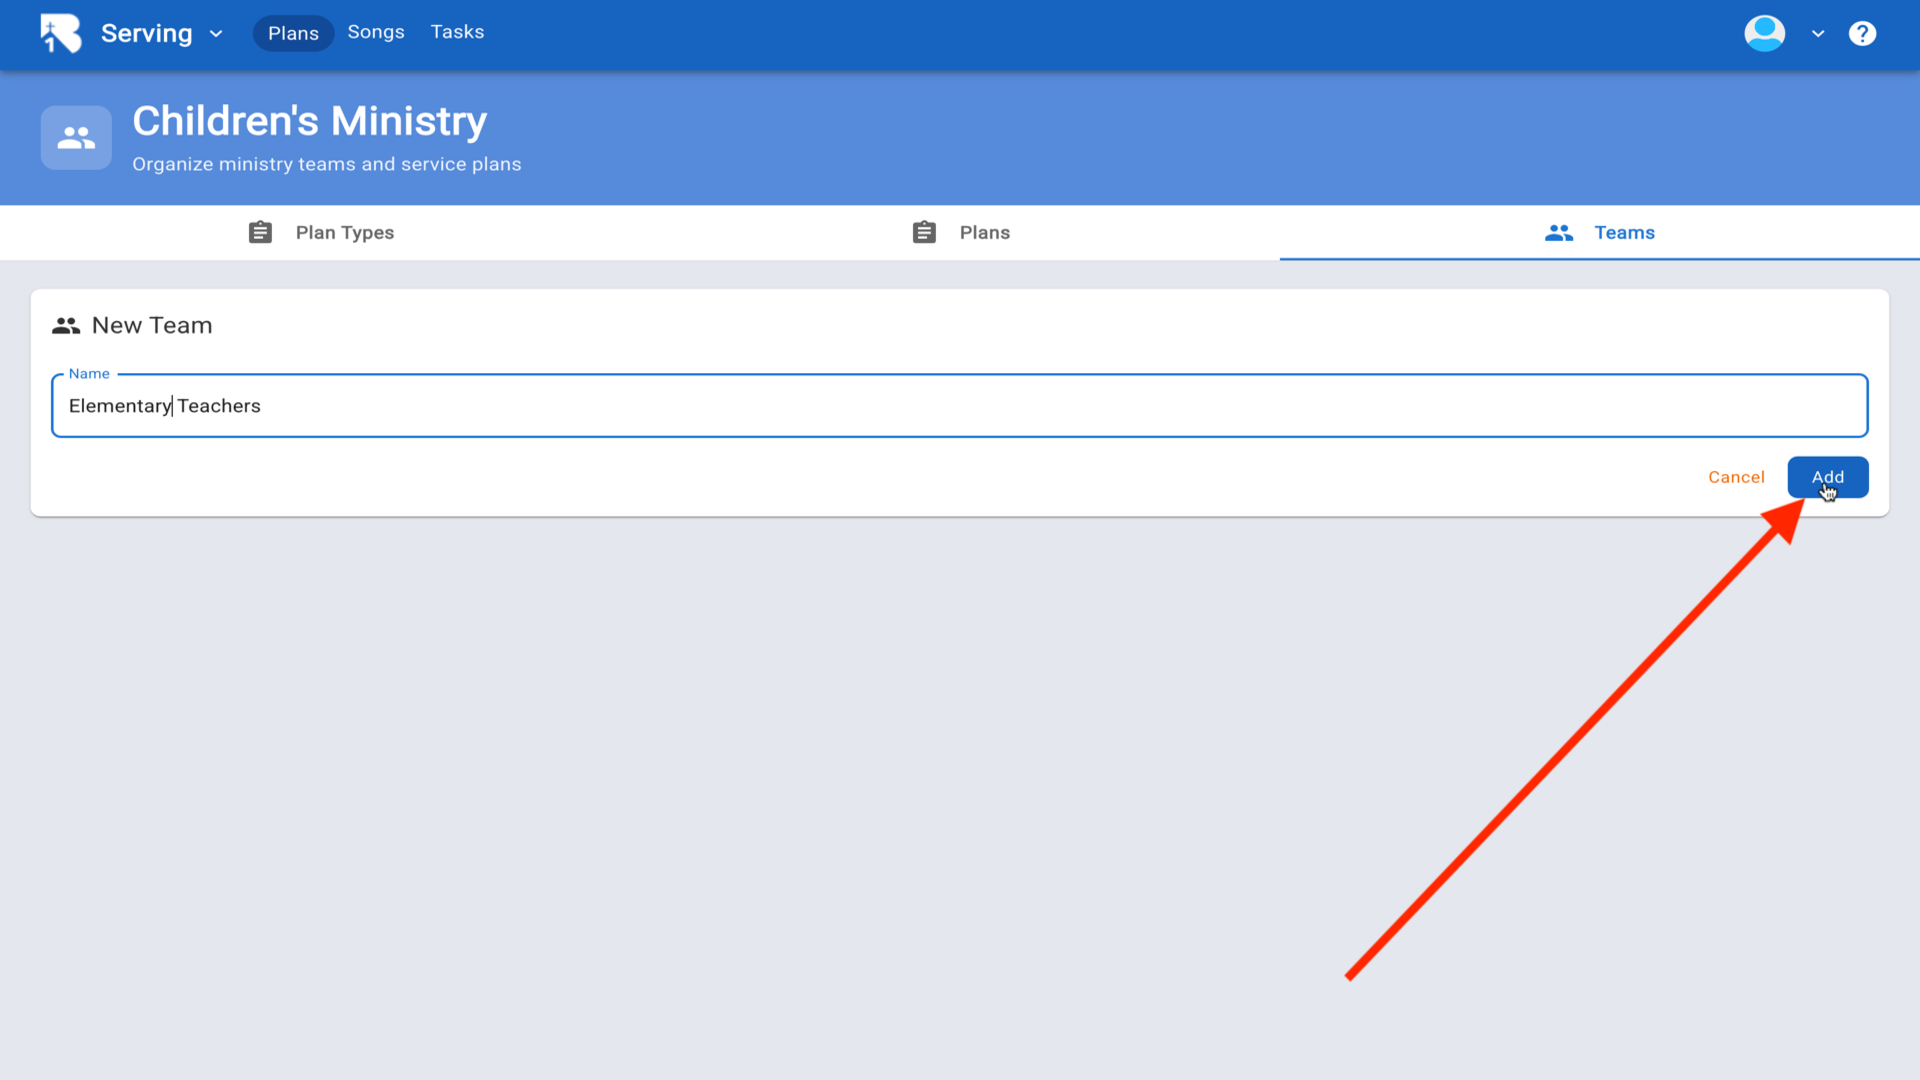
12.Click Create Team▼
13.Enter a name like Elementary Teachers and click Add▼
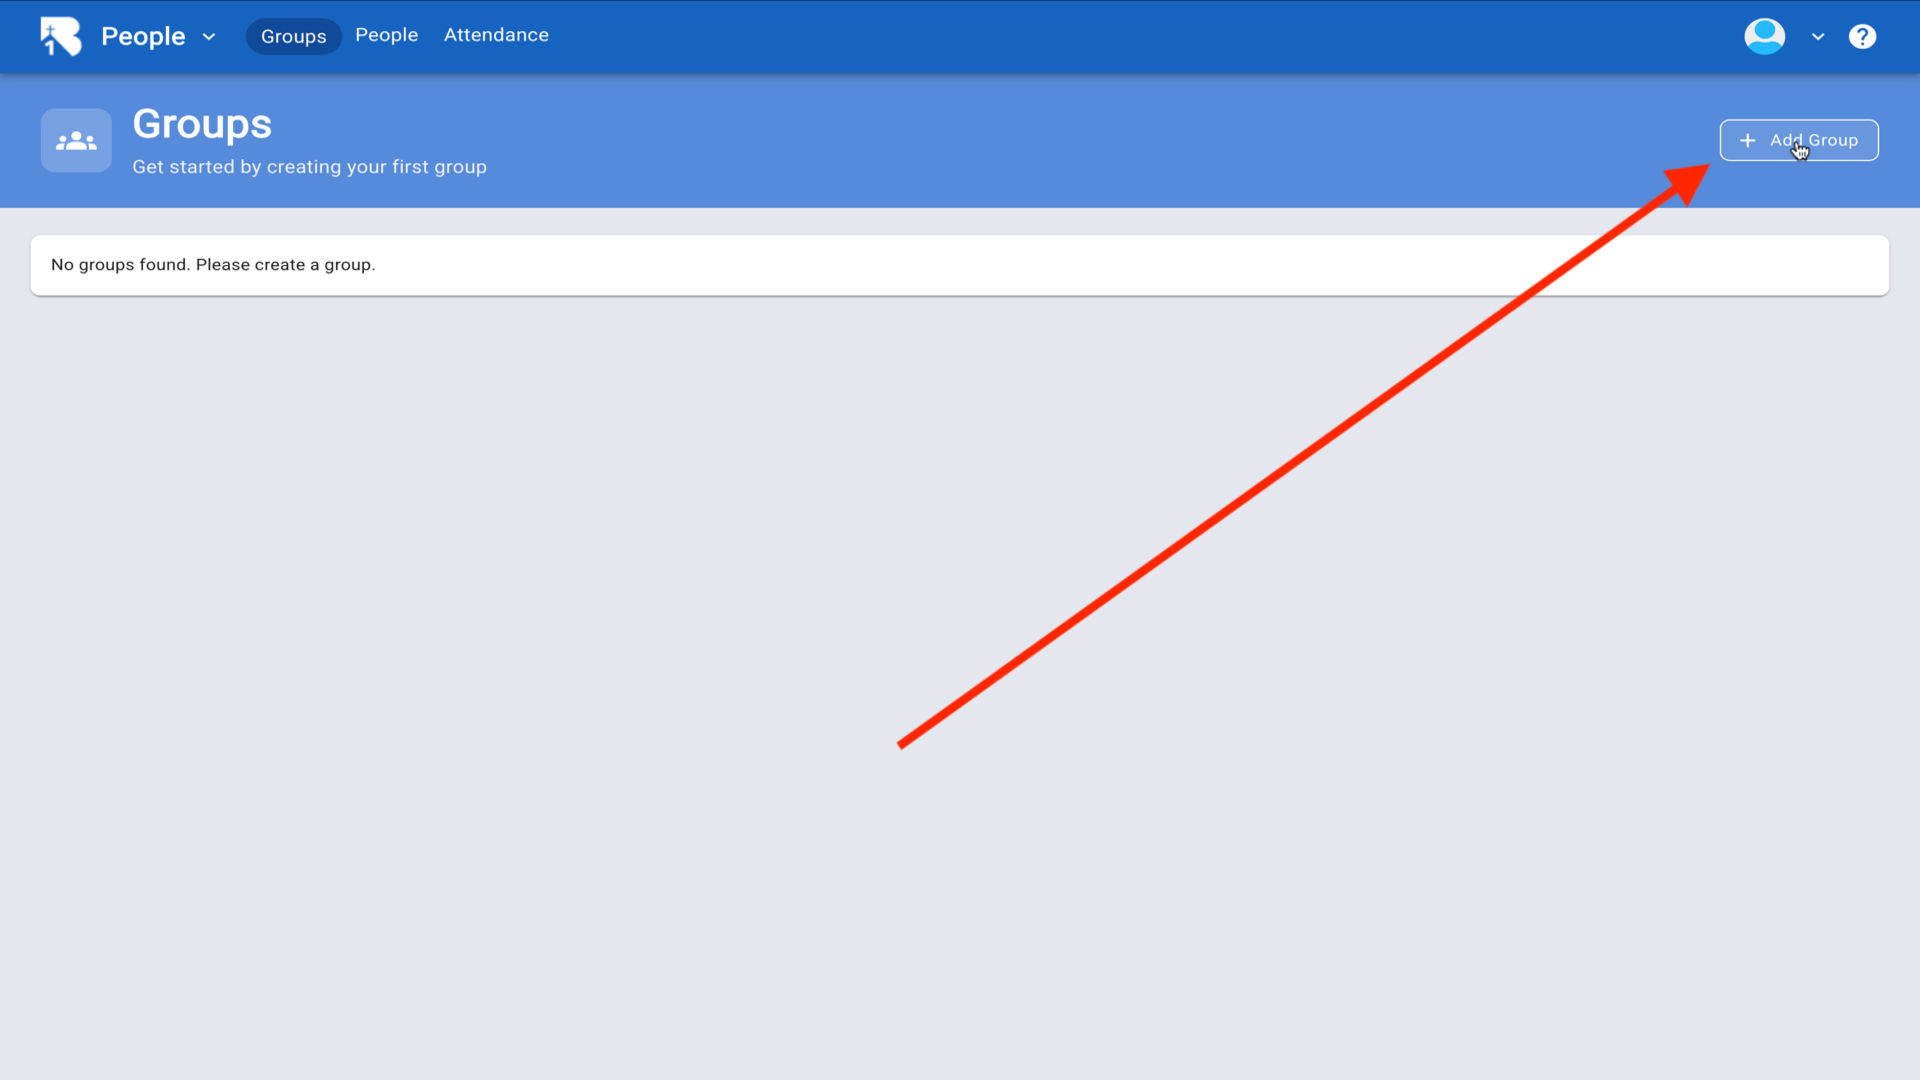
14.Click Dashboard dropdown and select People▼
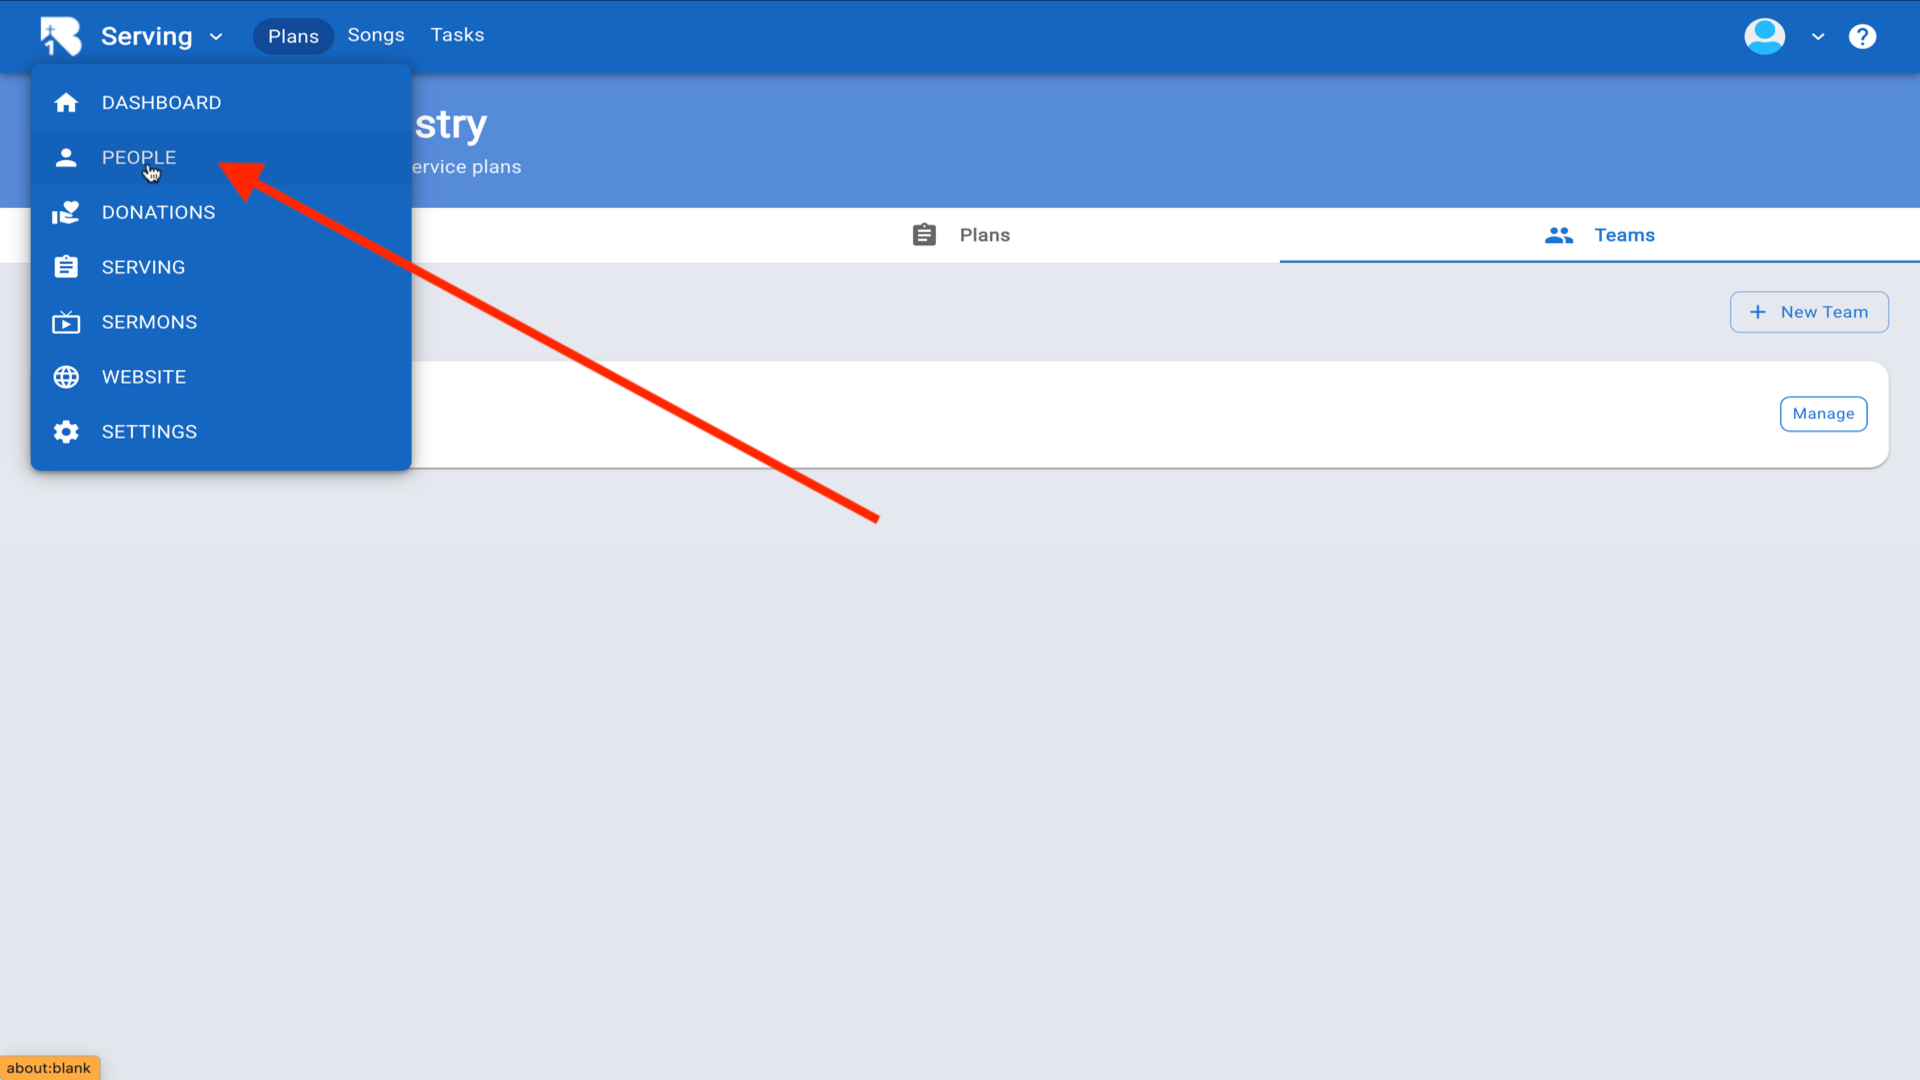
15.Click Groups in the top navigation▼
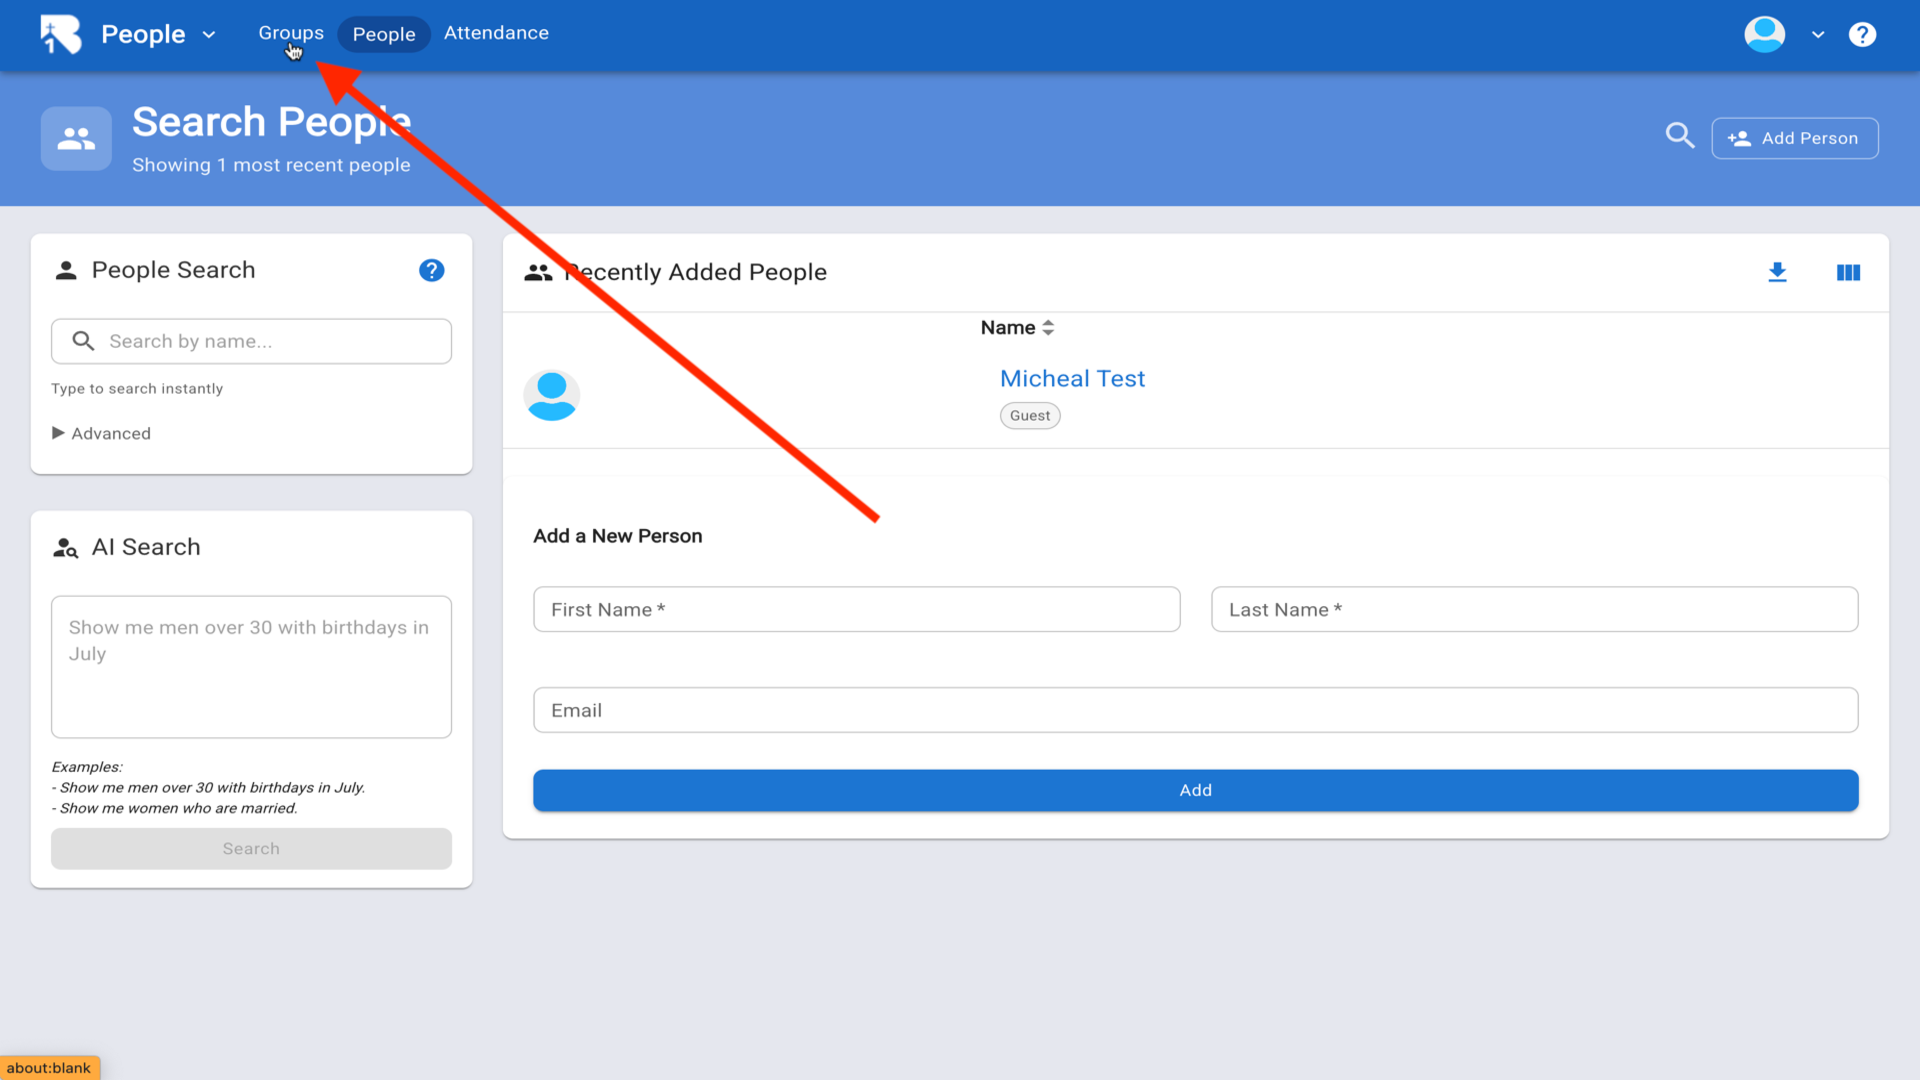
16.Click Add Group▼
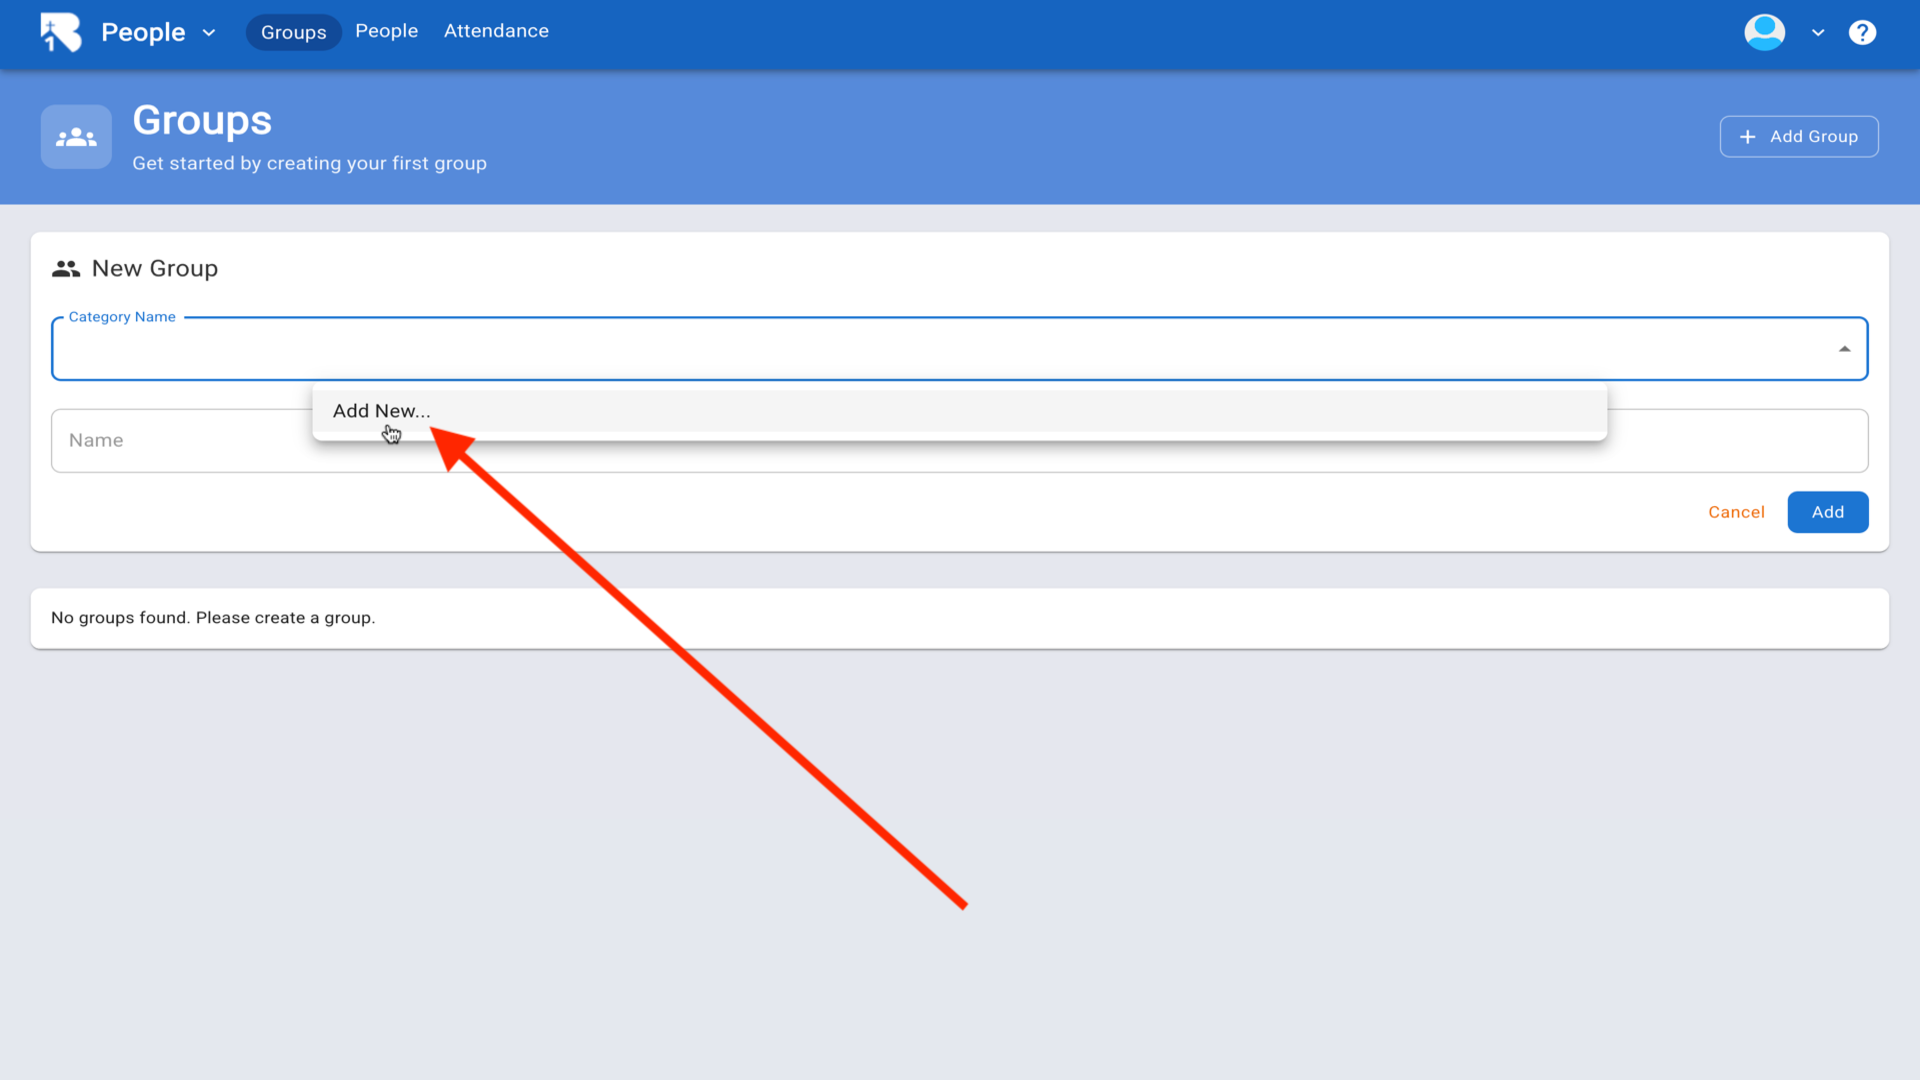
17.Click Category Name dropdown and select Add New▼
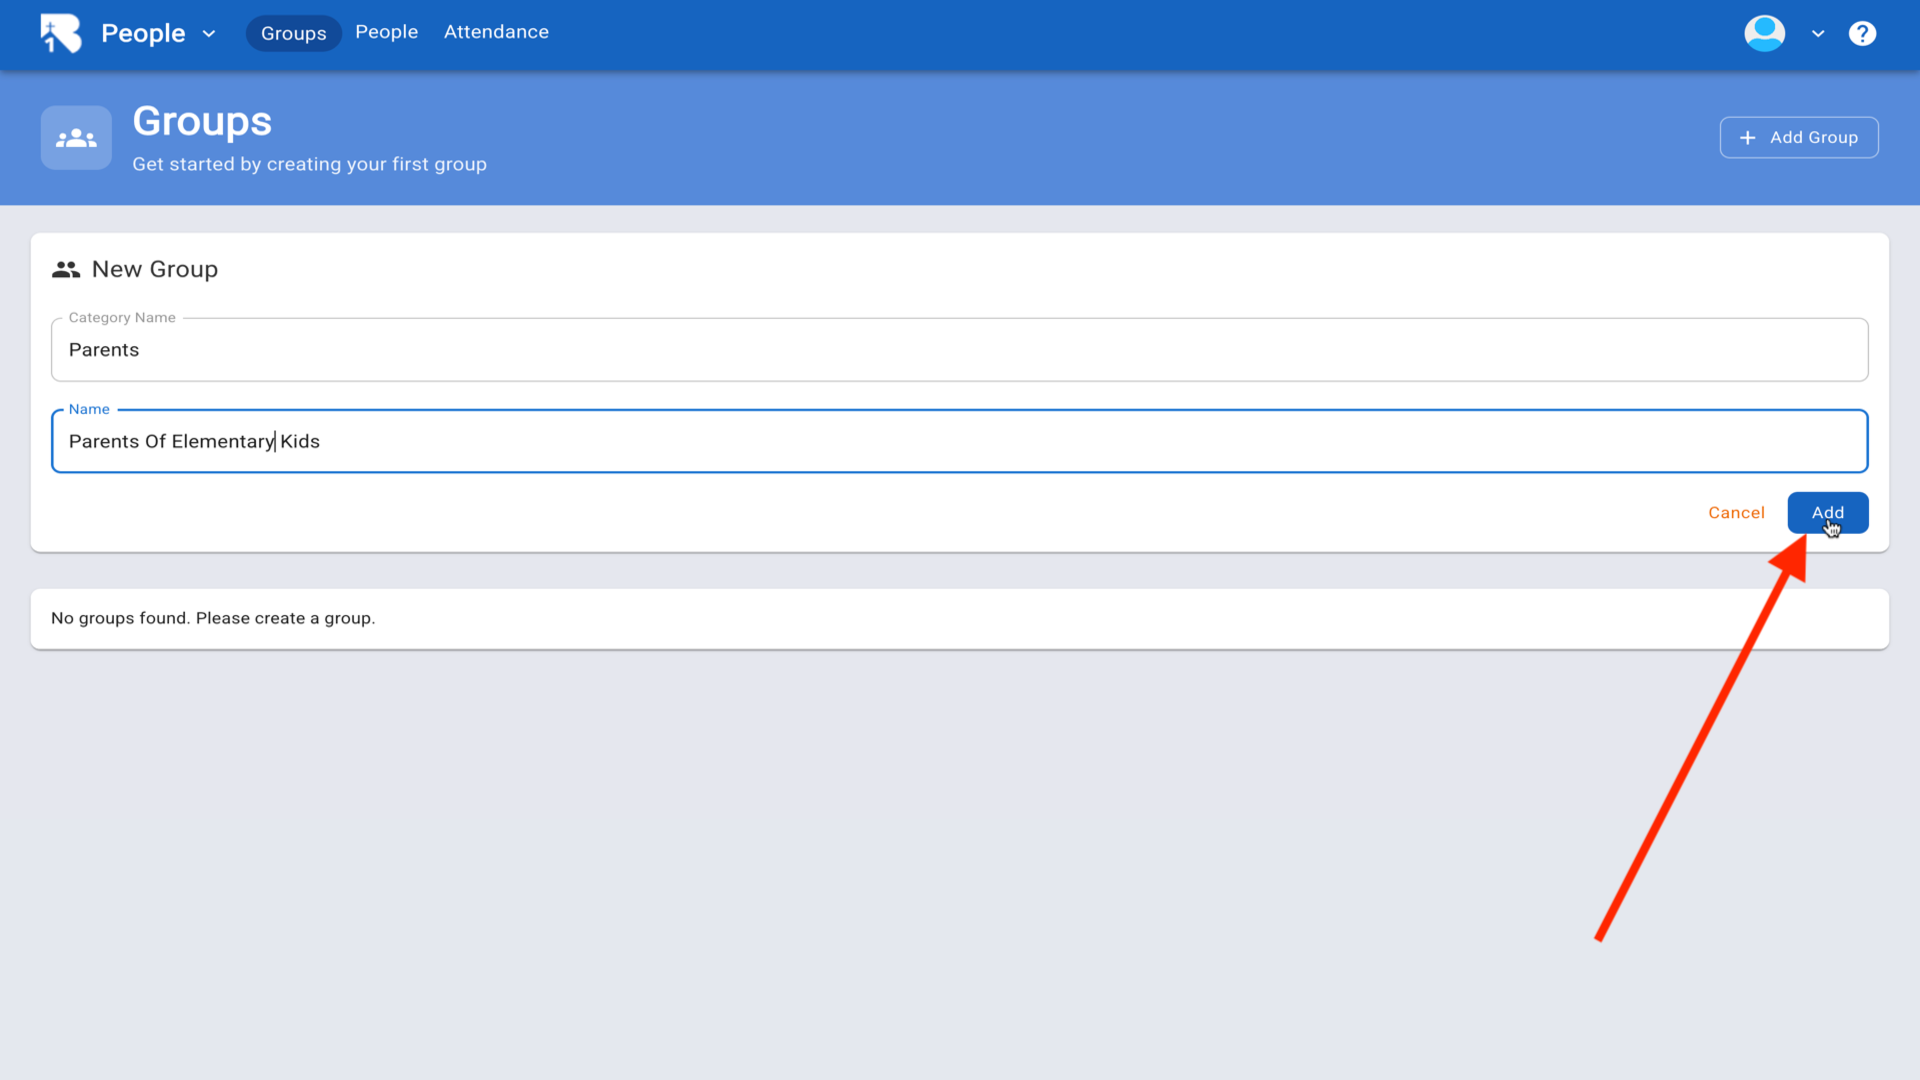
18.Enter Parents as category and Parents Of Elementary Kids as group name, click Add▼
19.Your parent group is now created▼
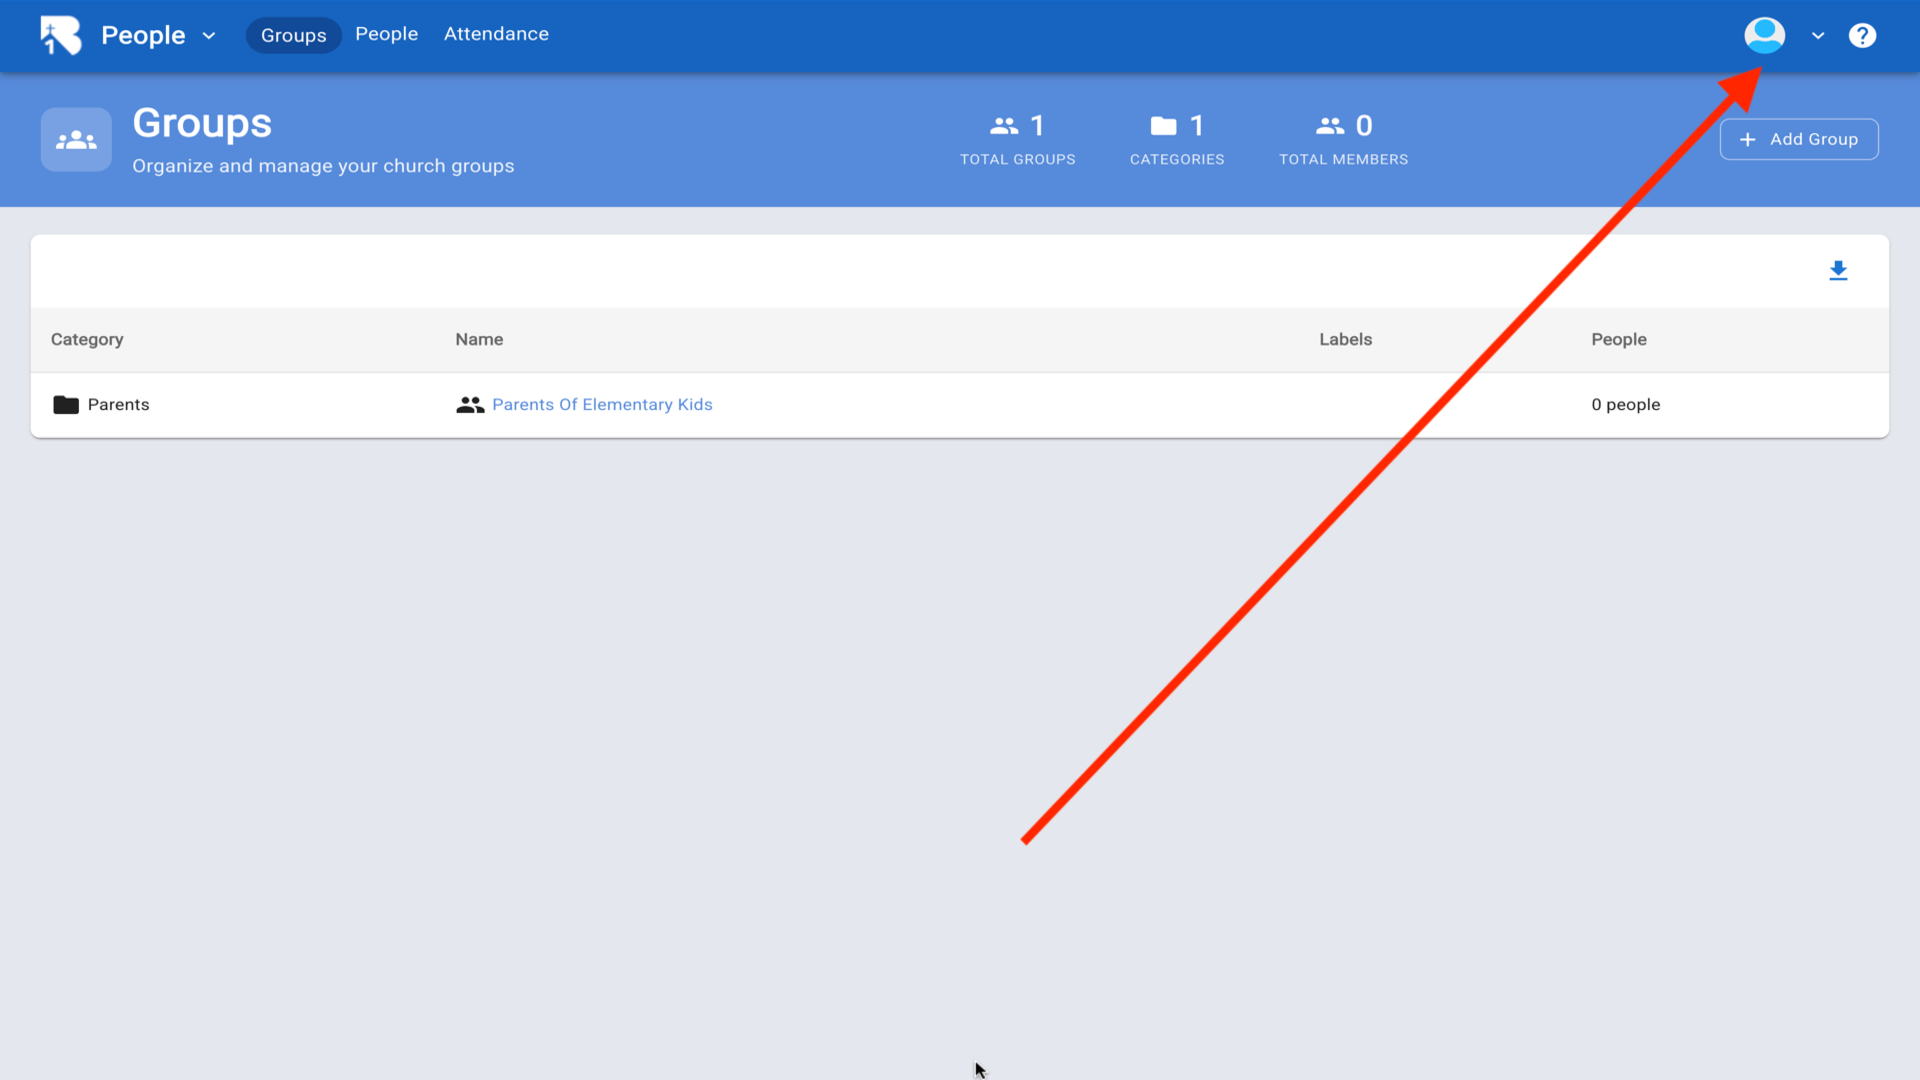
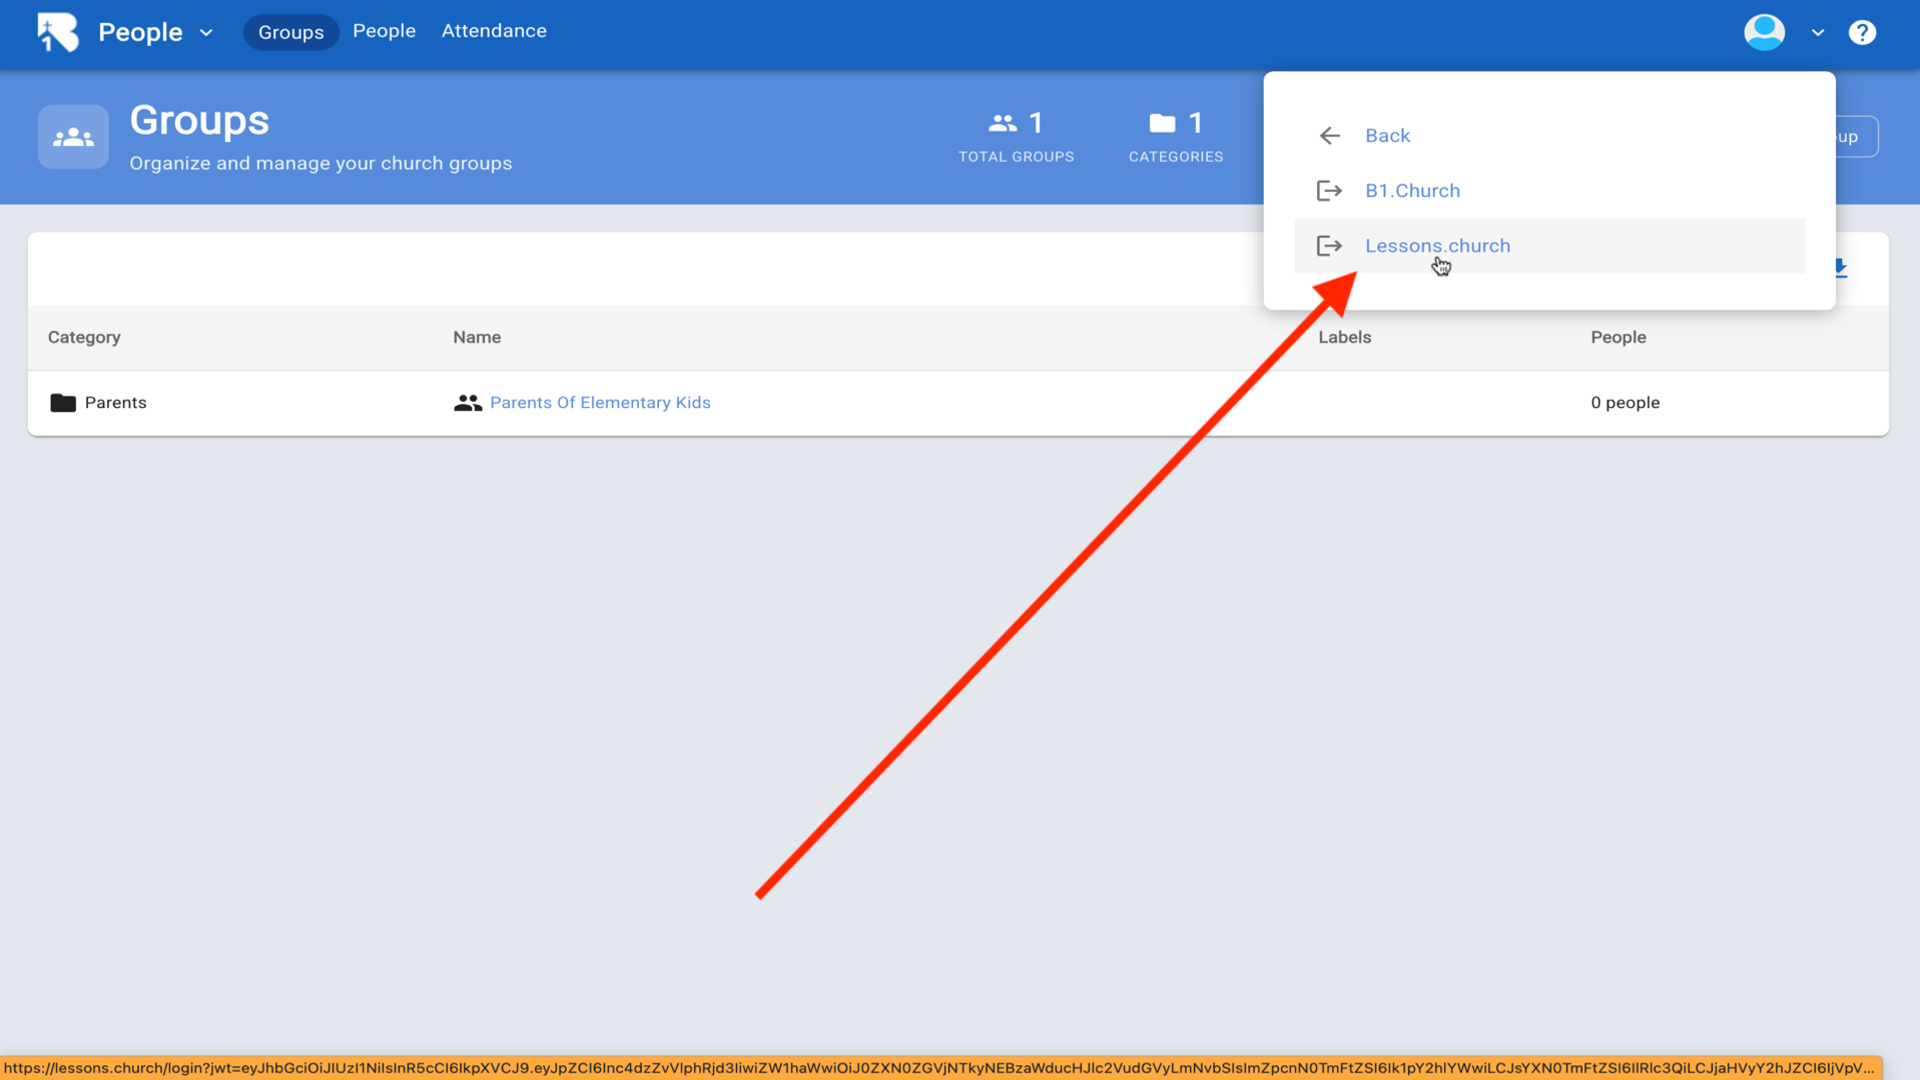
20.Click your profile icon and select Switch App▼
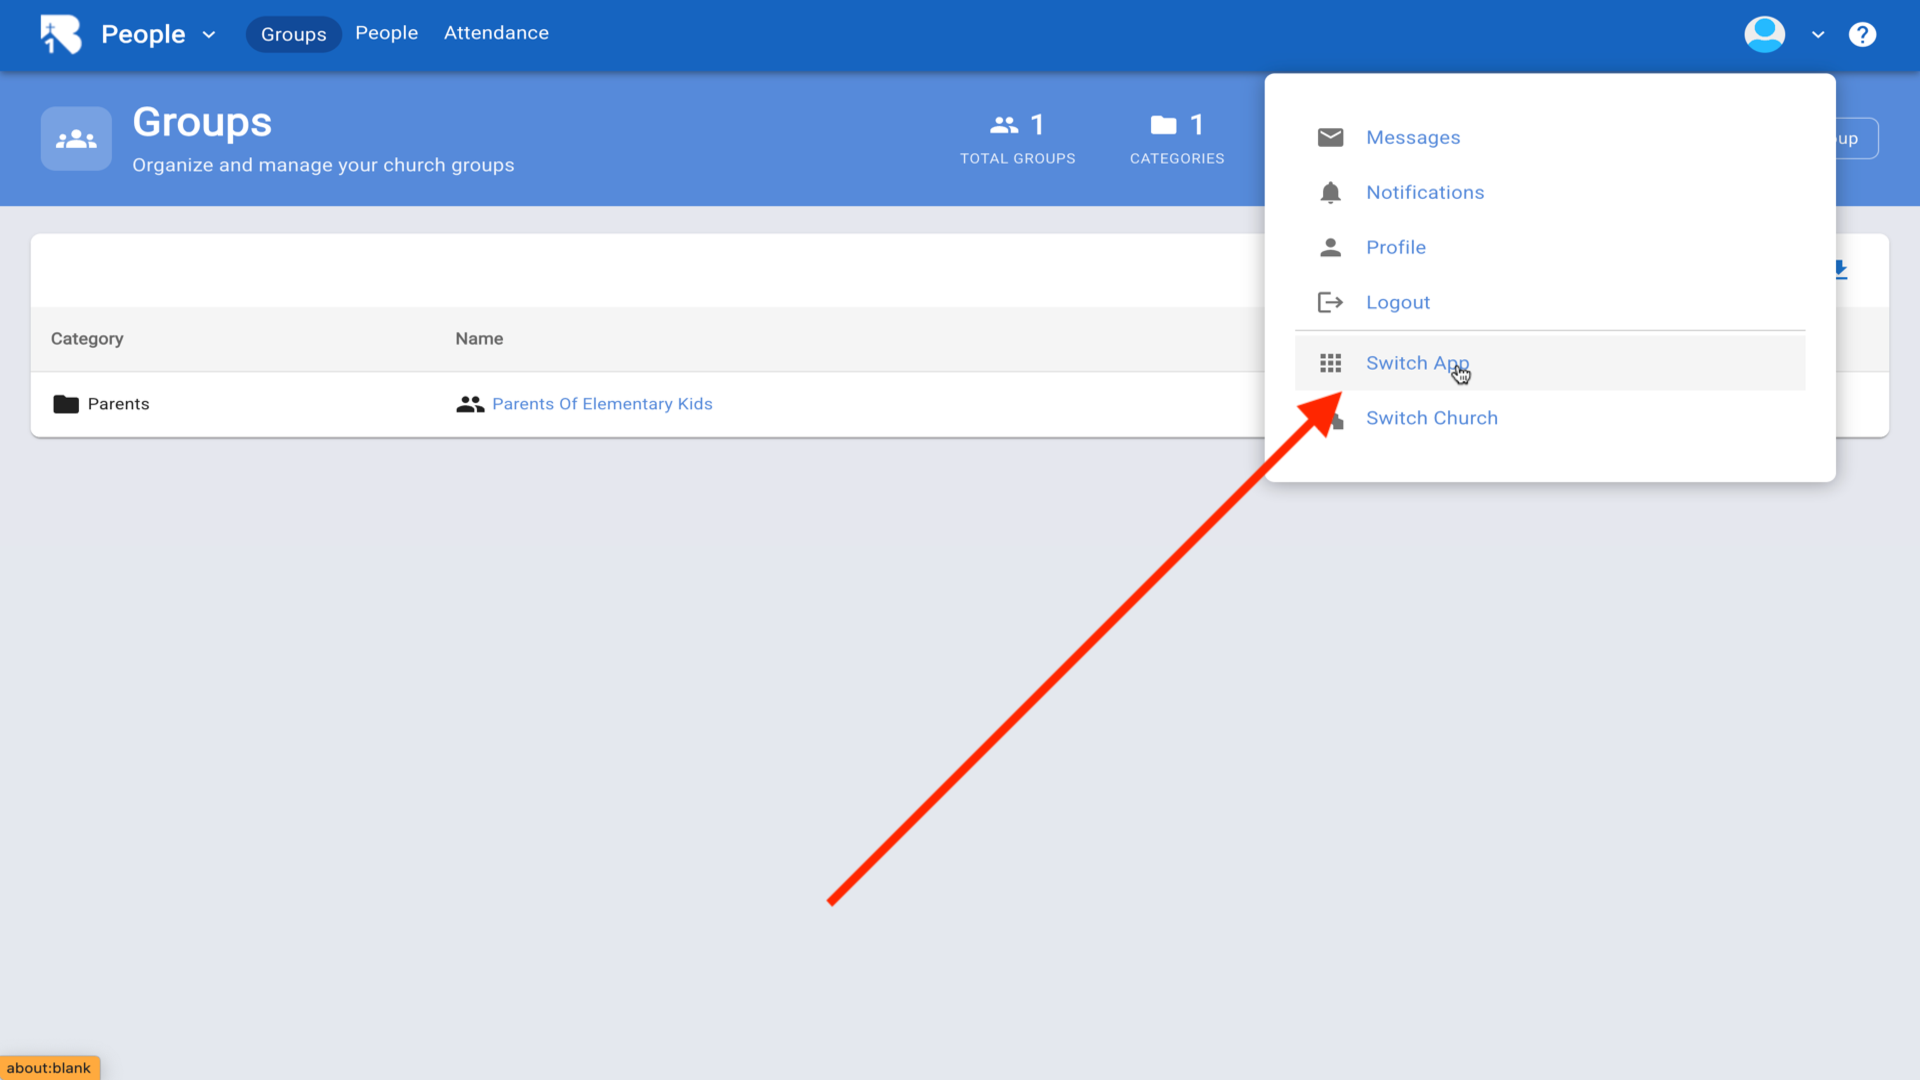
21.Click Lessons.church▼
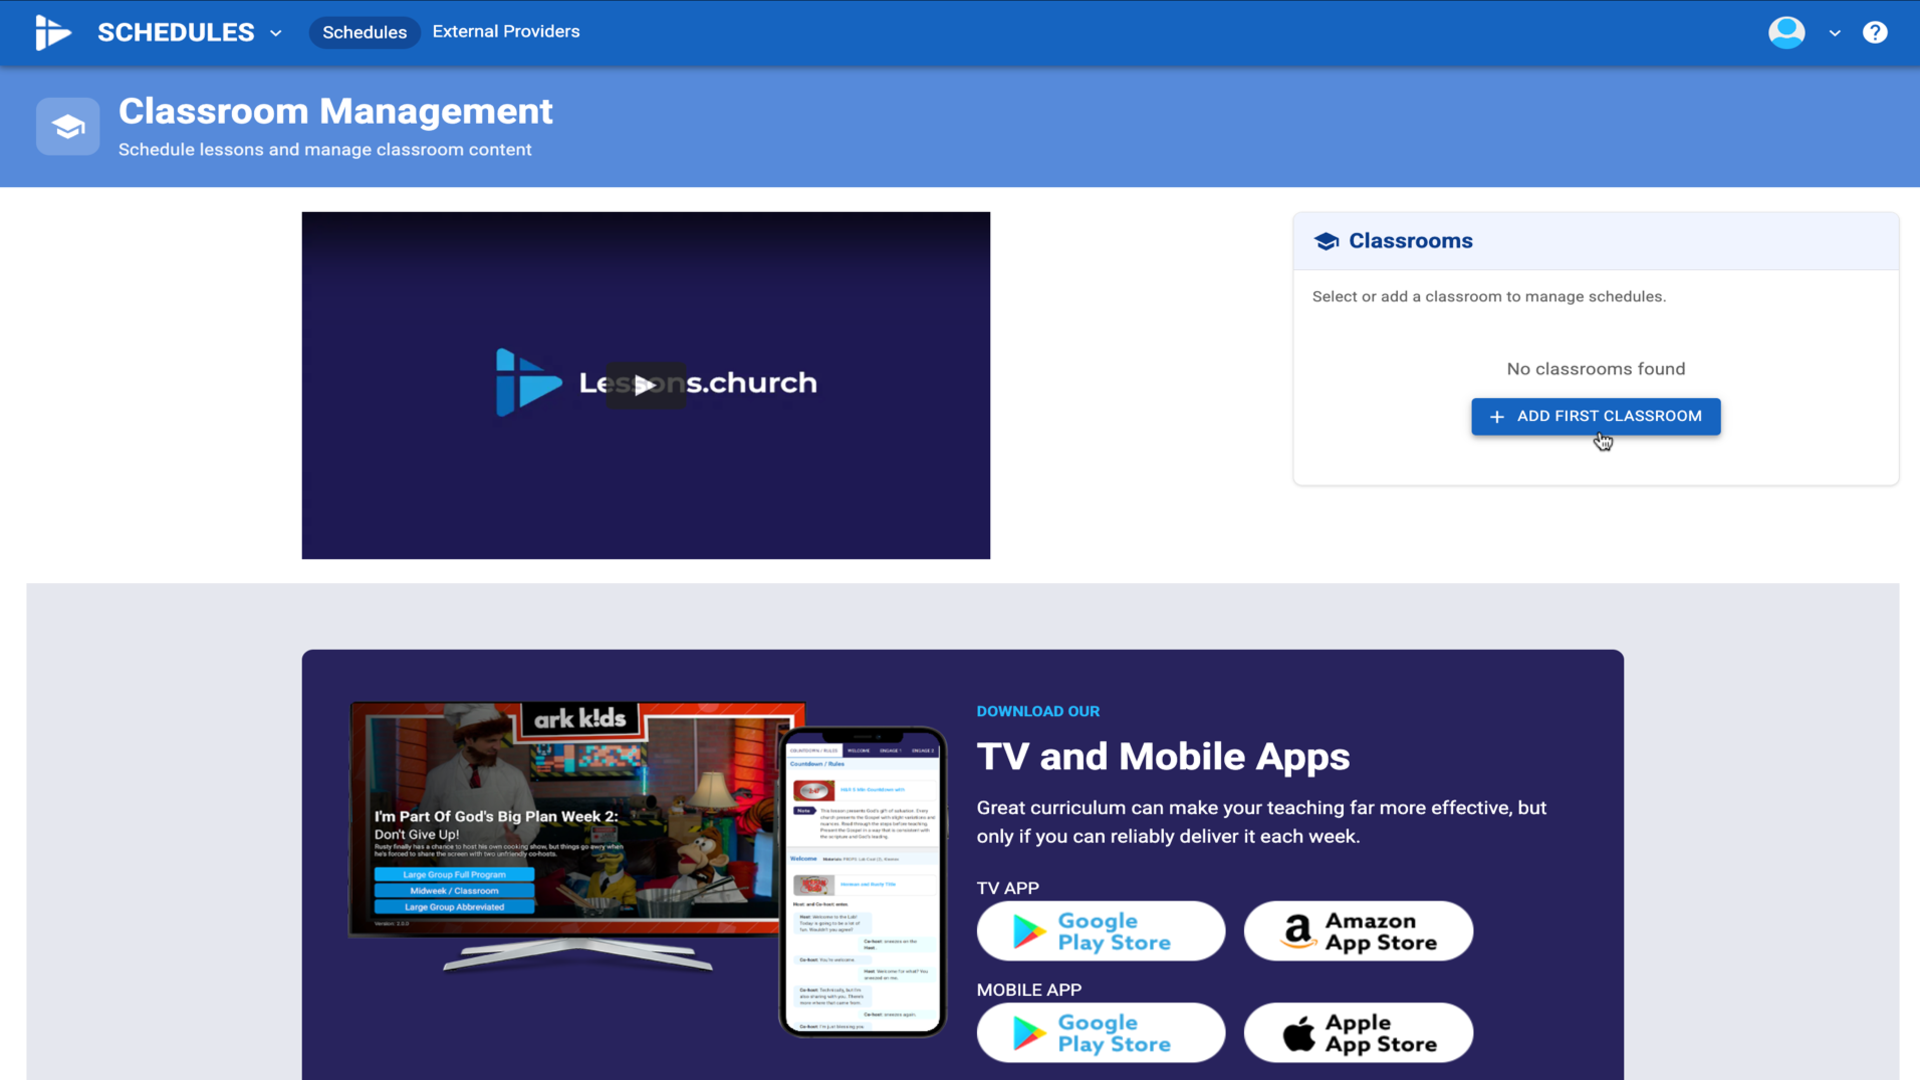
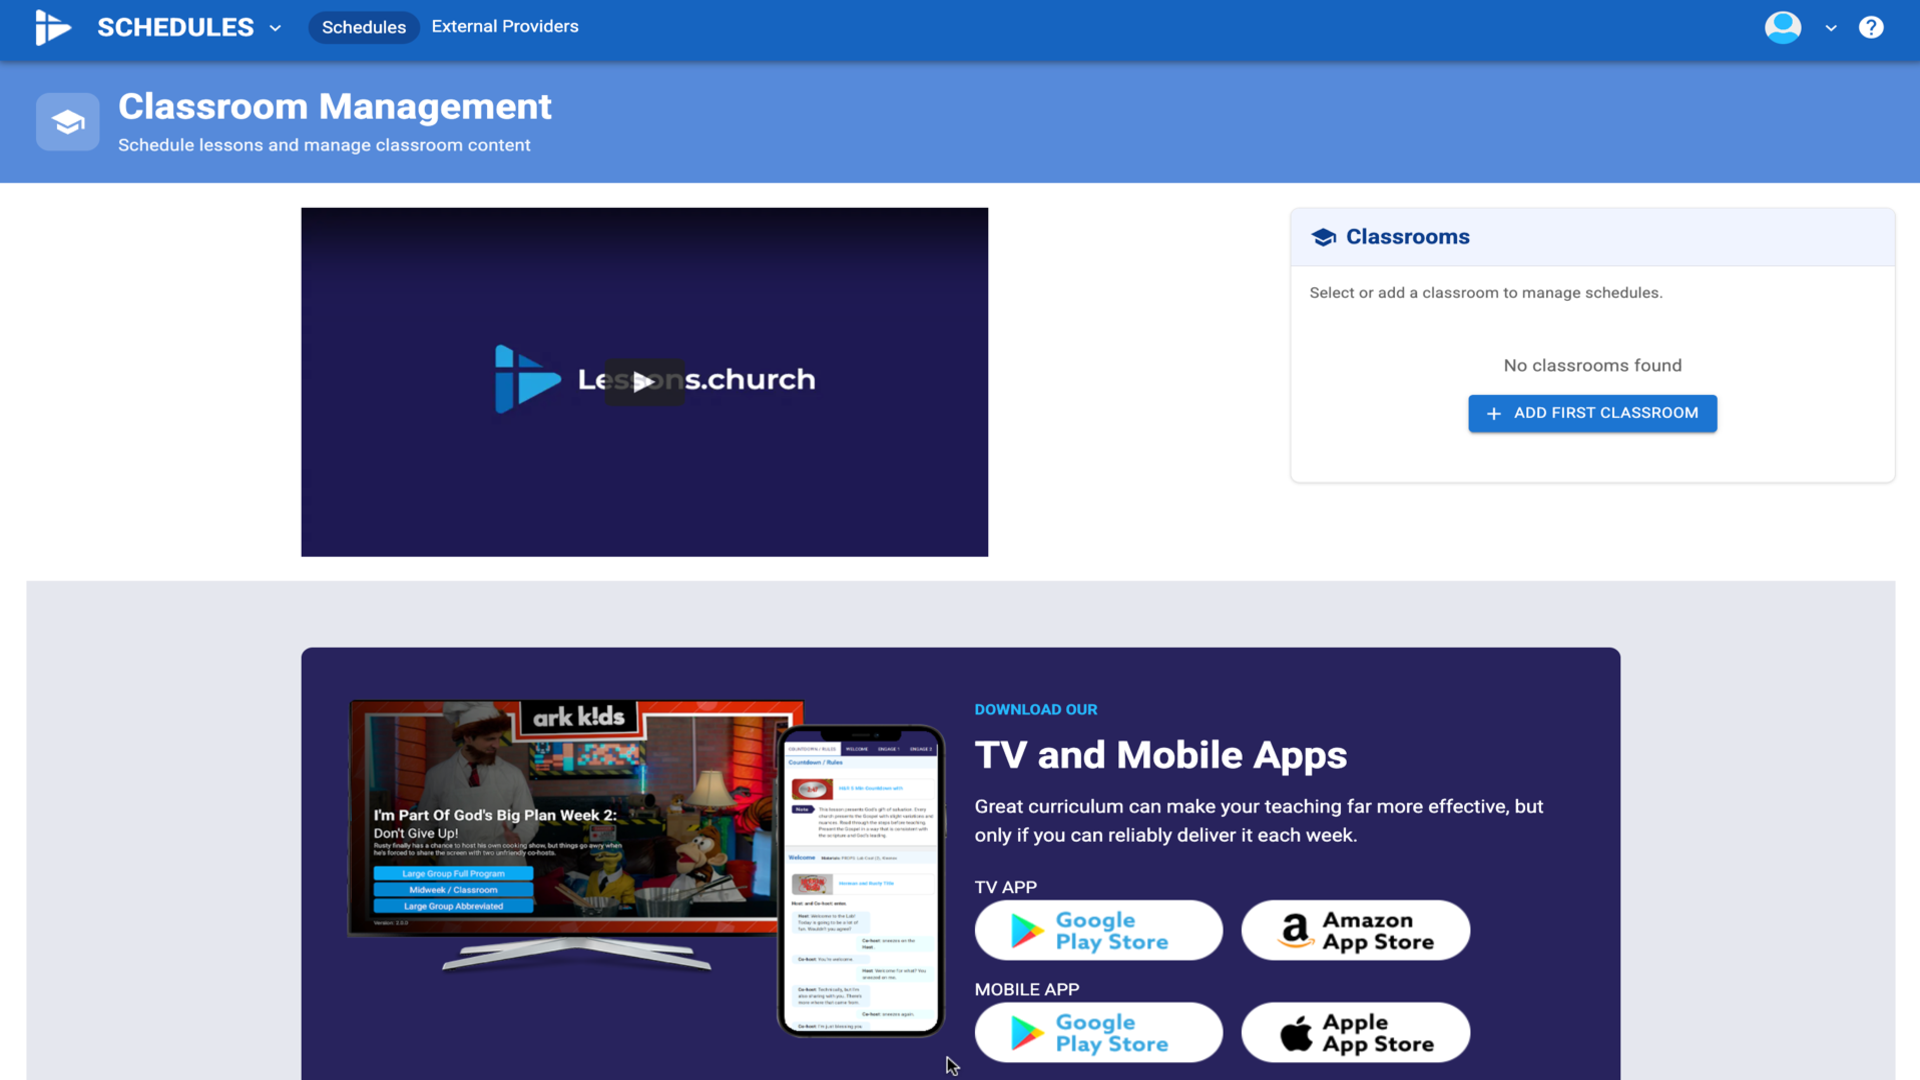
22.You're back in Lessons.church - click Add First Classroom to continue▼
Steps
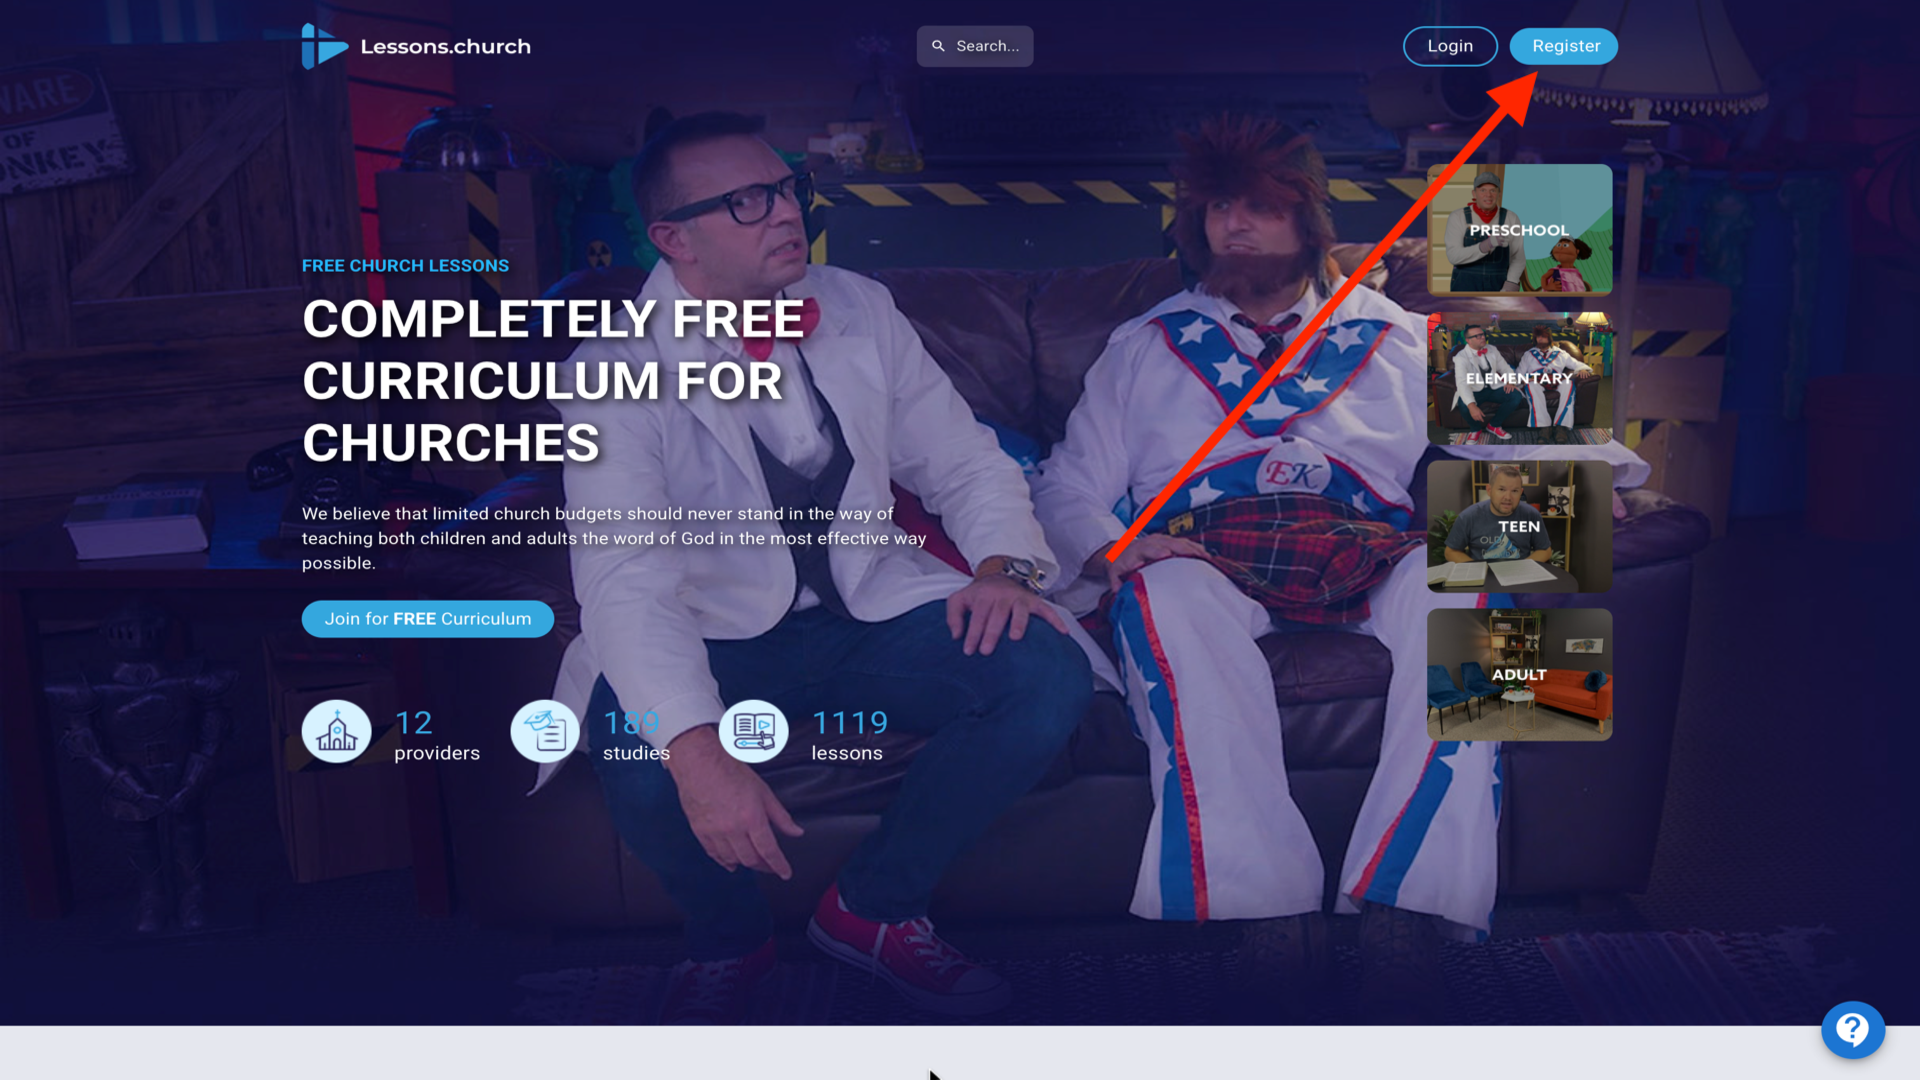
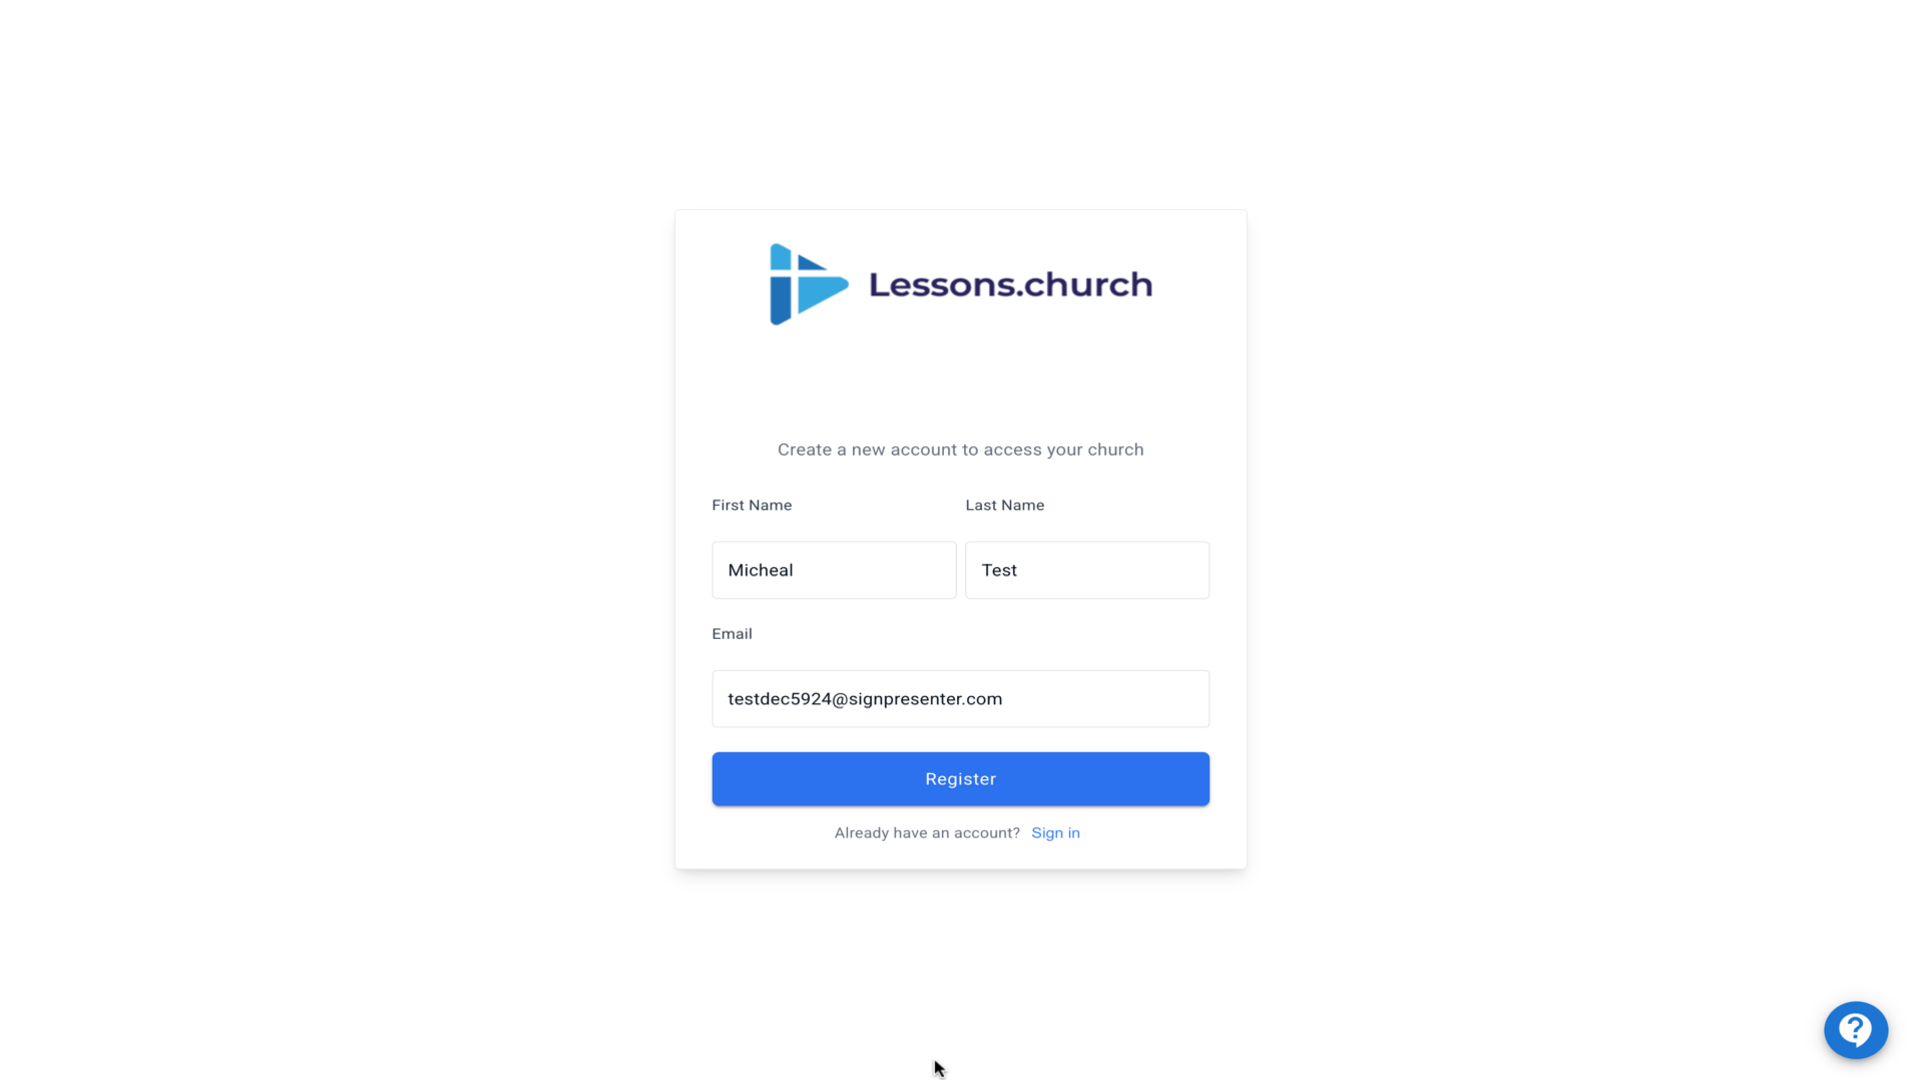
1.Visit lessons.church and click the Register button▼
2.Enter your first name, last name, and email address, then click Register▼
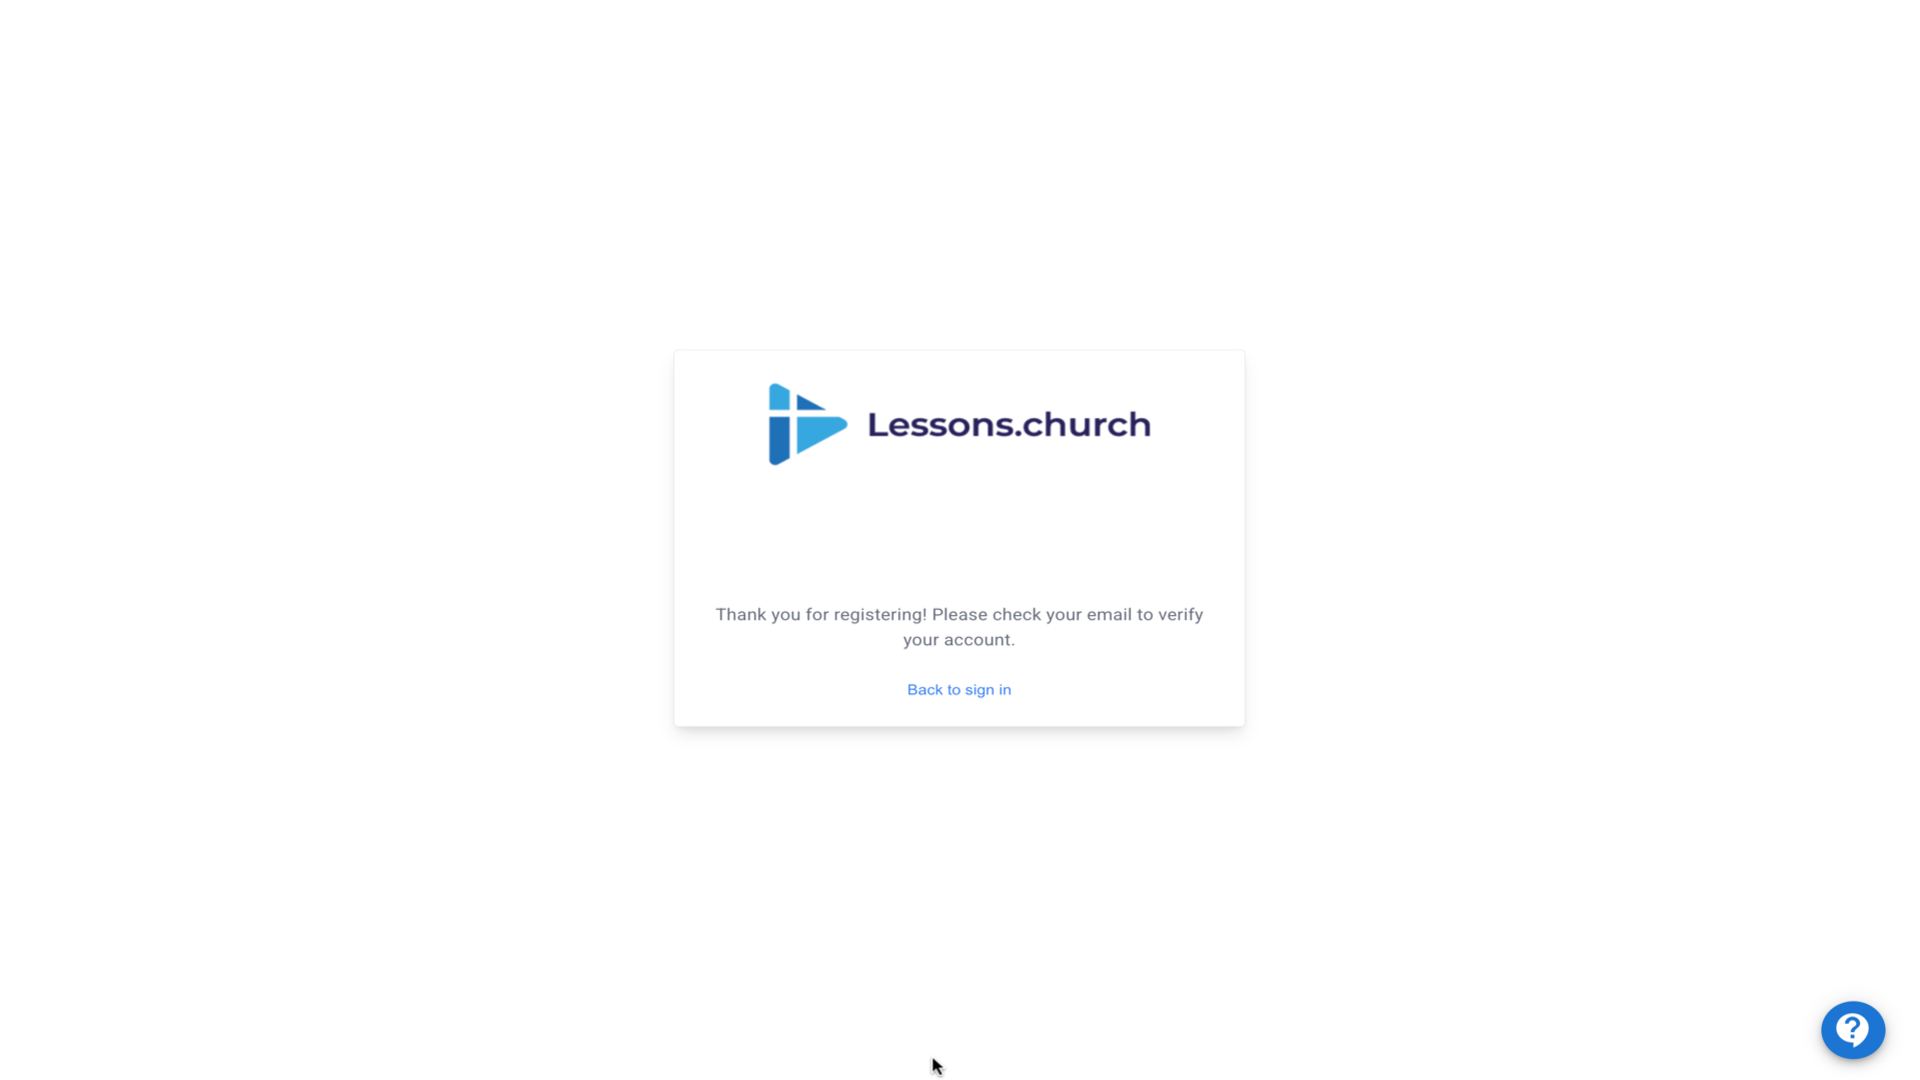
3.Check your email for a verification link (check spam if needed)▼
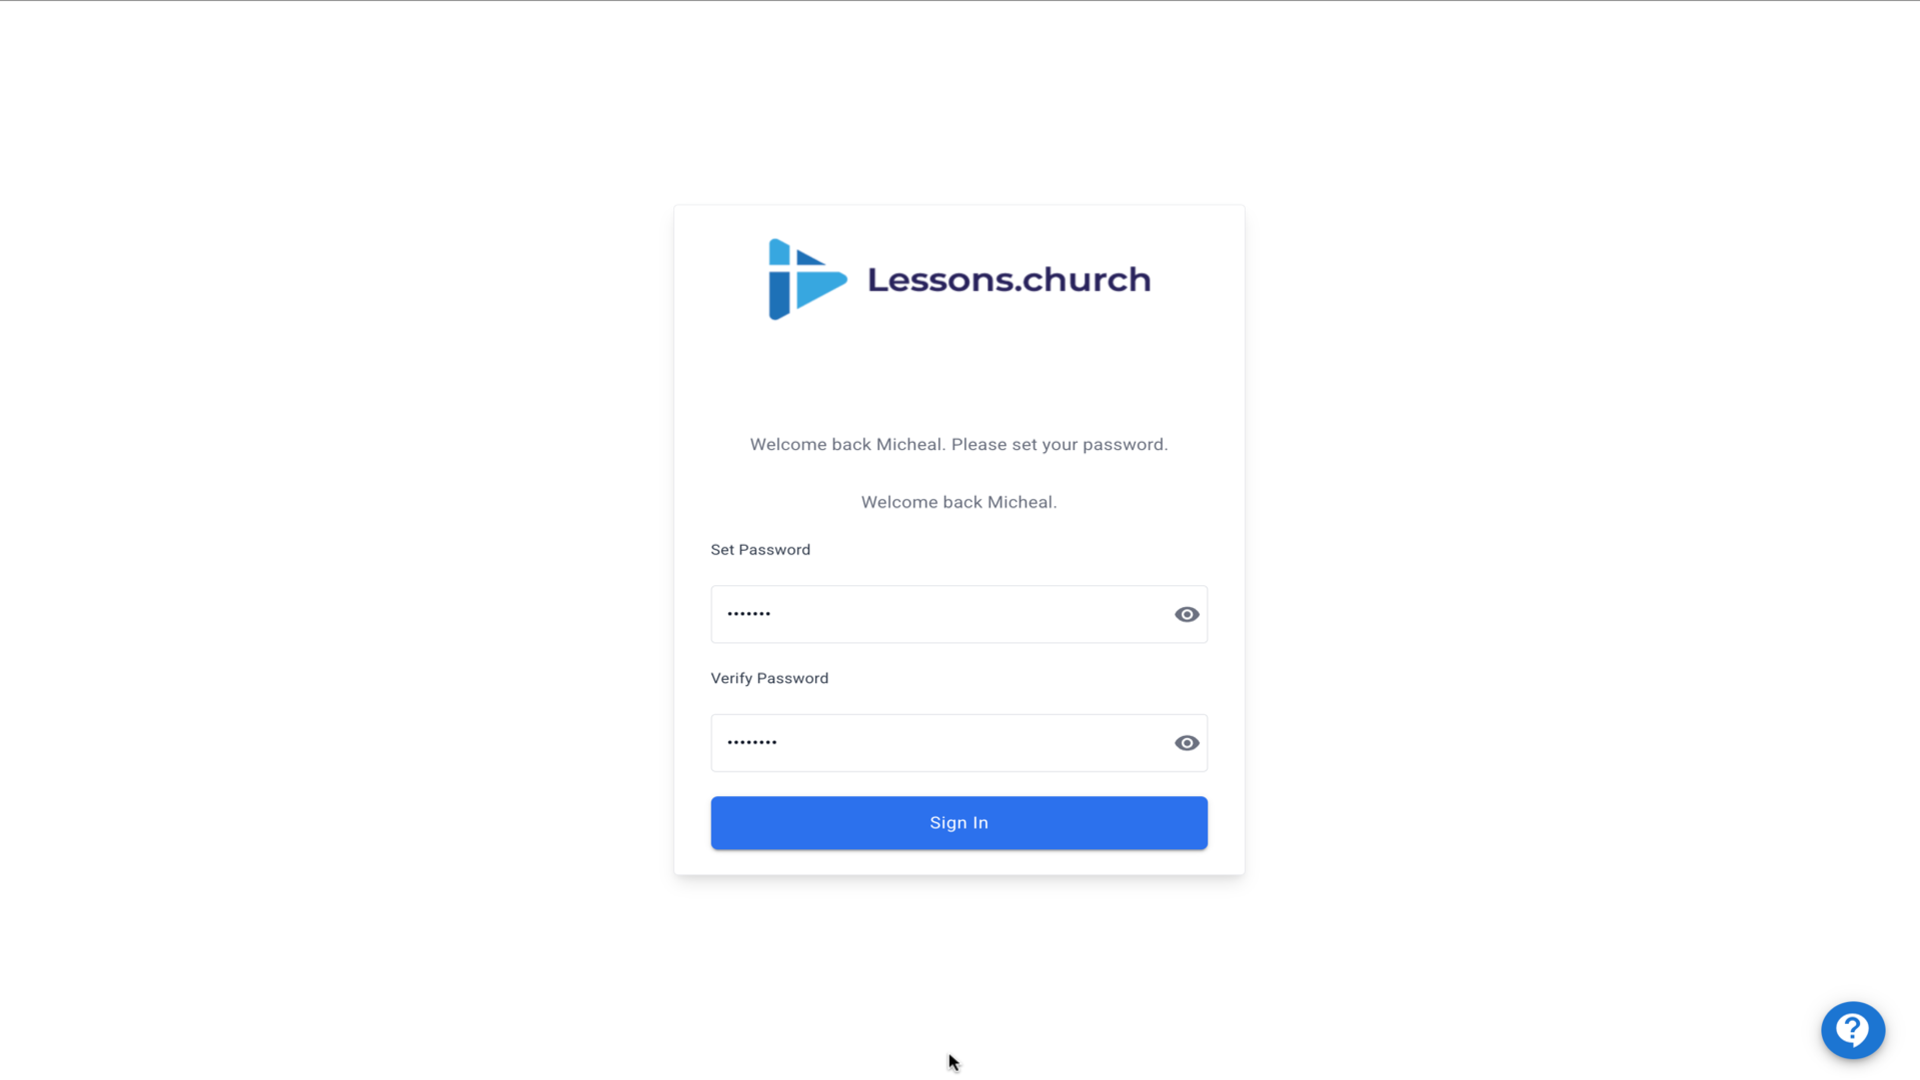
4.Click the email link and set your password, then click Sign In▼
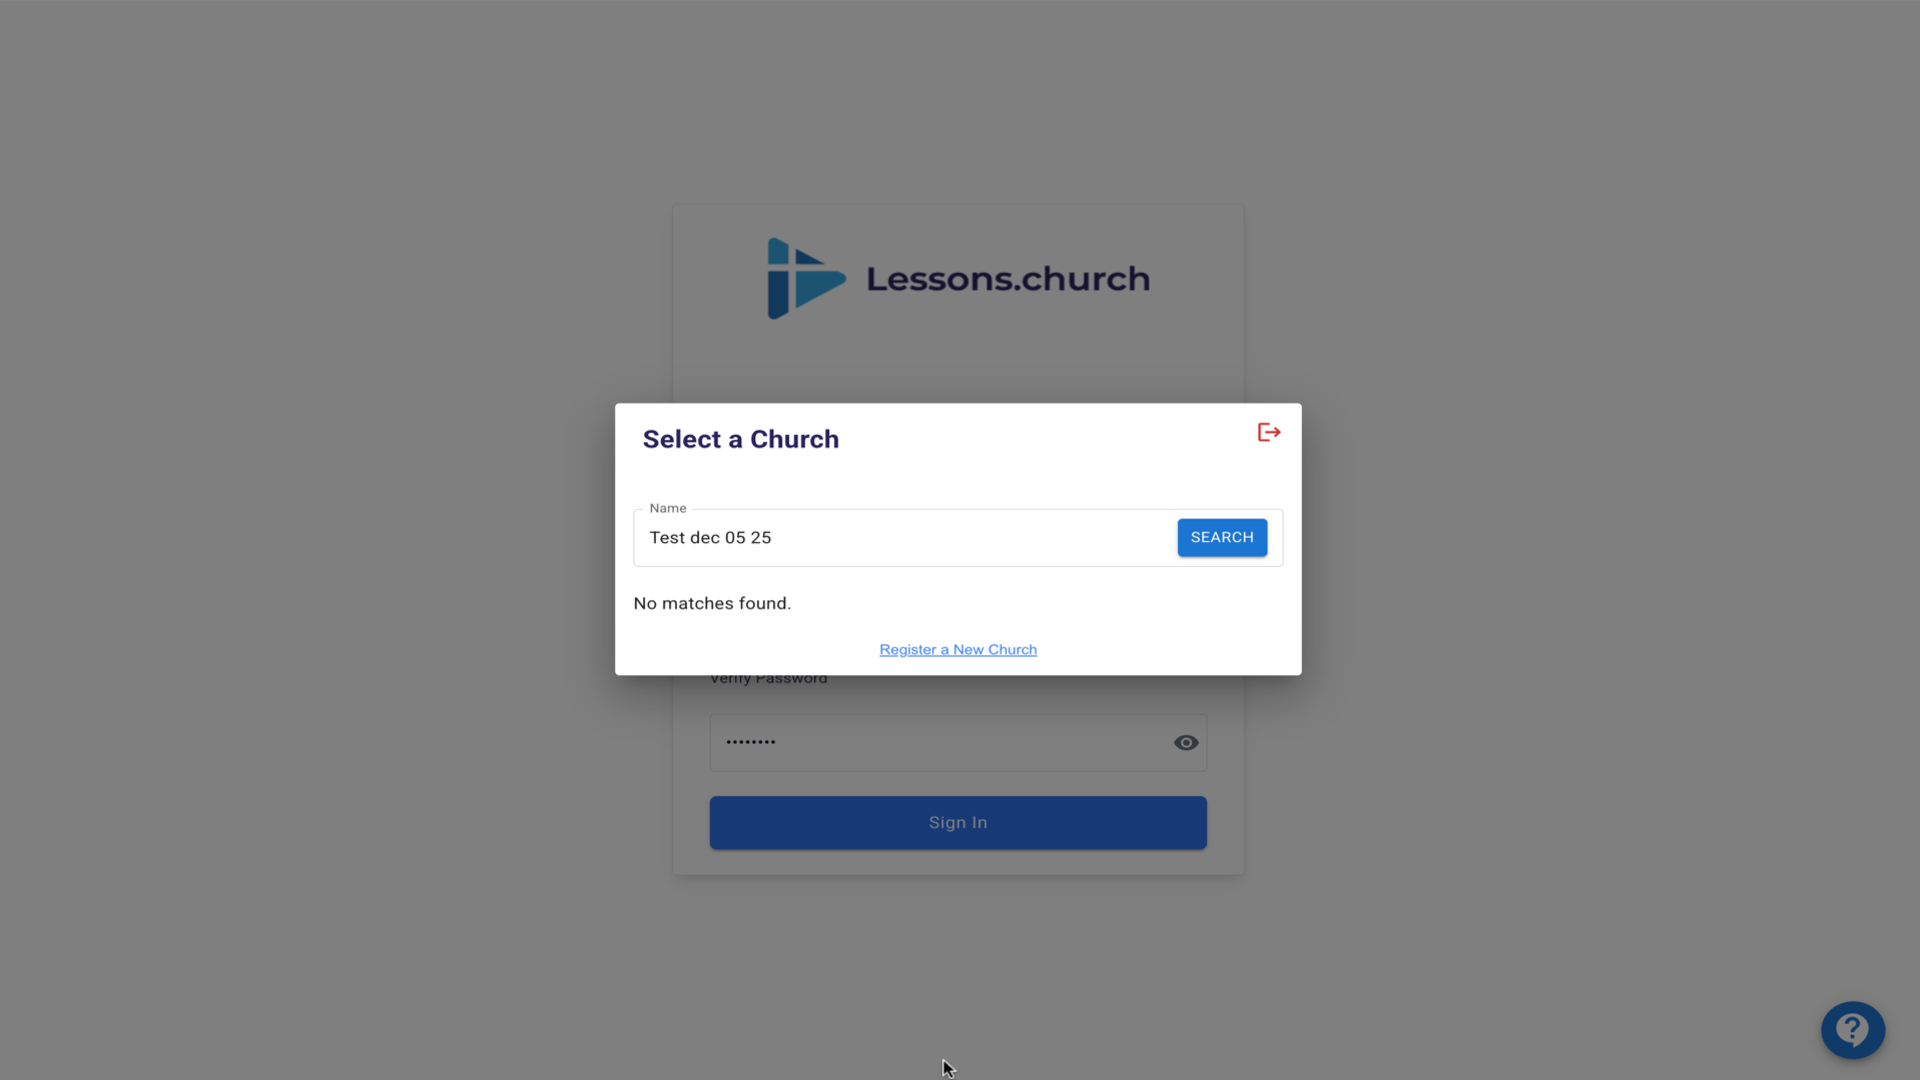
5.Click in the search box to select your church▼
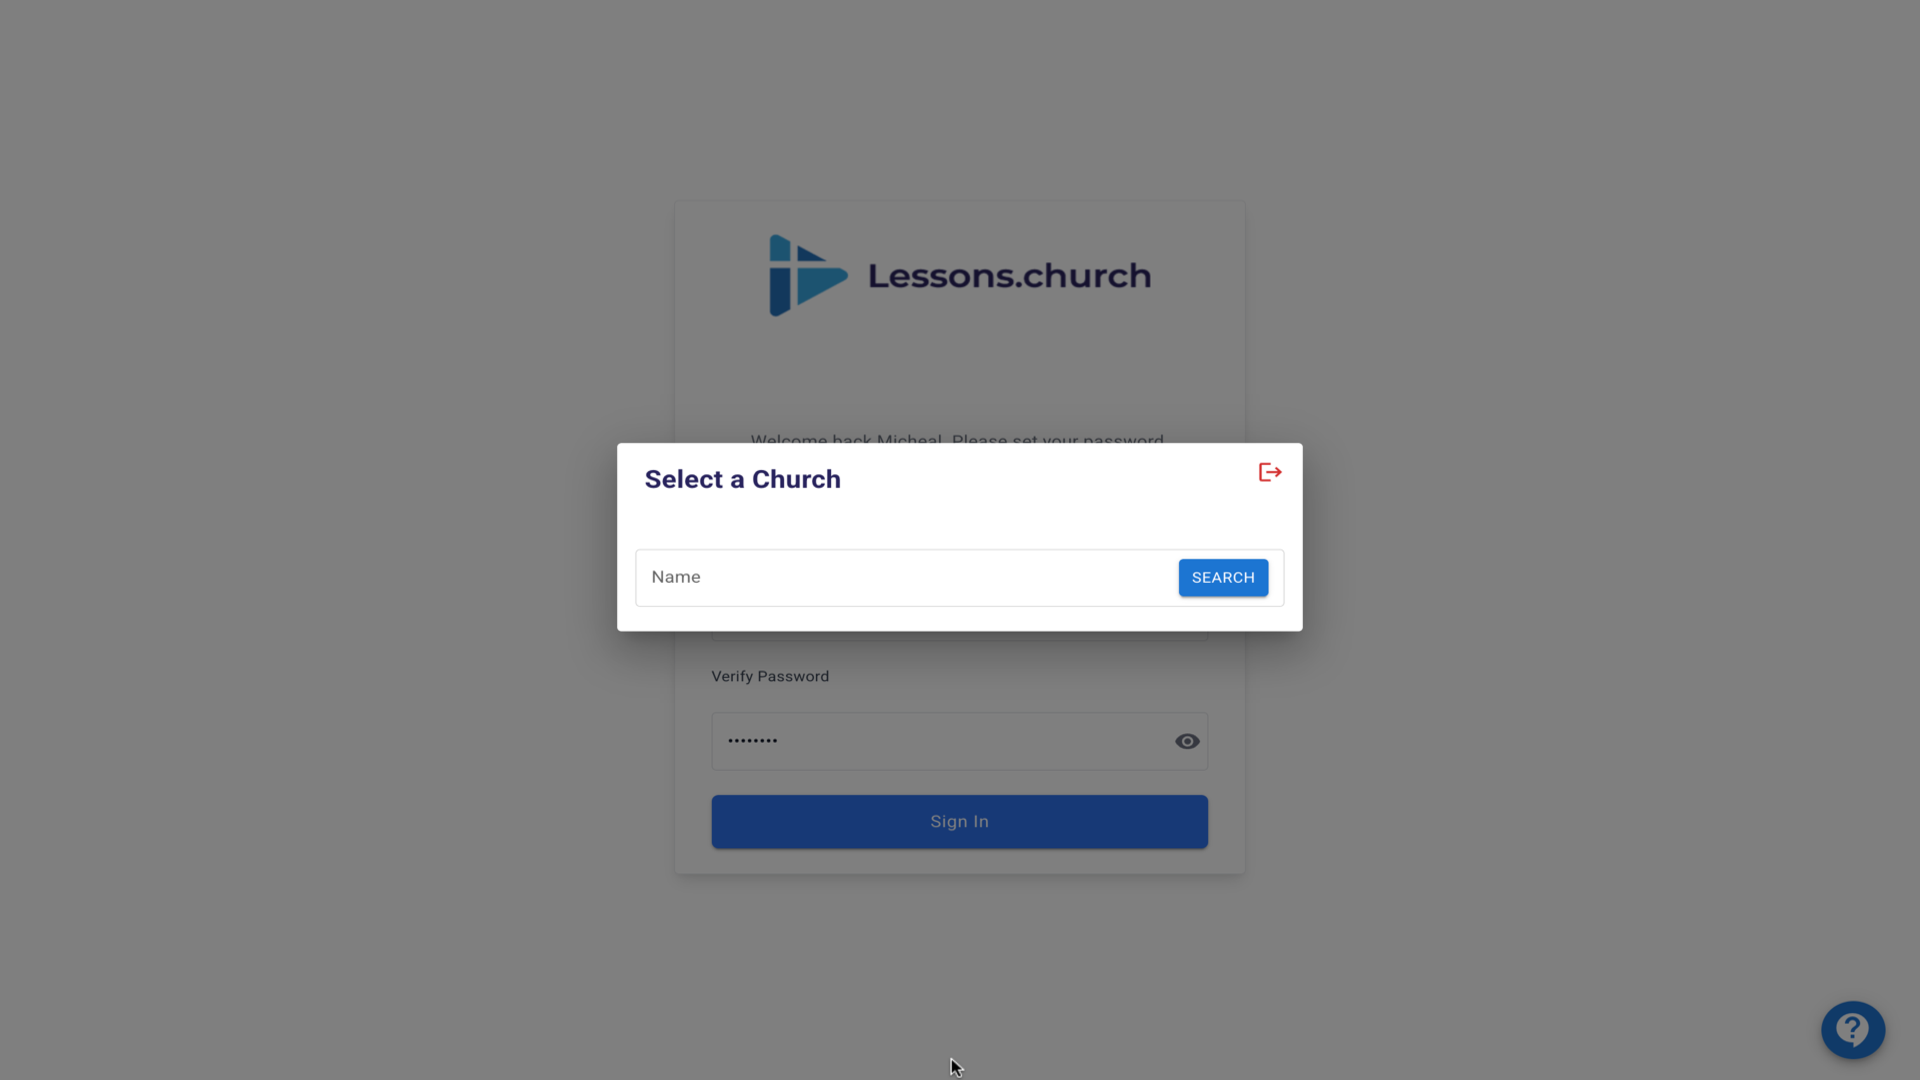
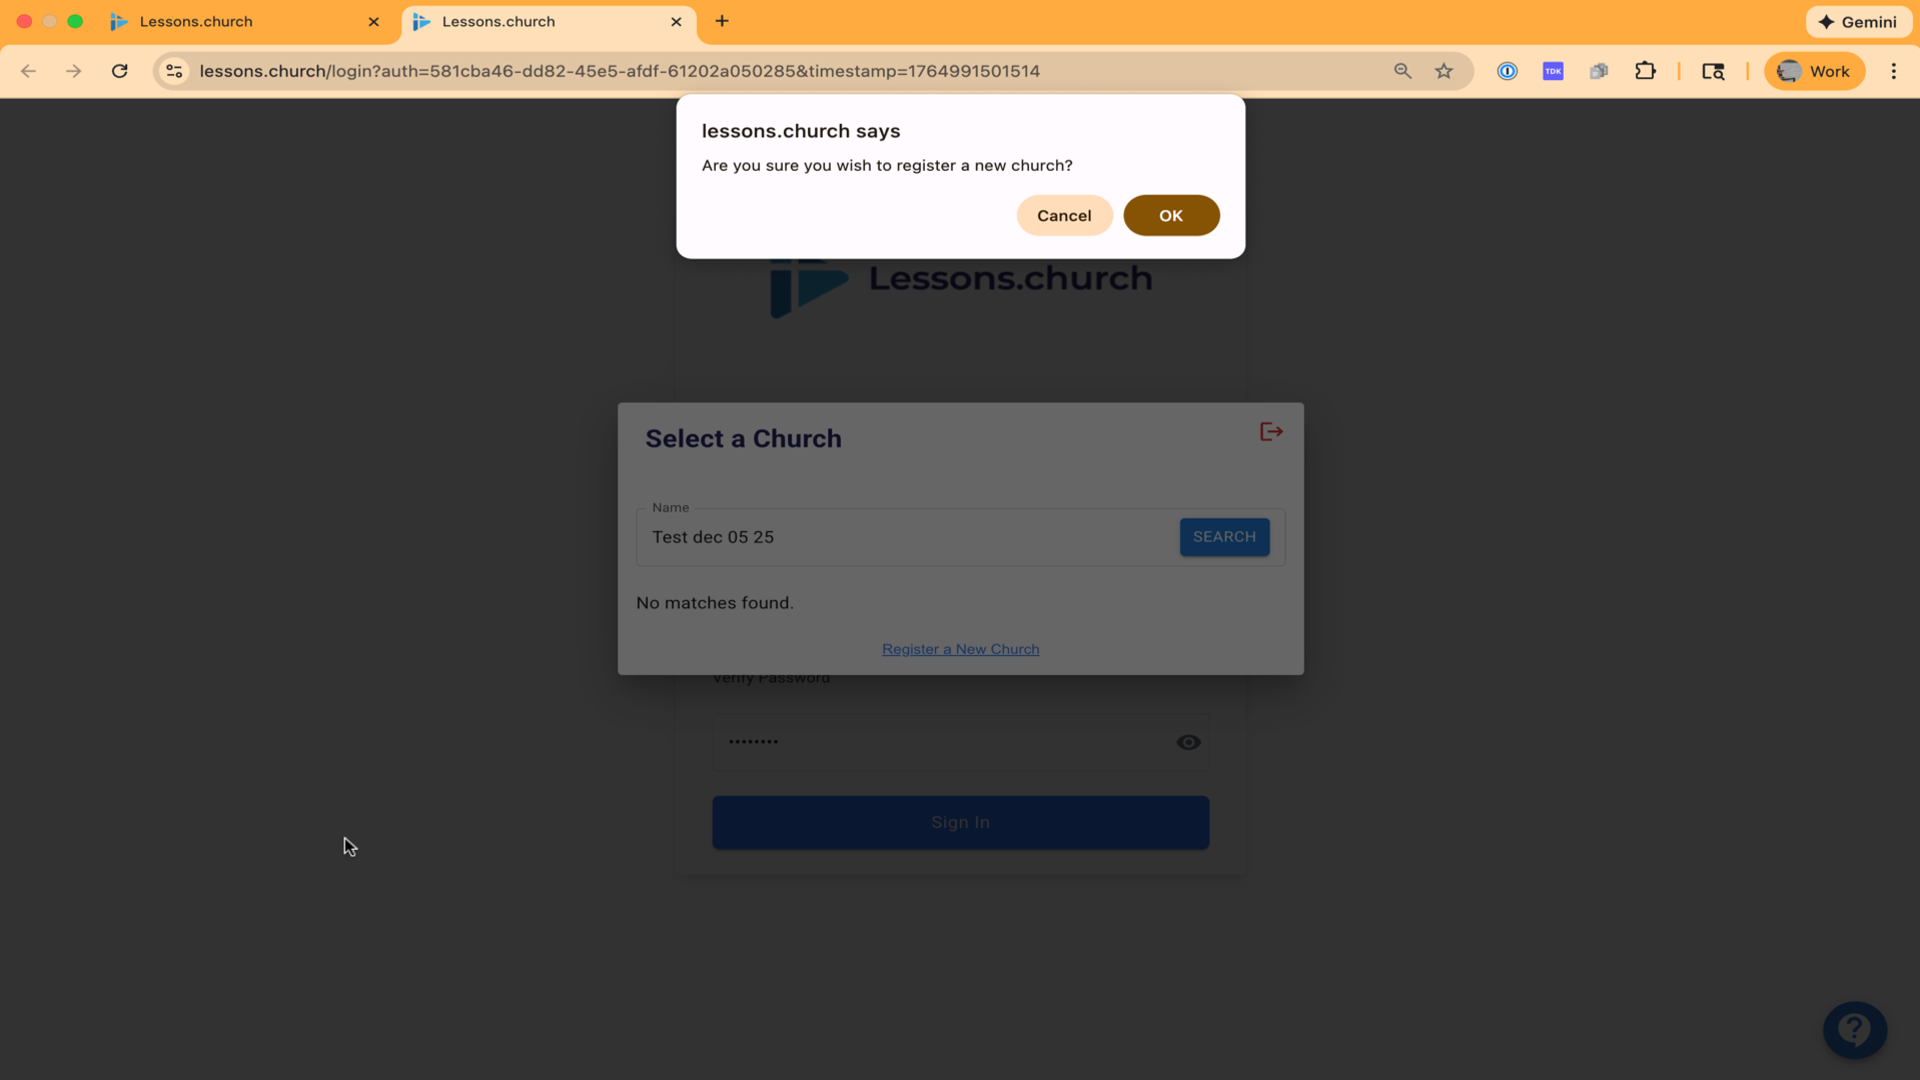
6.Search for your church, or click Register a New Church if not found▼
7.Click OK on the confirmation dialog▼
8.Enter your church information and click Save▼

9.Click on your church to select it▼
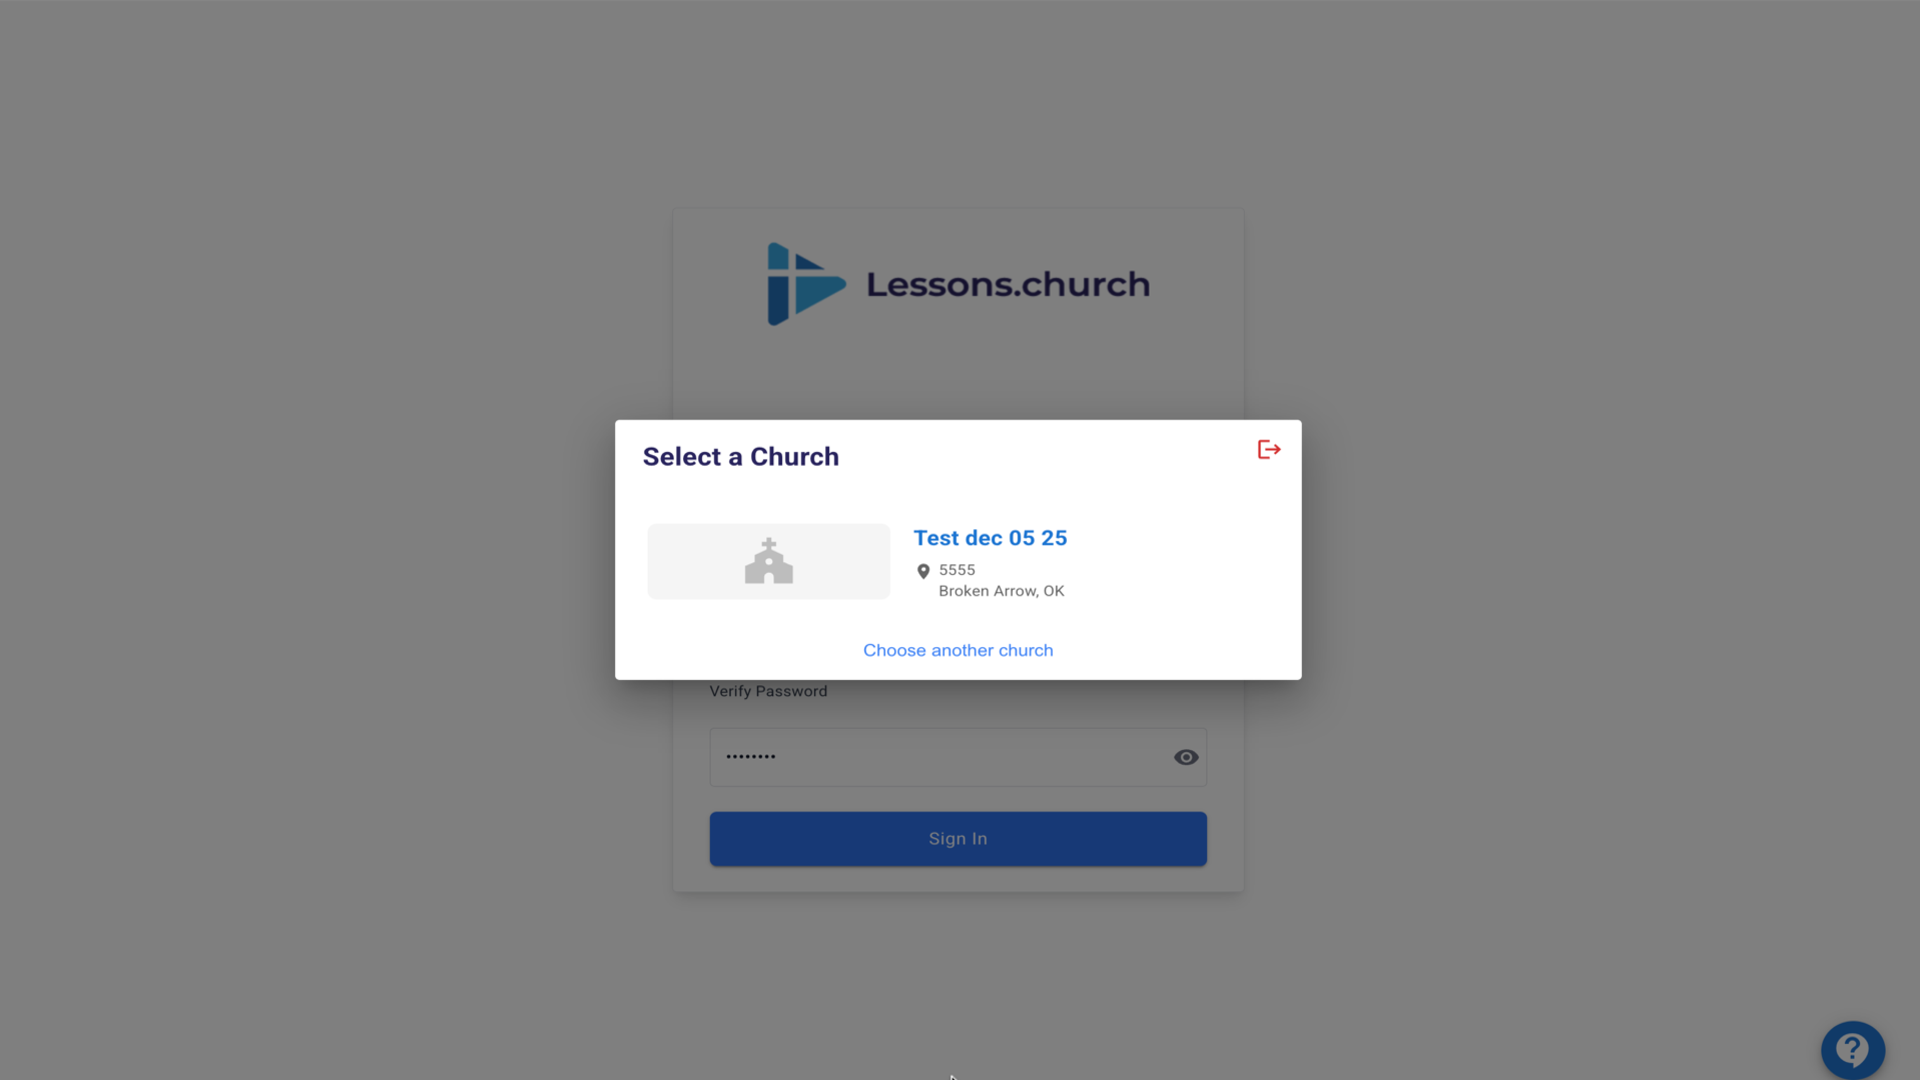
10.You're all set! You can now access the classroom management dashboard▼
Steps
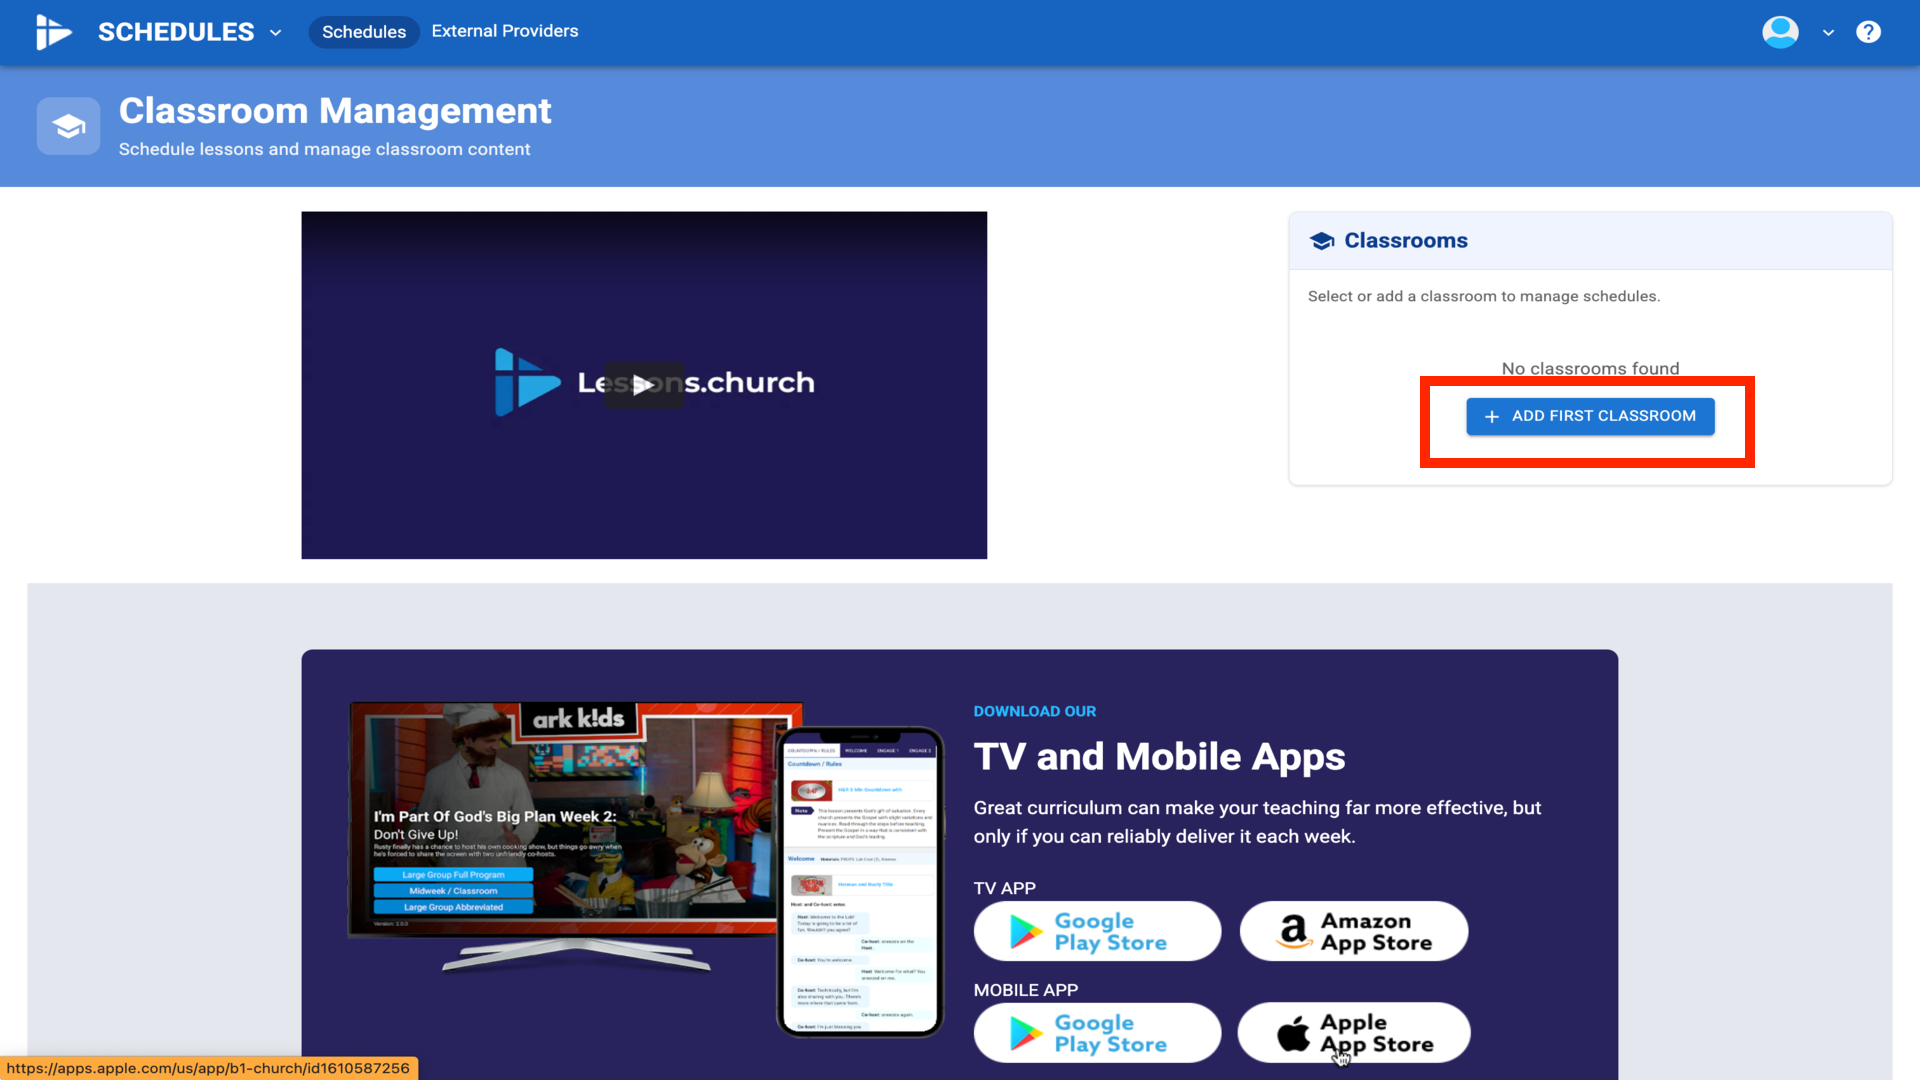
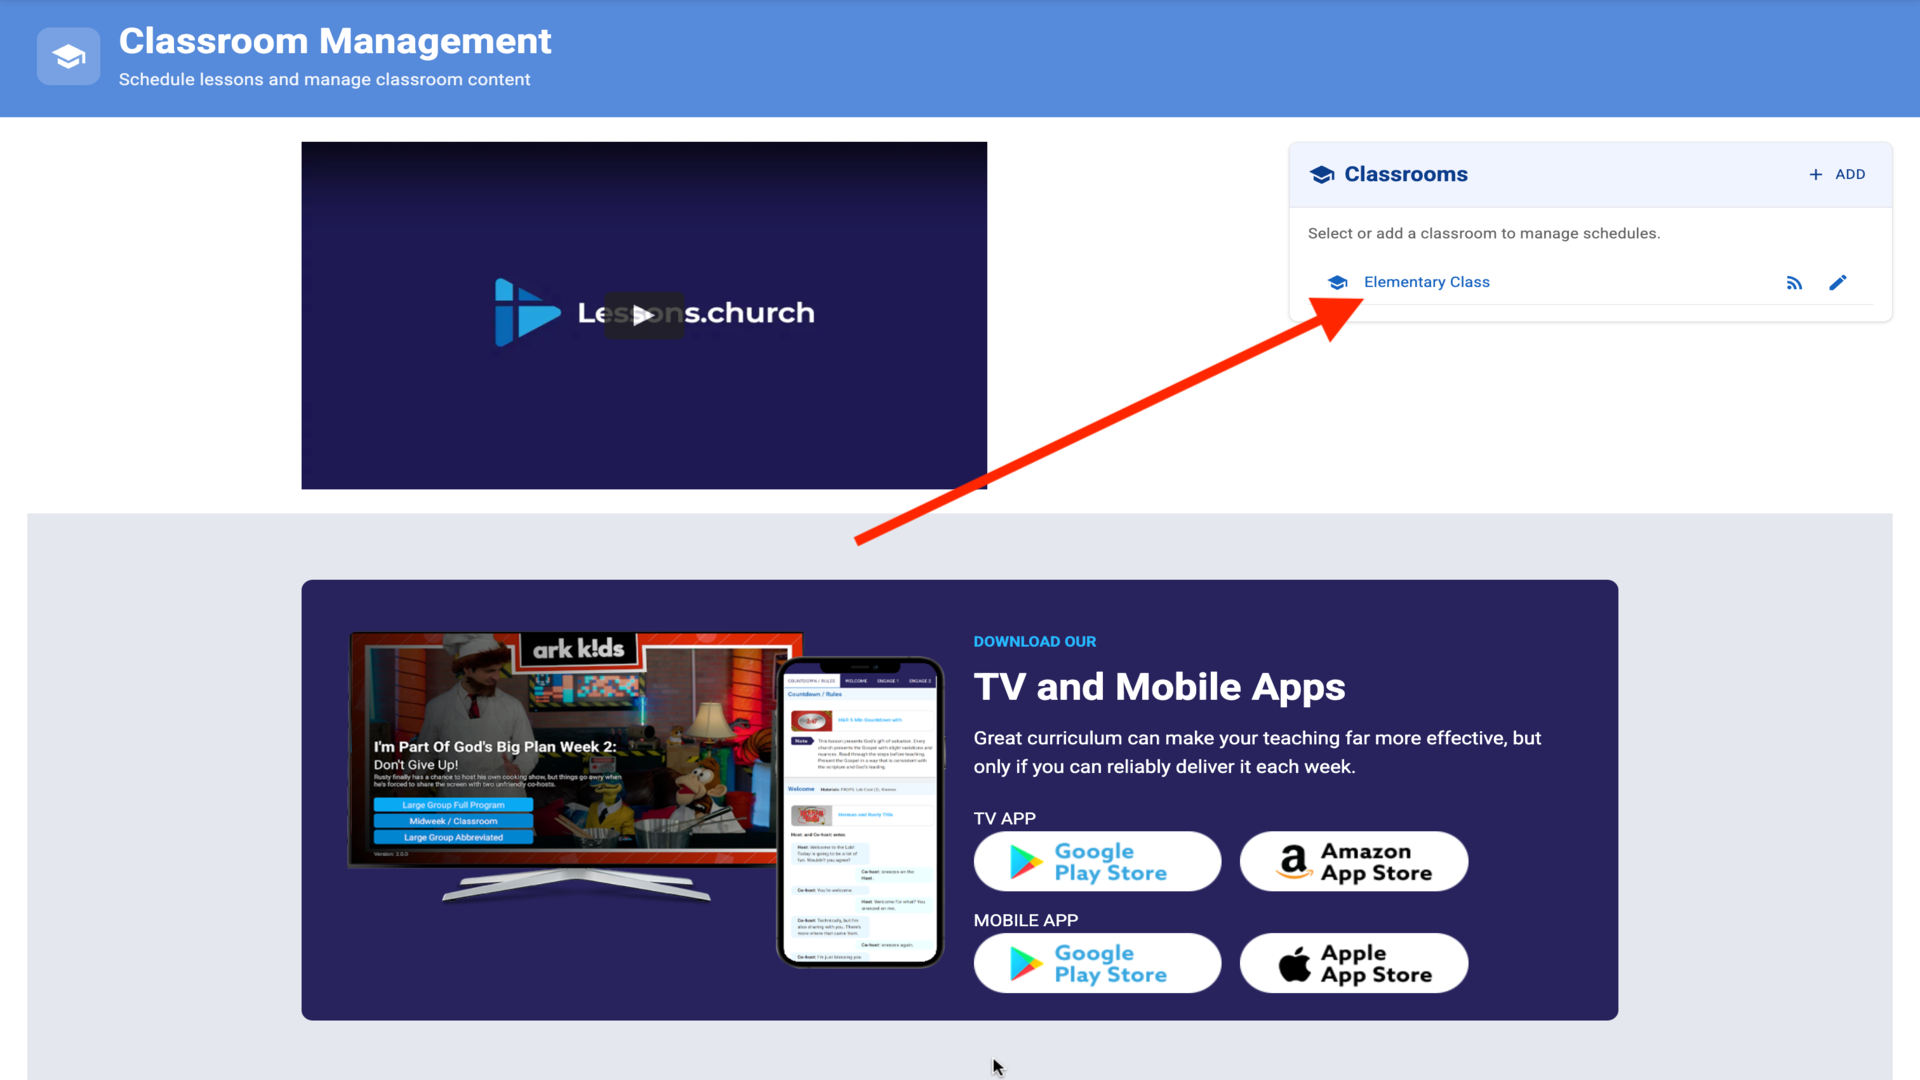
1.Click Add First Classroom▼
2.Enter a name for your classroom (e.g., Elementary Class)▼
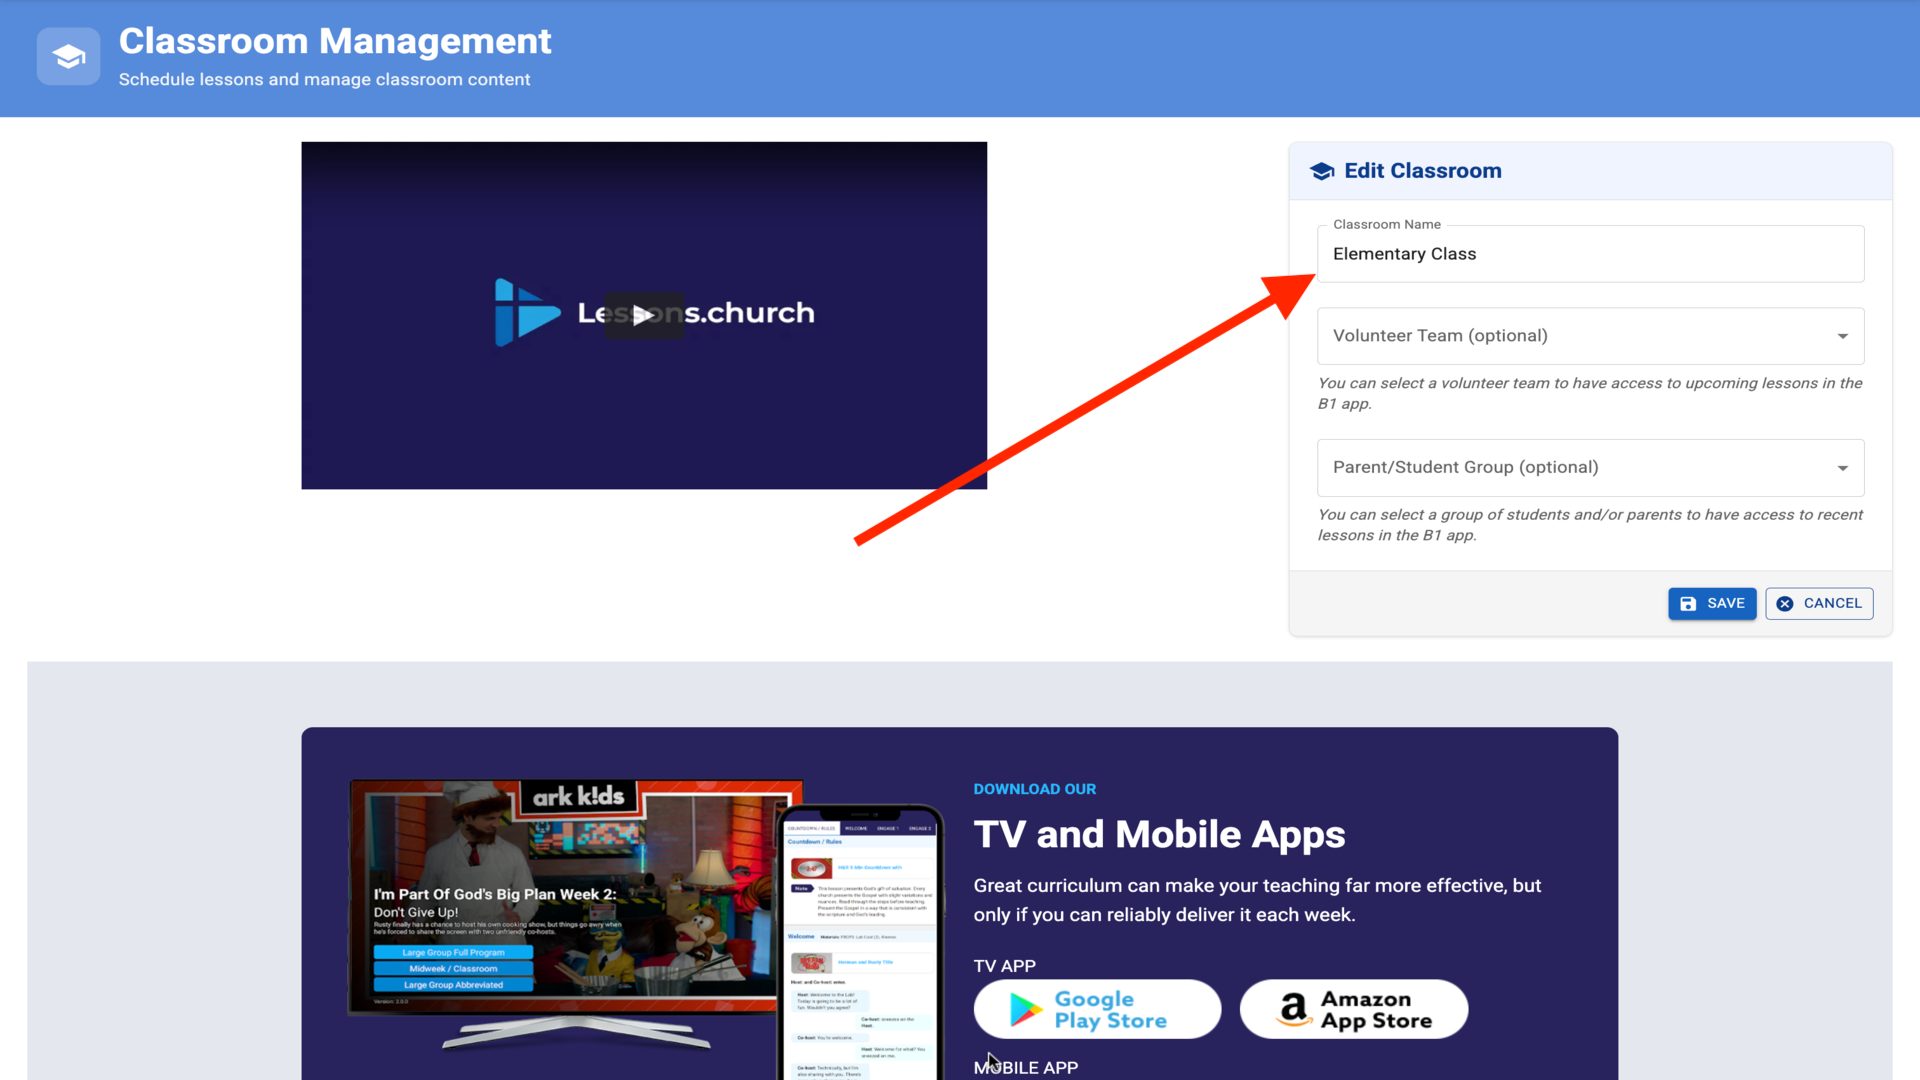
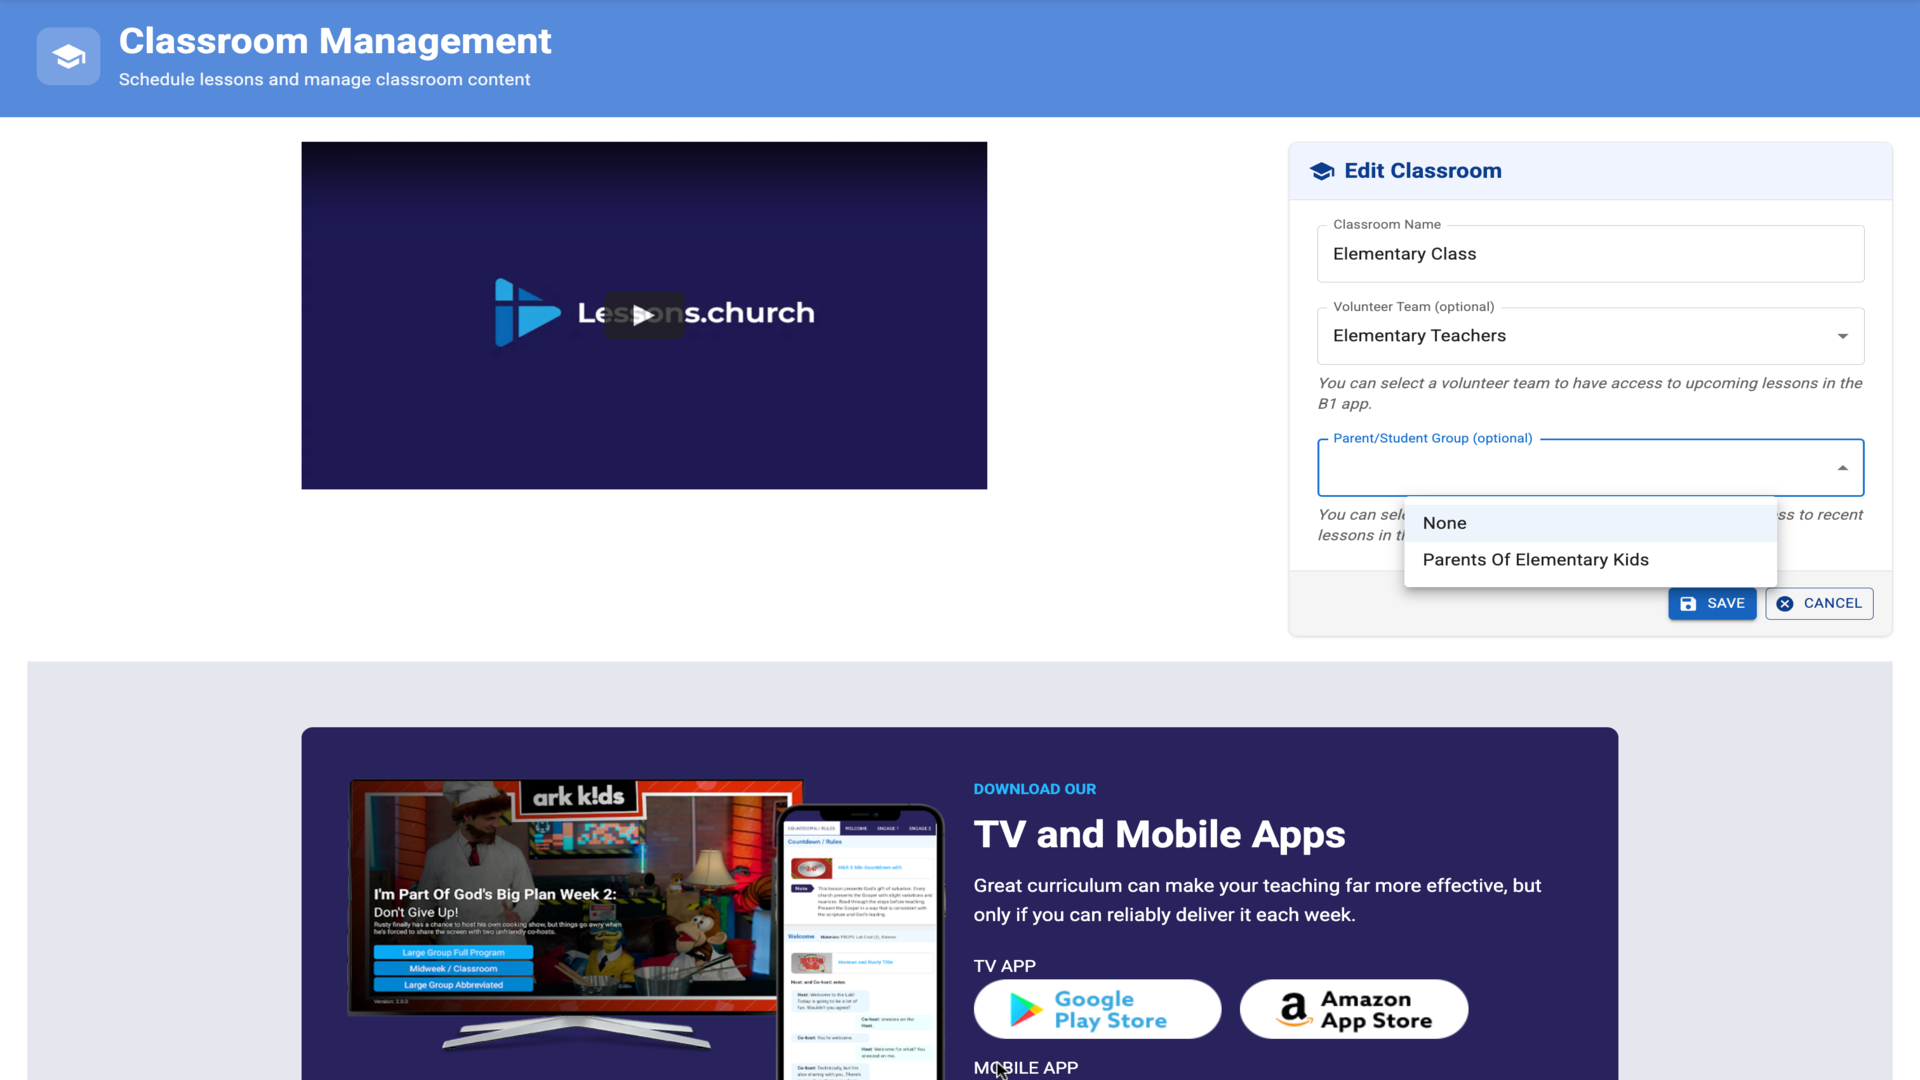
3.Select the Volunteer Team we created earlier (Elementary Teachers)▼

4.Select the Parent/Student Group we created (Parents Of Elementary Kids)▼
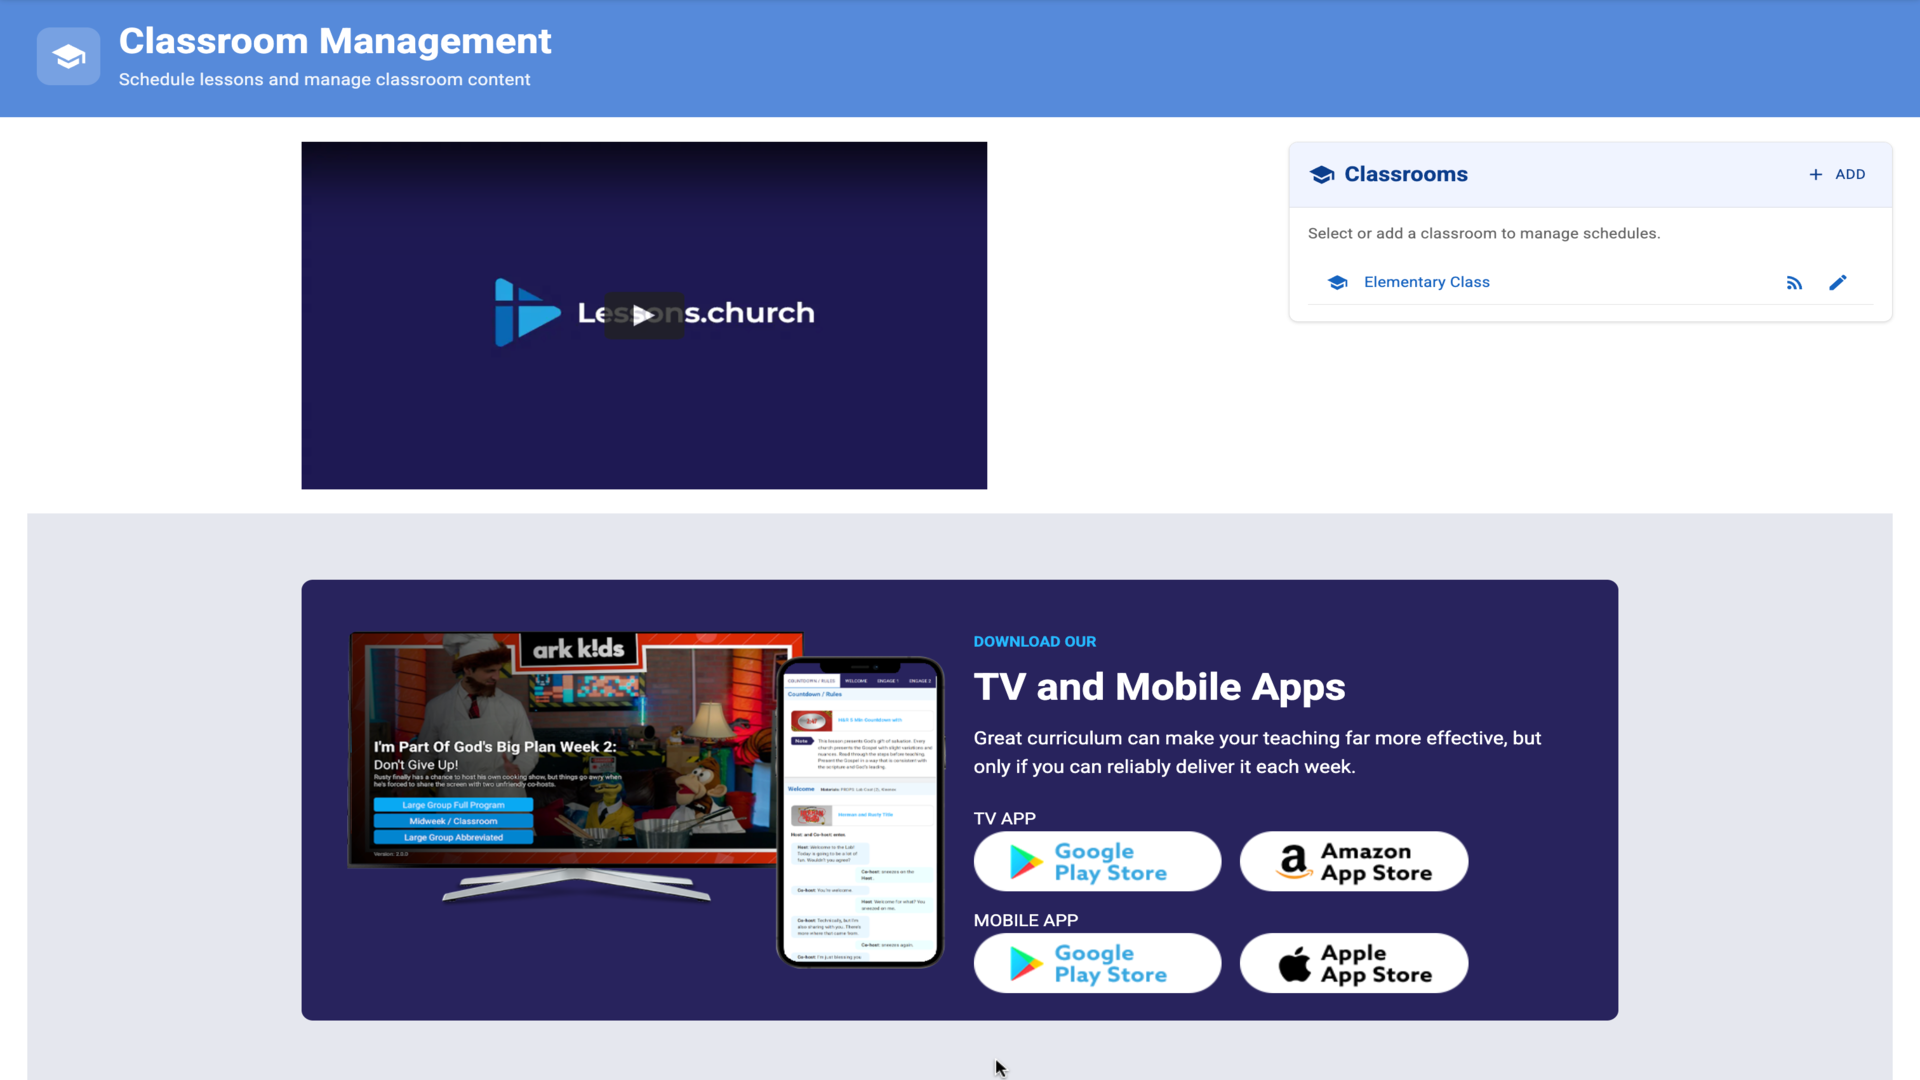
5.Click Save to create your classroom▼

6.Your classroom is created and ready to use▼
Steps
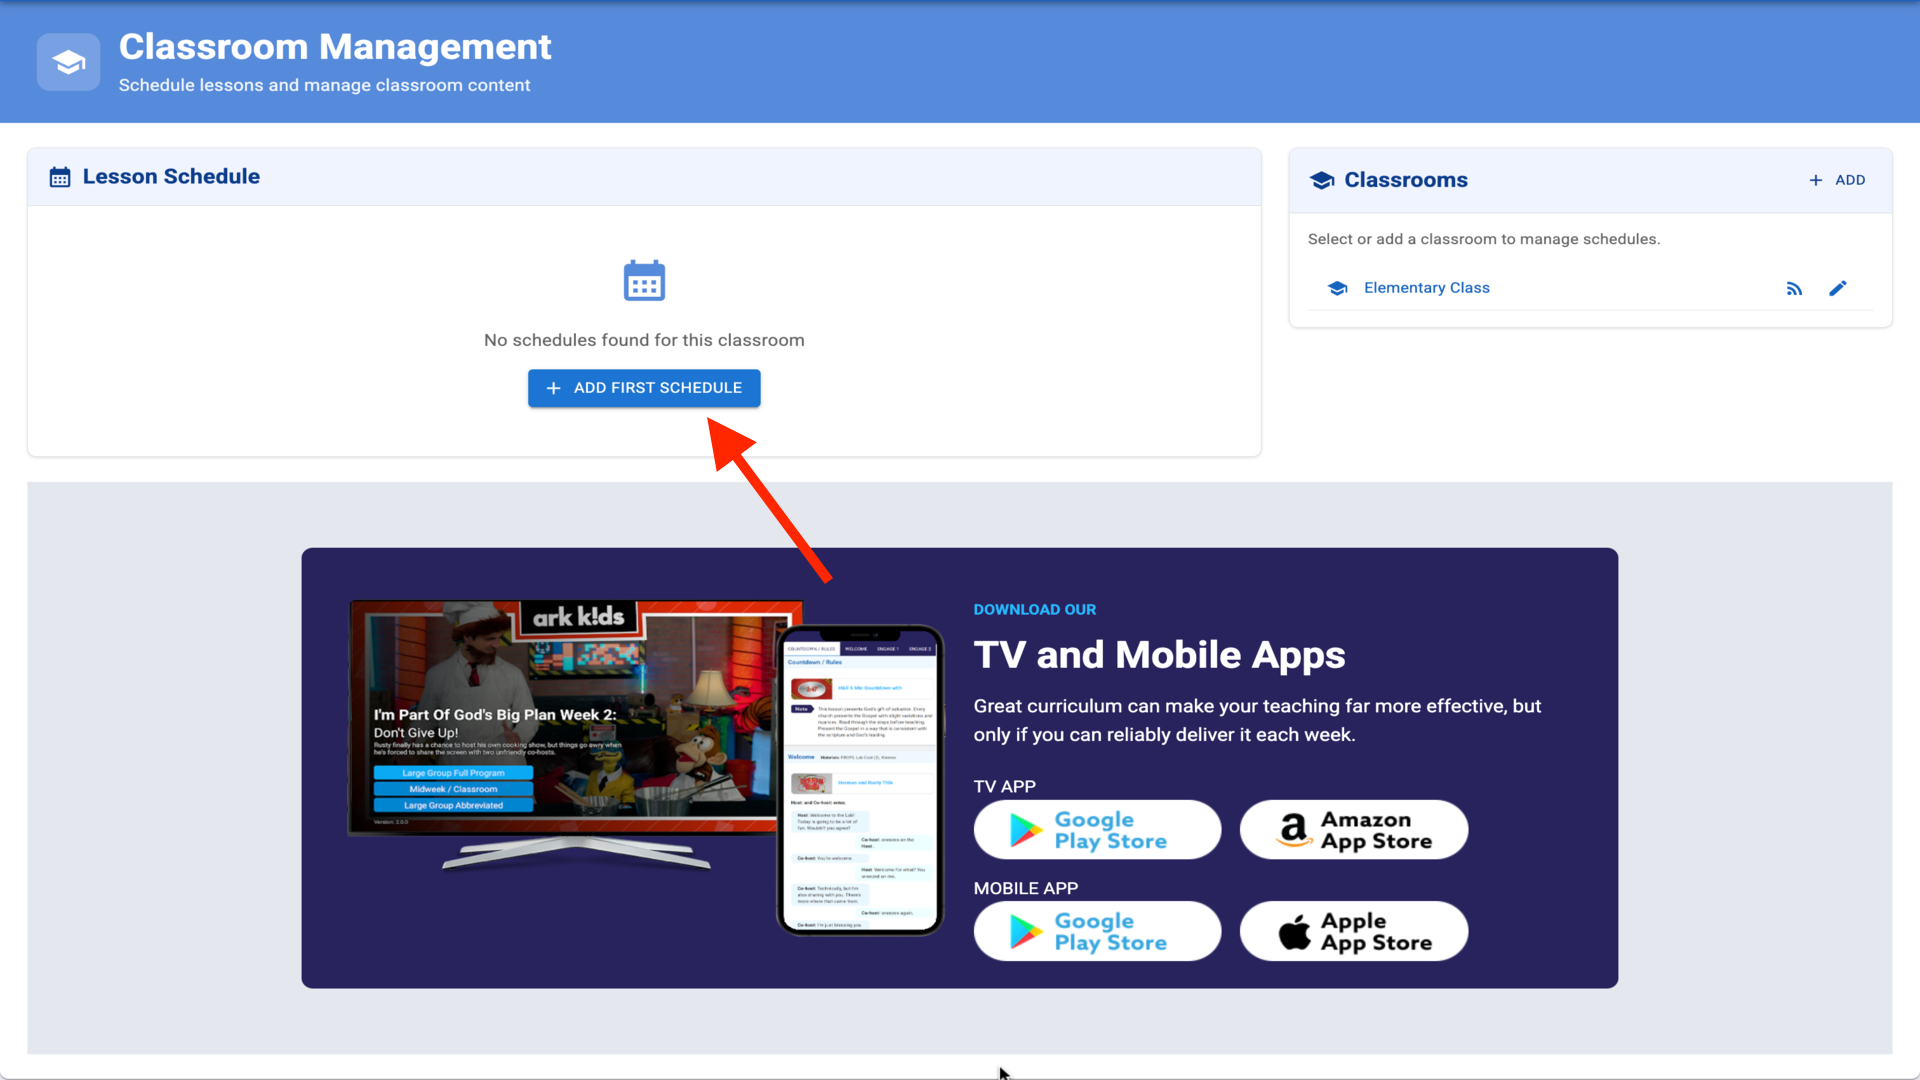
1.Click on your classroom to open it▼
2.Click Add First Schedule▼
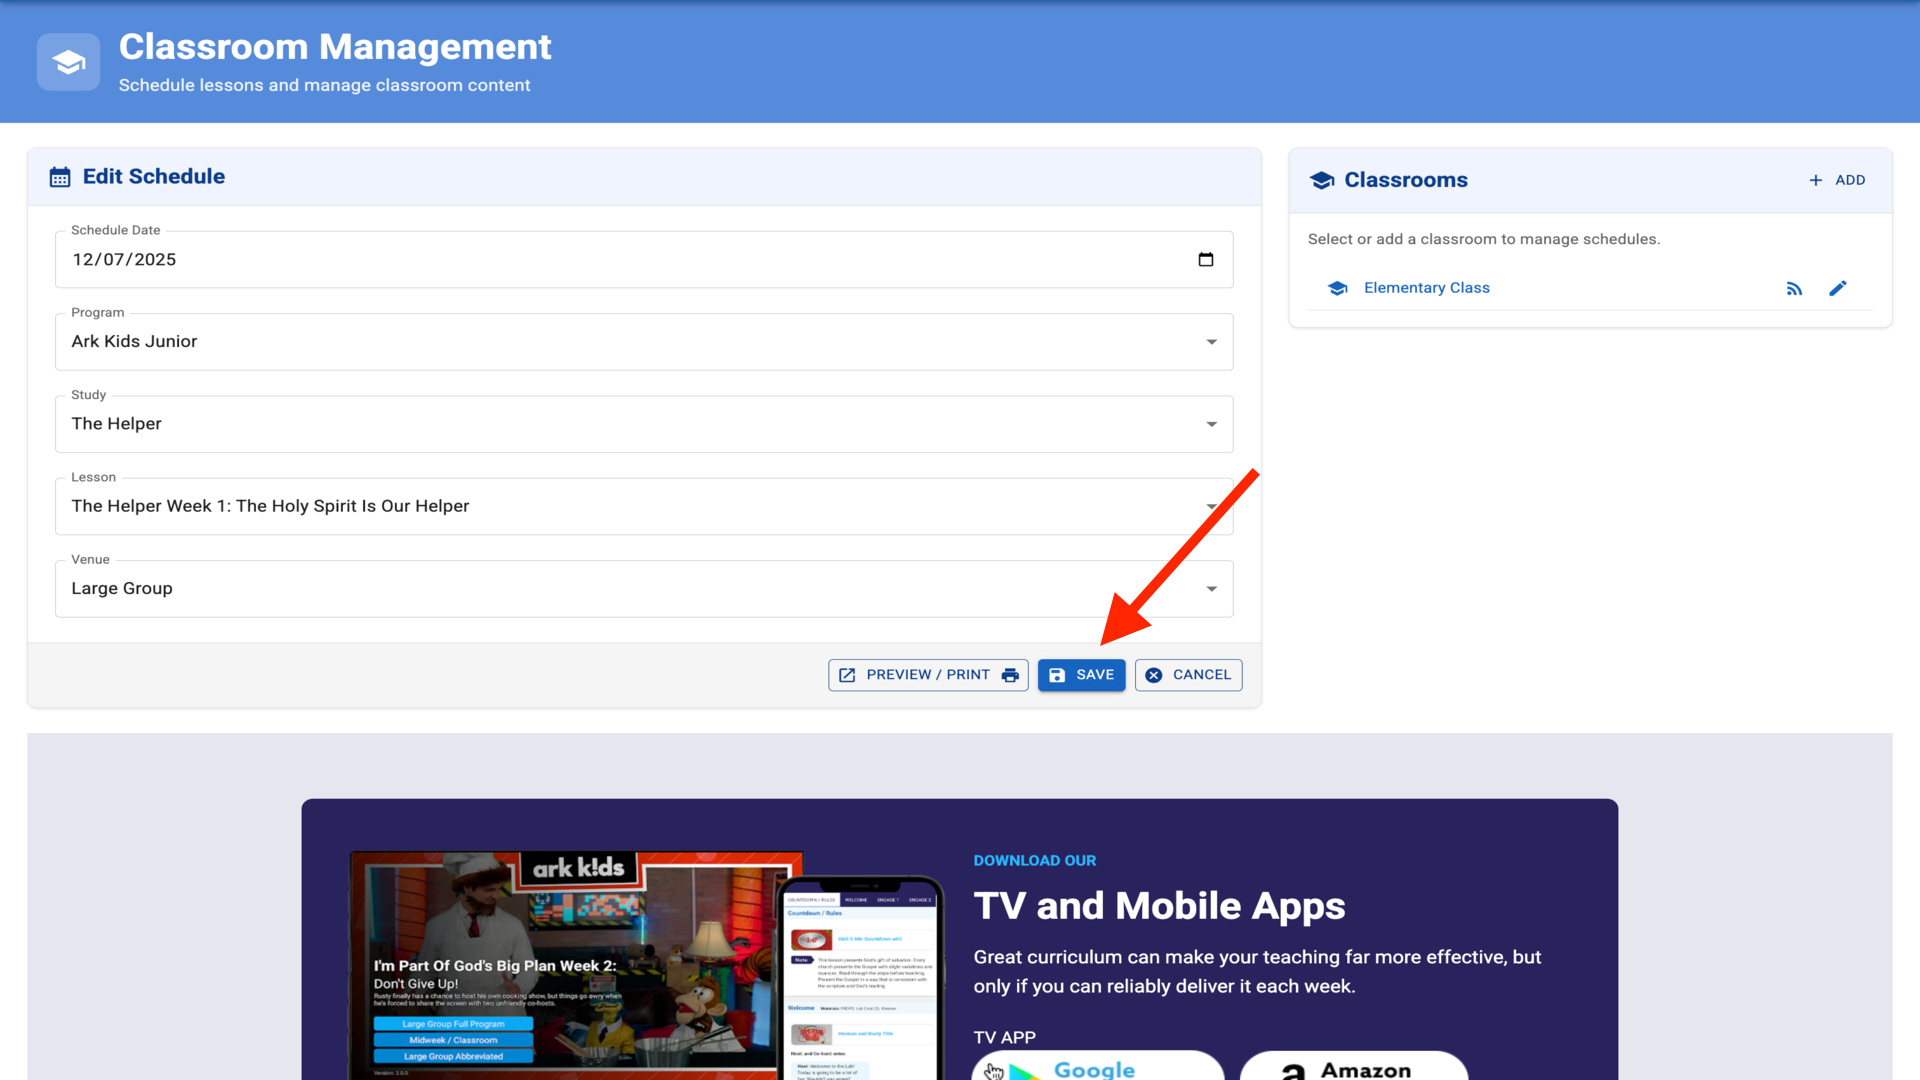
3.Select Date, Program, Study, Lesson, and Venue, then click Save▼
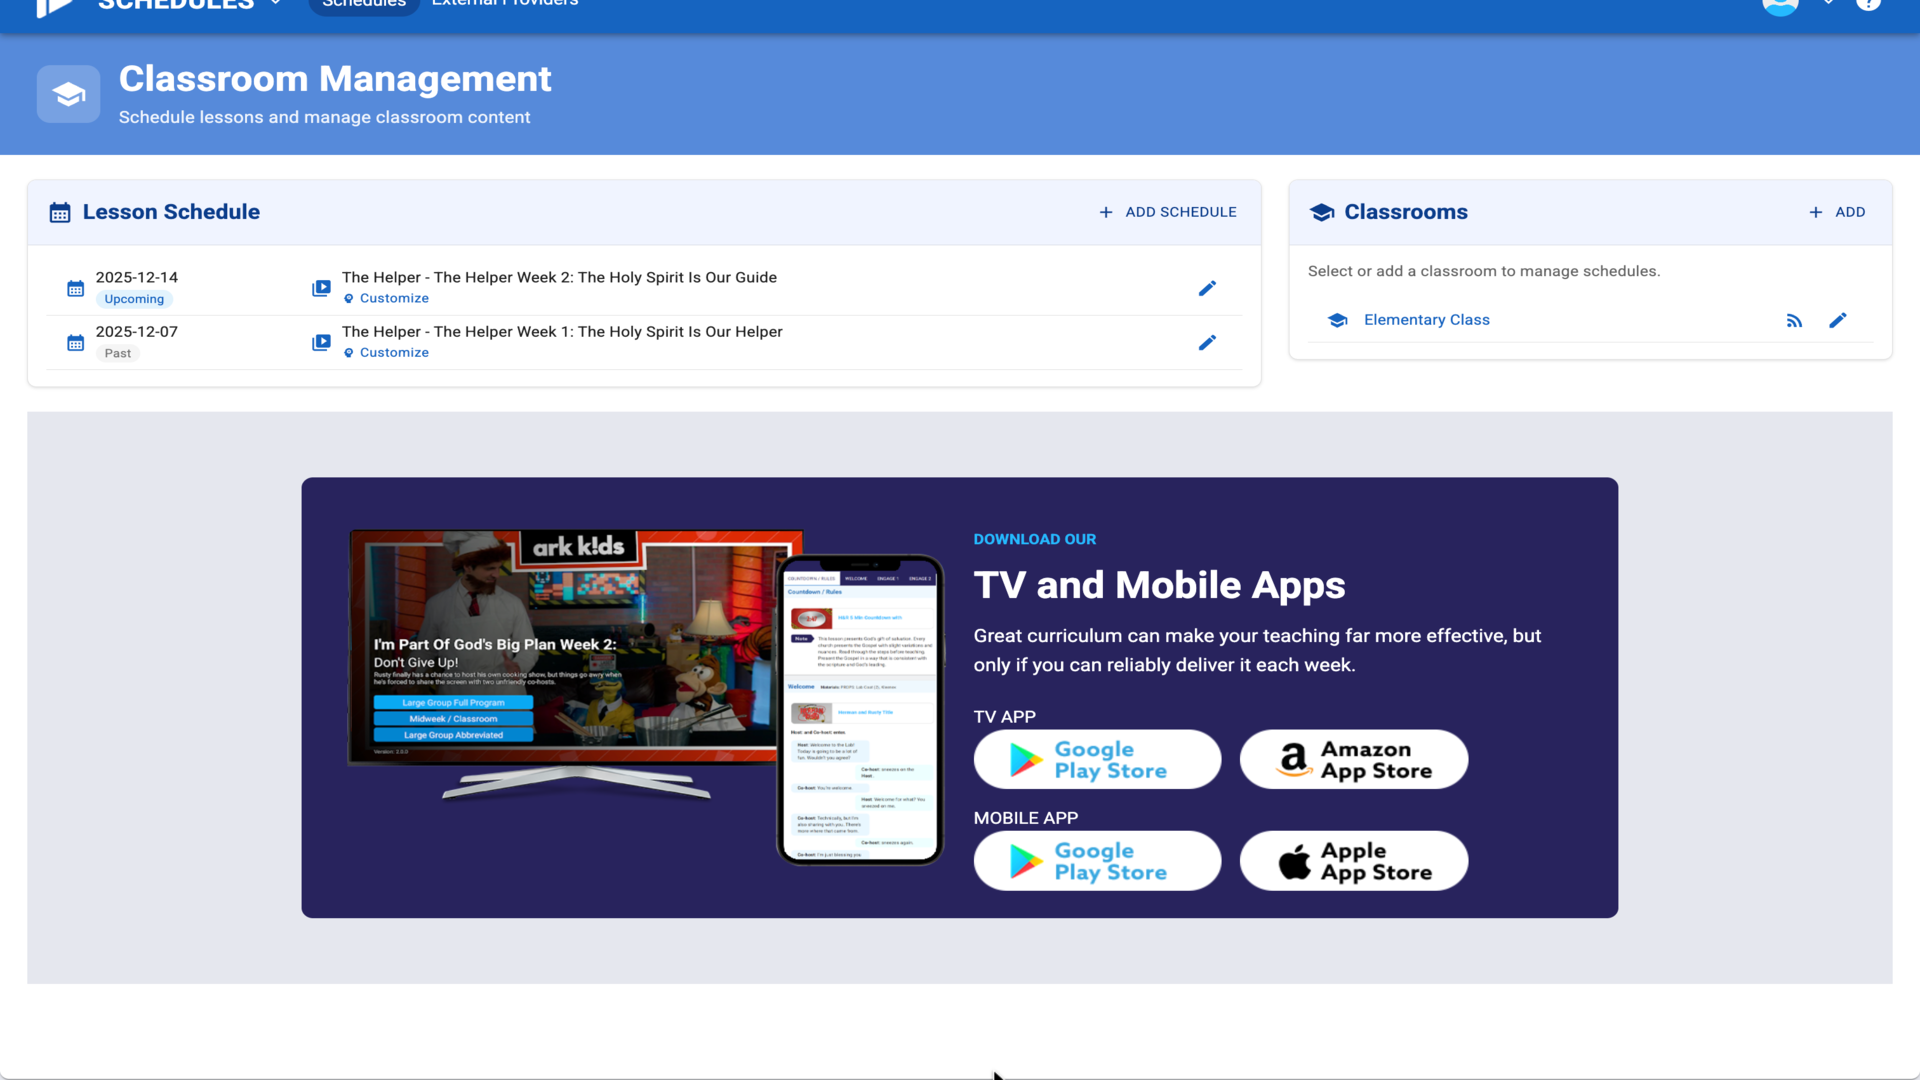
4.Your first lesson is scheduled - click Add Schedule for more▼
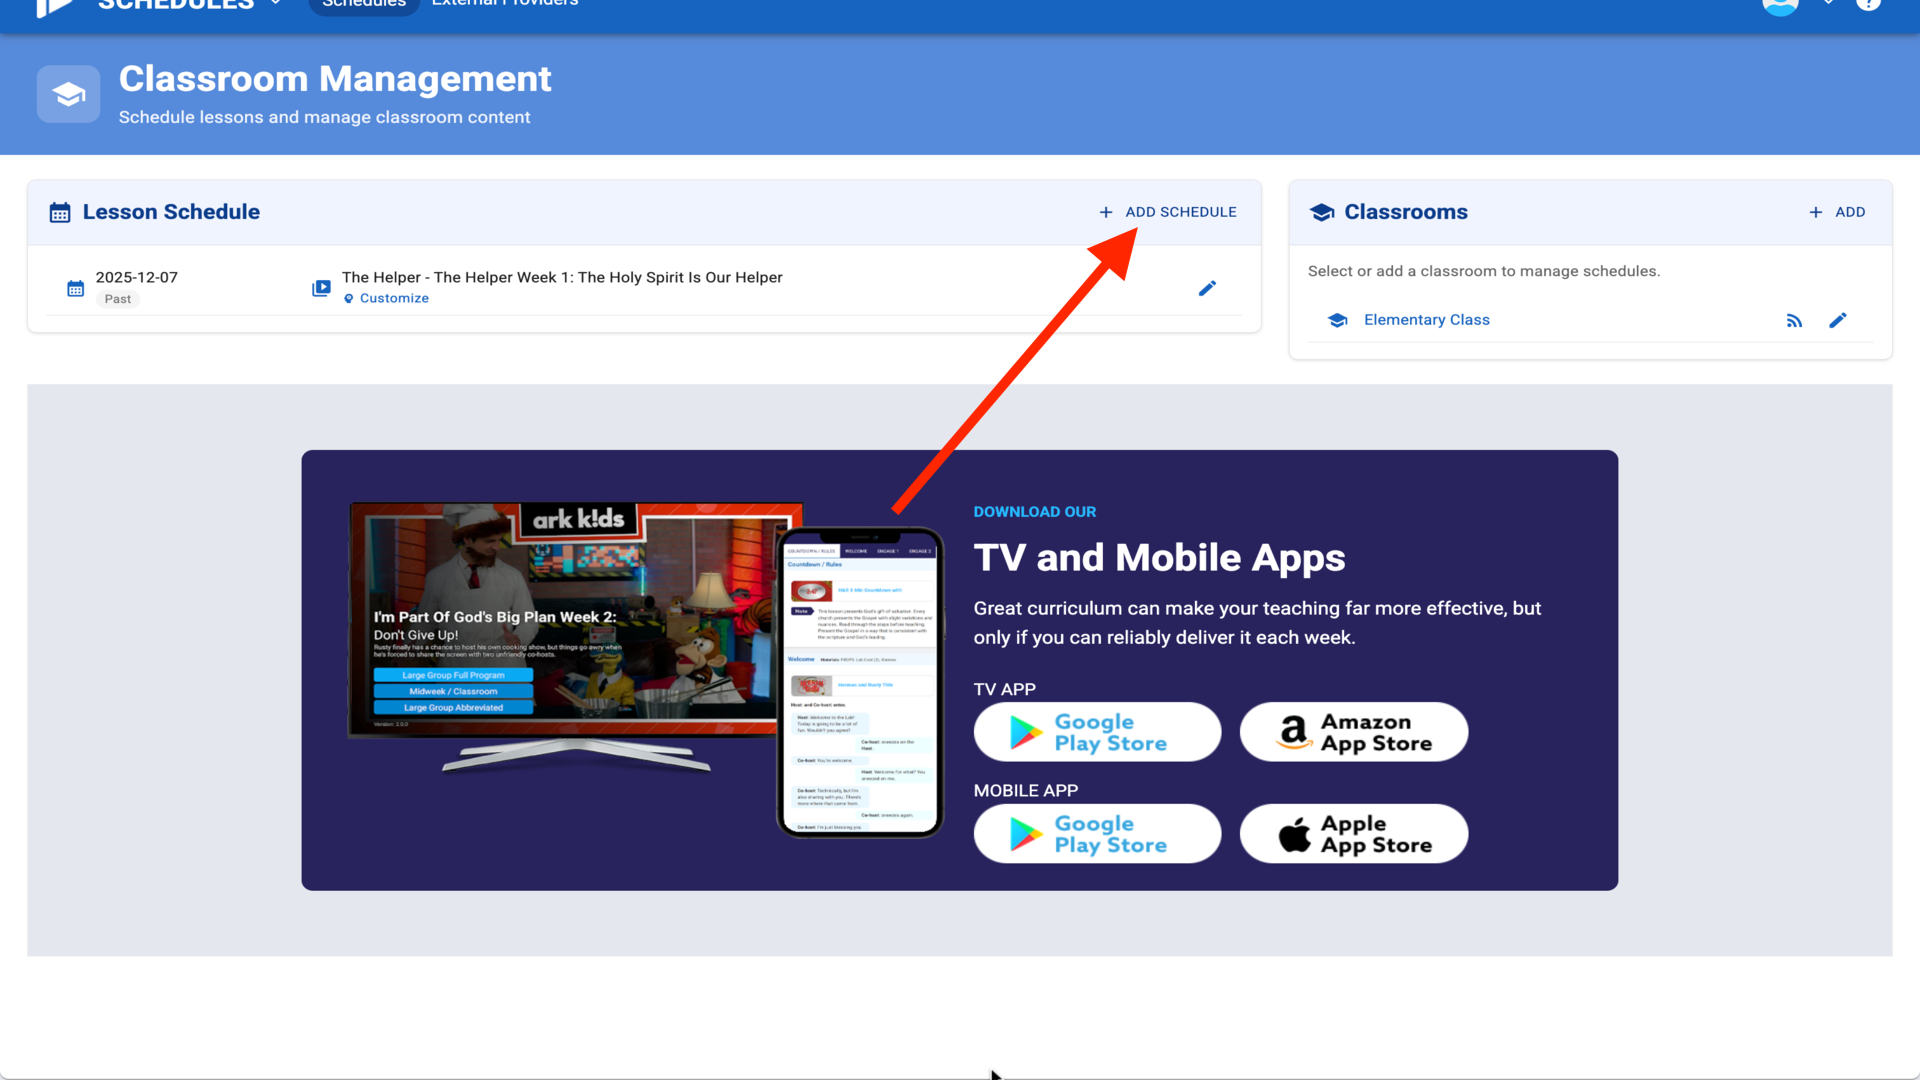
5.System auto-selects next week and next lesson in series - just Save▼
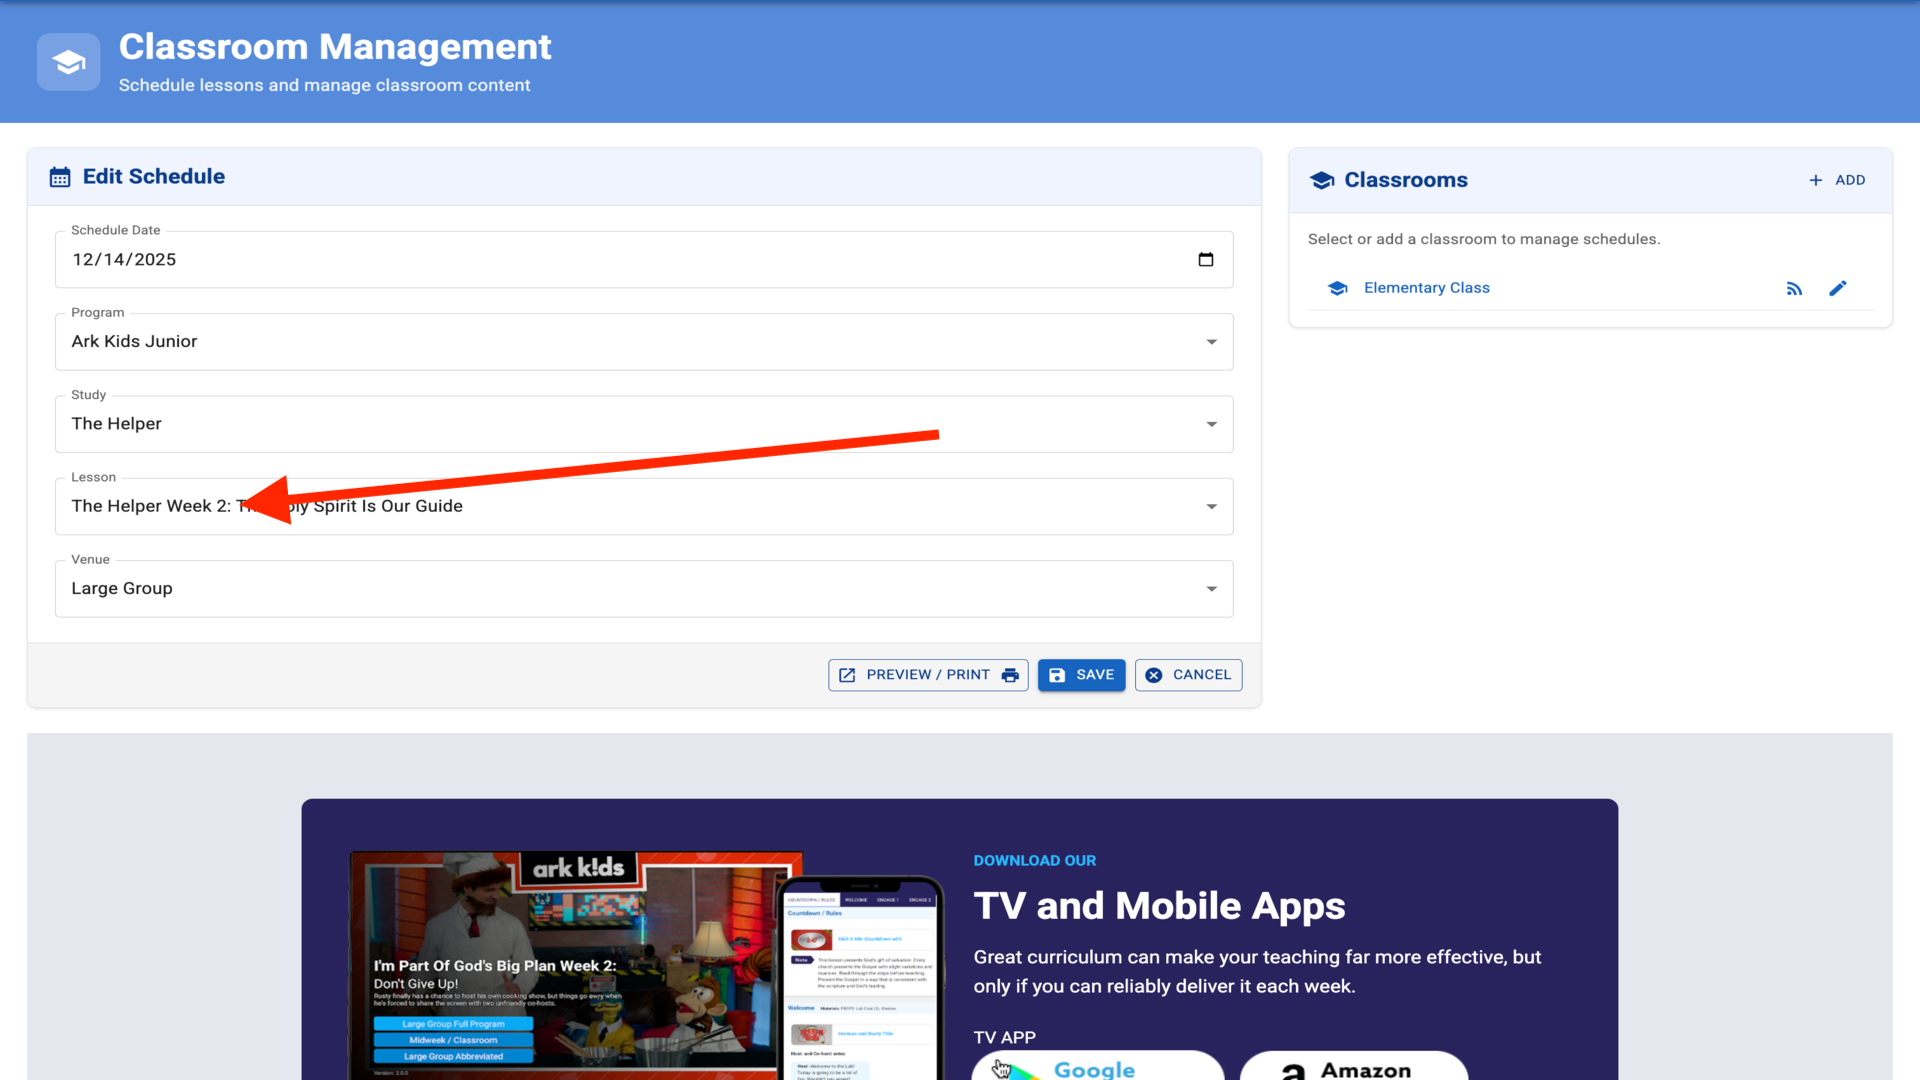
6.Multiple lessons scheduled - continue to build your full schedule▼
Steps
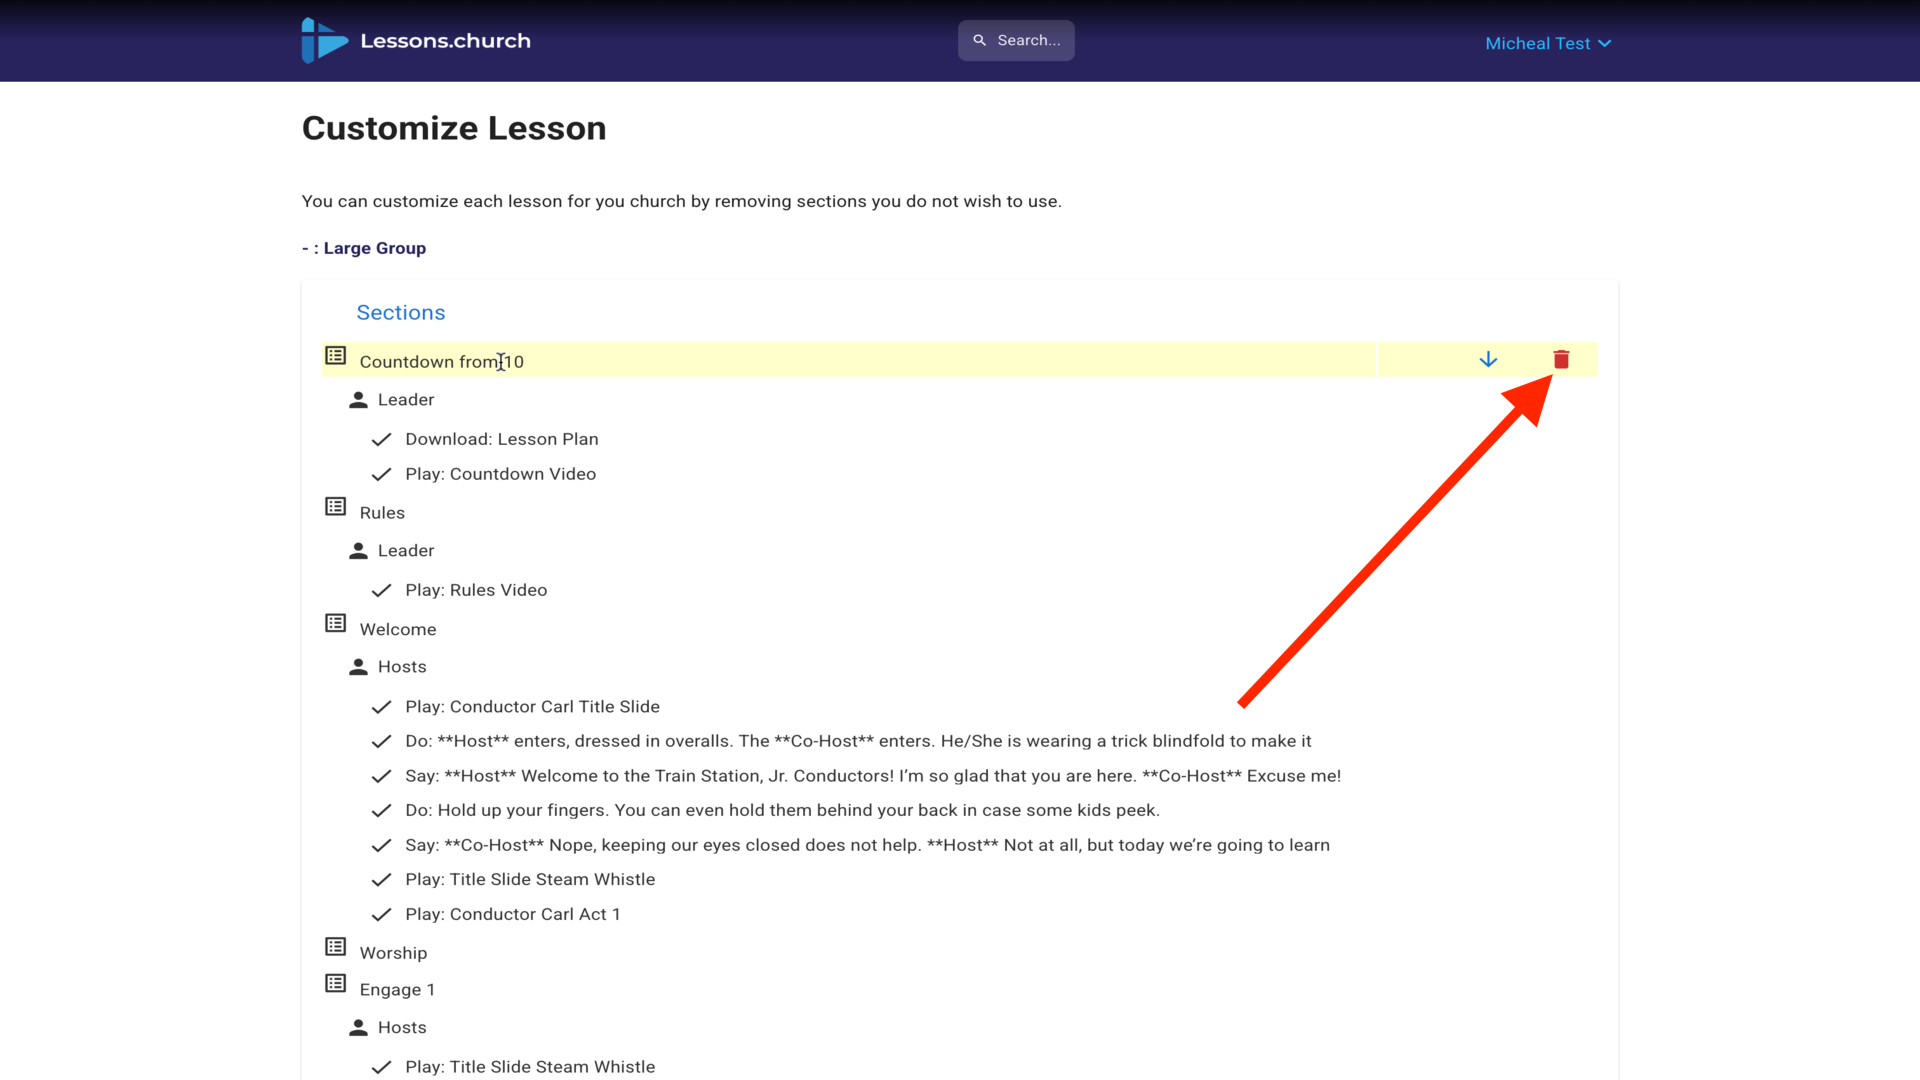
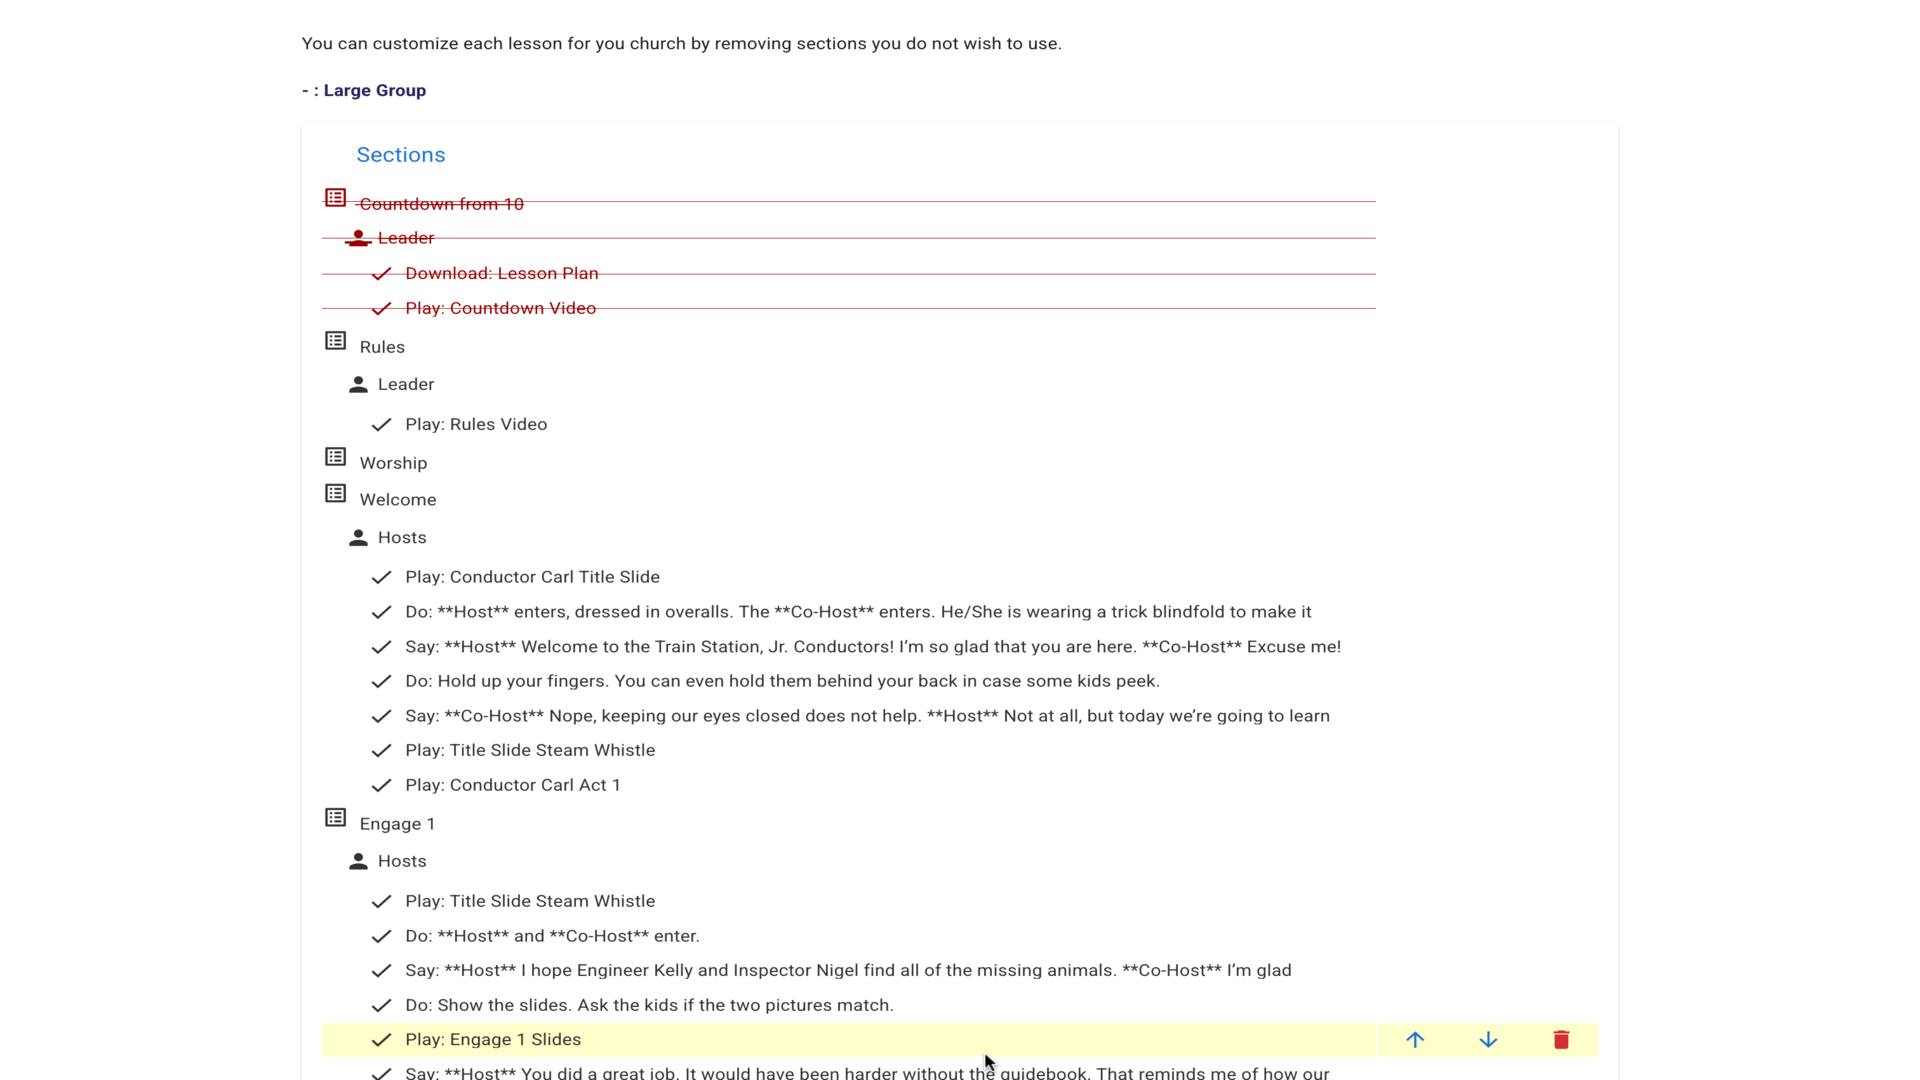
1.Click the small but powerful Customize link next to any scheduled lesson▼
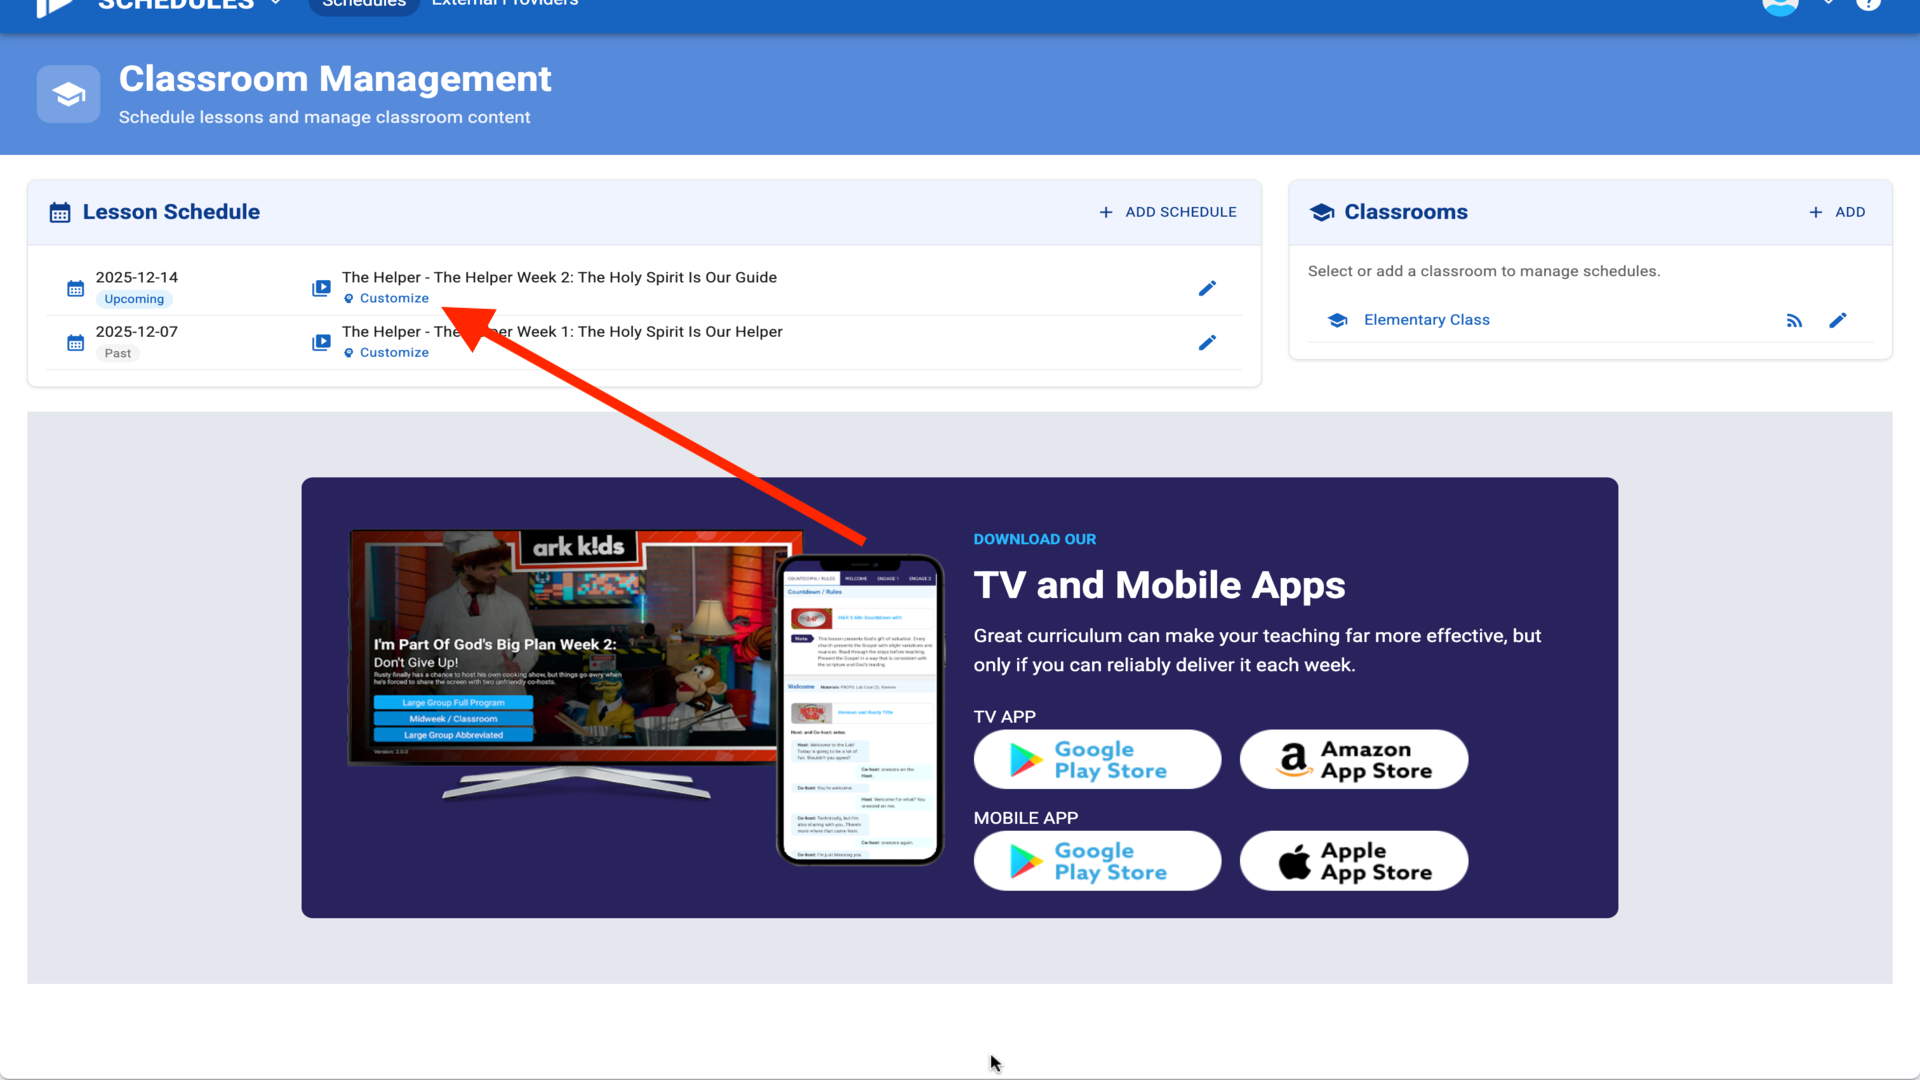
2.View all sections in the lesson that you can customize▼
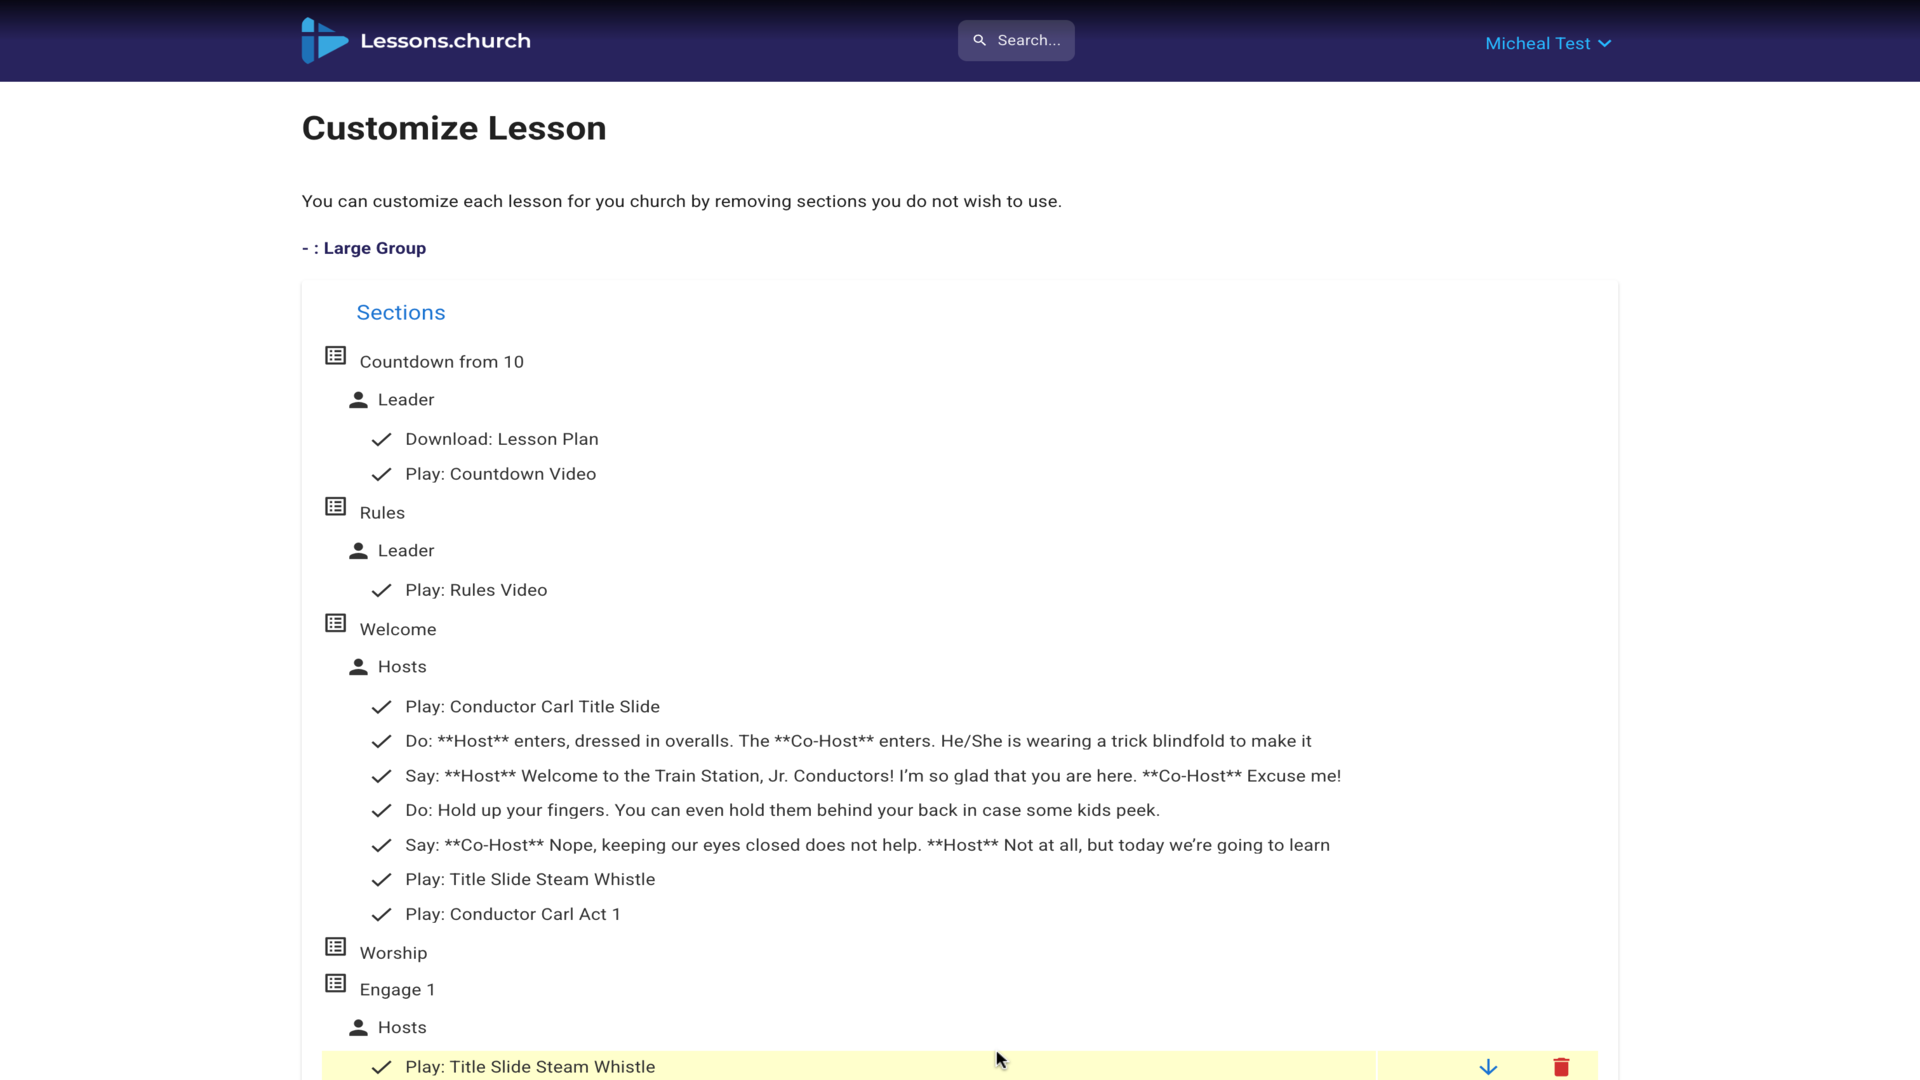
3.Click a section to select it, then click the trash icon to remove▼
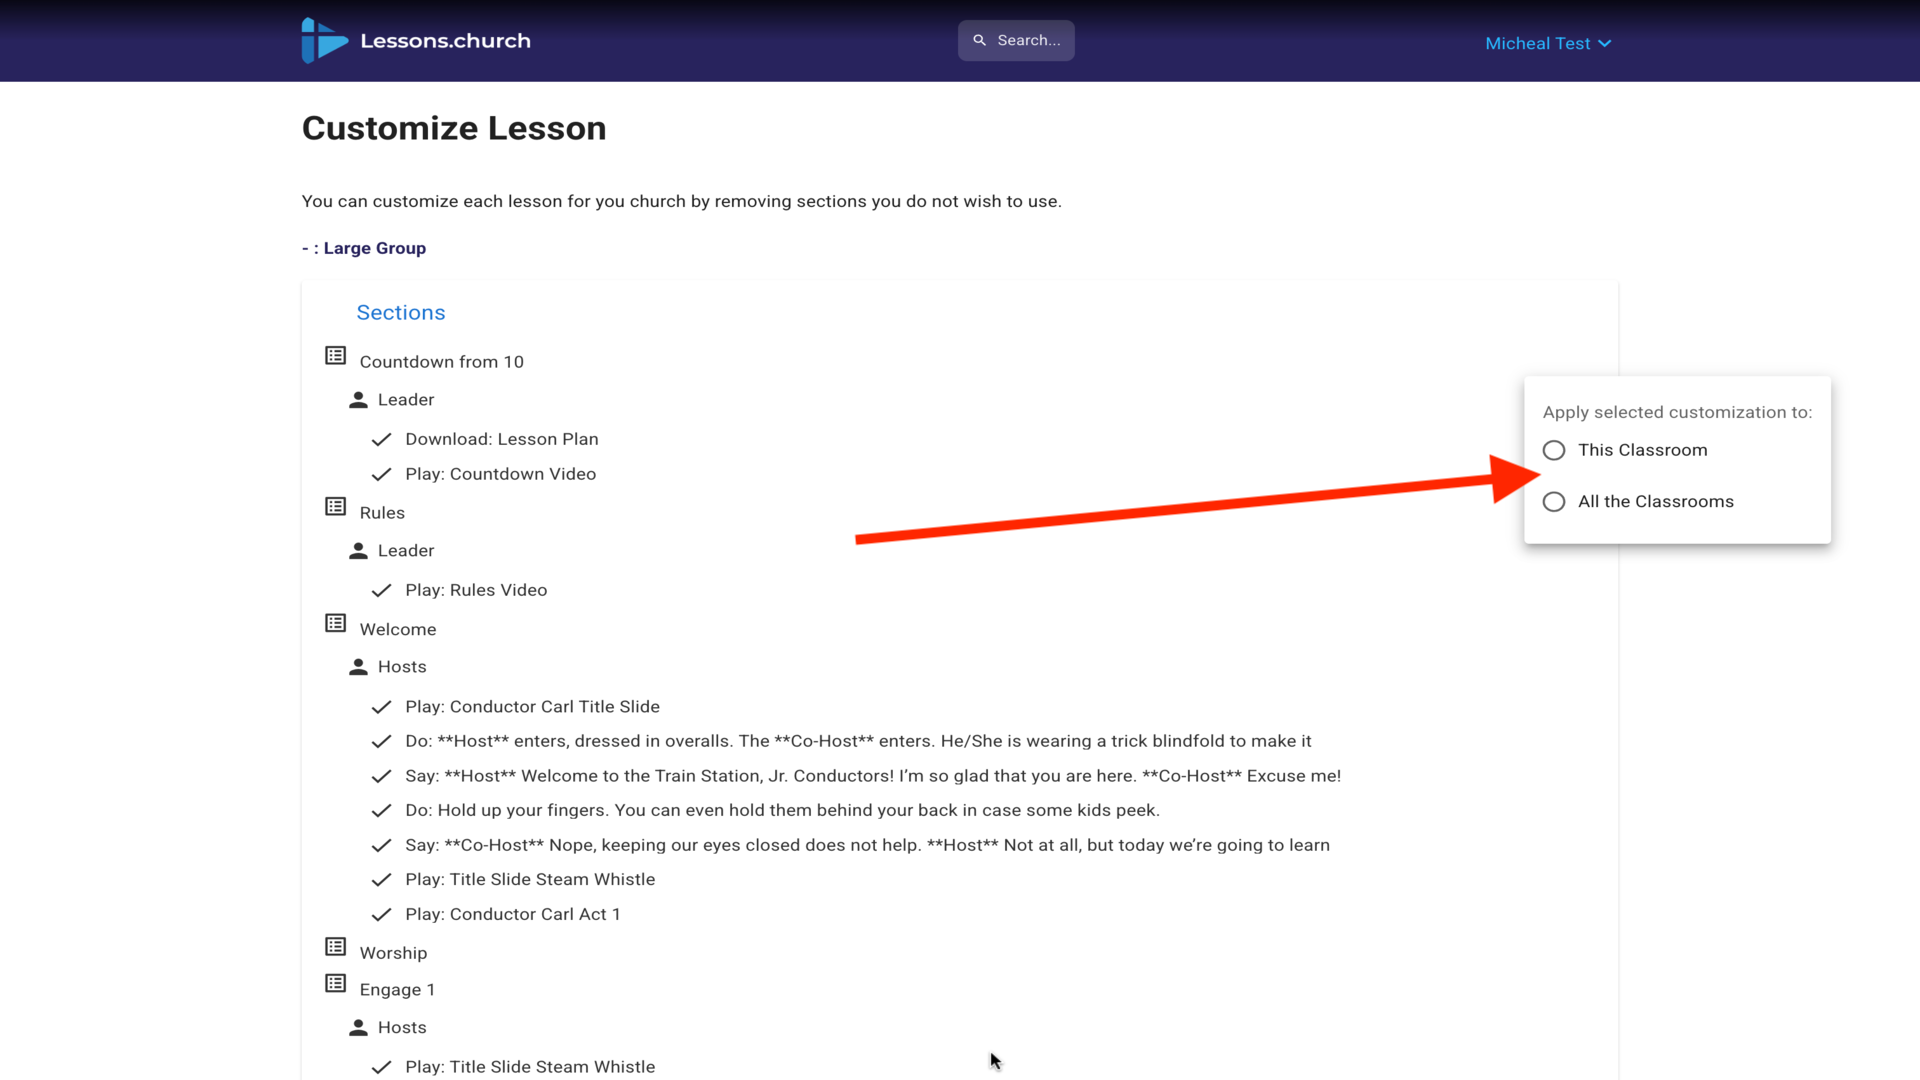
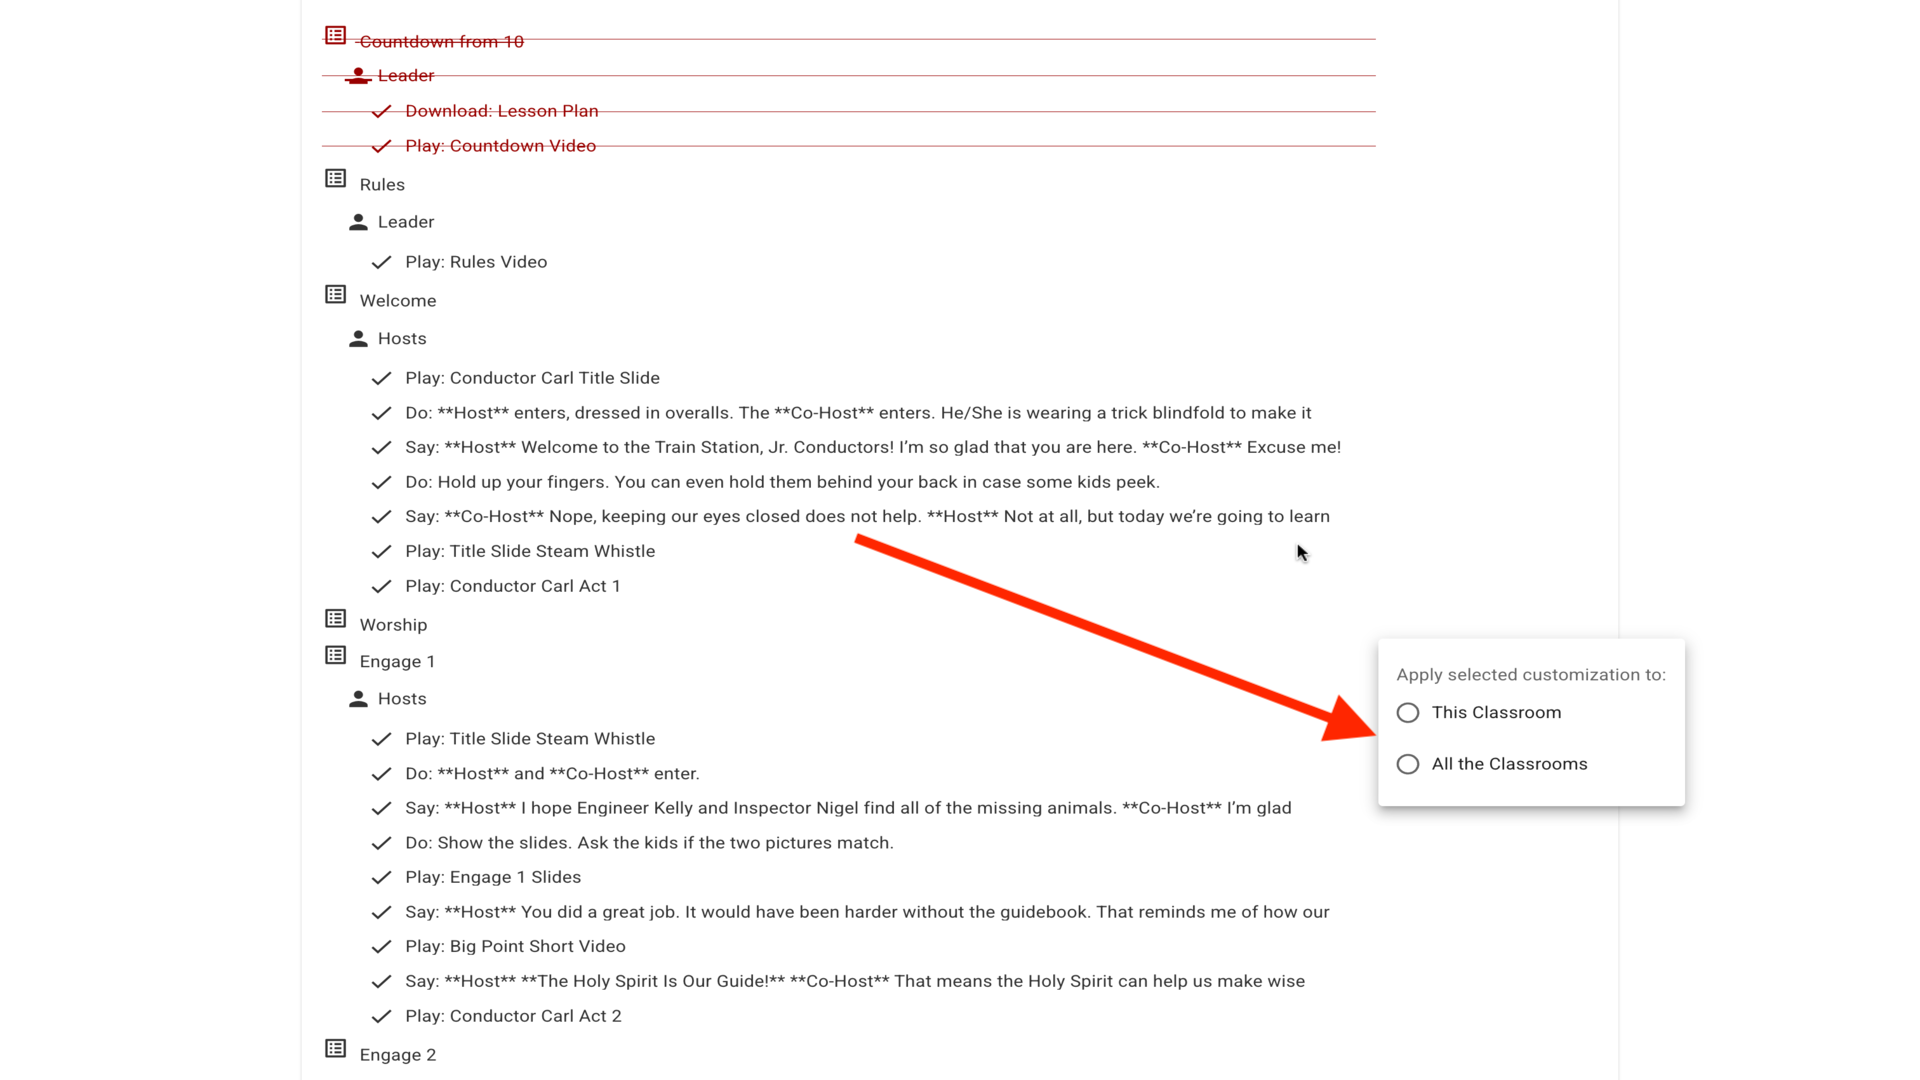
4.Choose This Classroom or All Classrooms - useful when sharing lessons across rooms▼
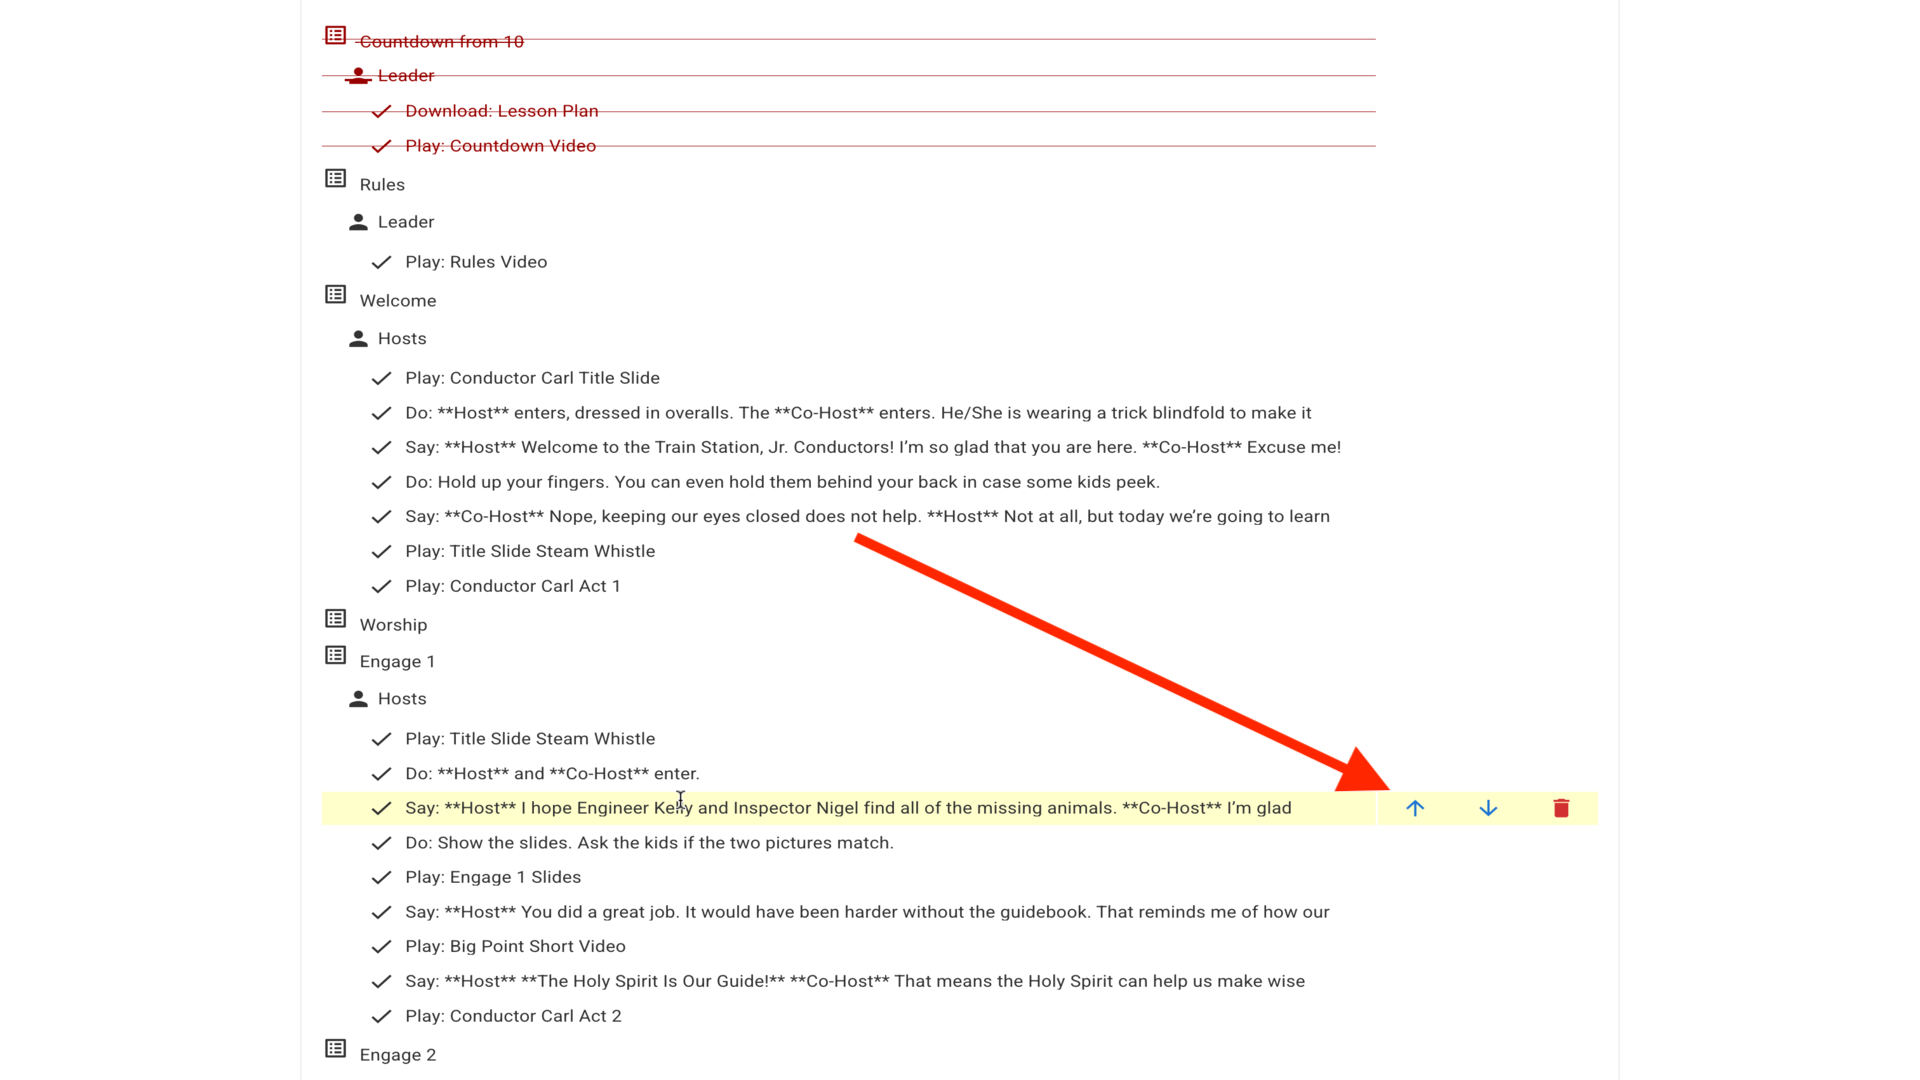
5.Removed sections show in red with strikethrough▼

6.Use the up/down arrows to reorder sections▼
7.Apply changes to just this classroom or all classrooms as needed▼
8.Your customized lesson is ready to present▼
Steps
1.Download the B1 Church app from the Apple App Store or Google Play Store▼
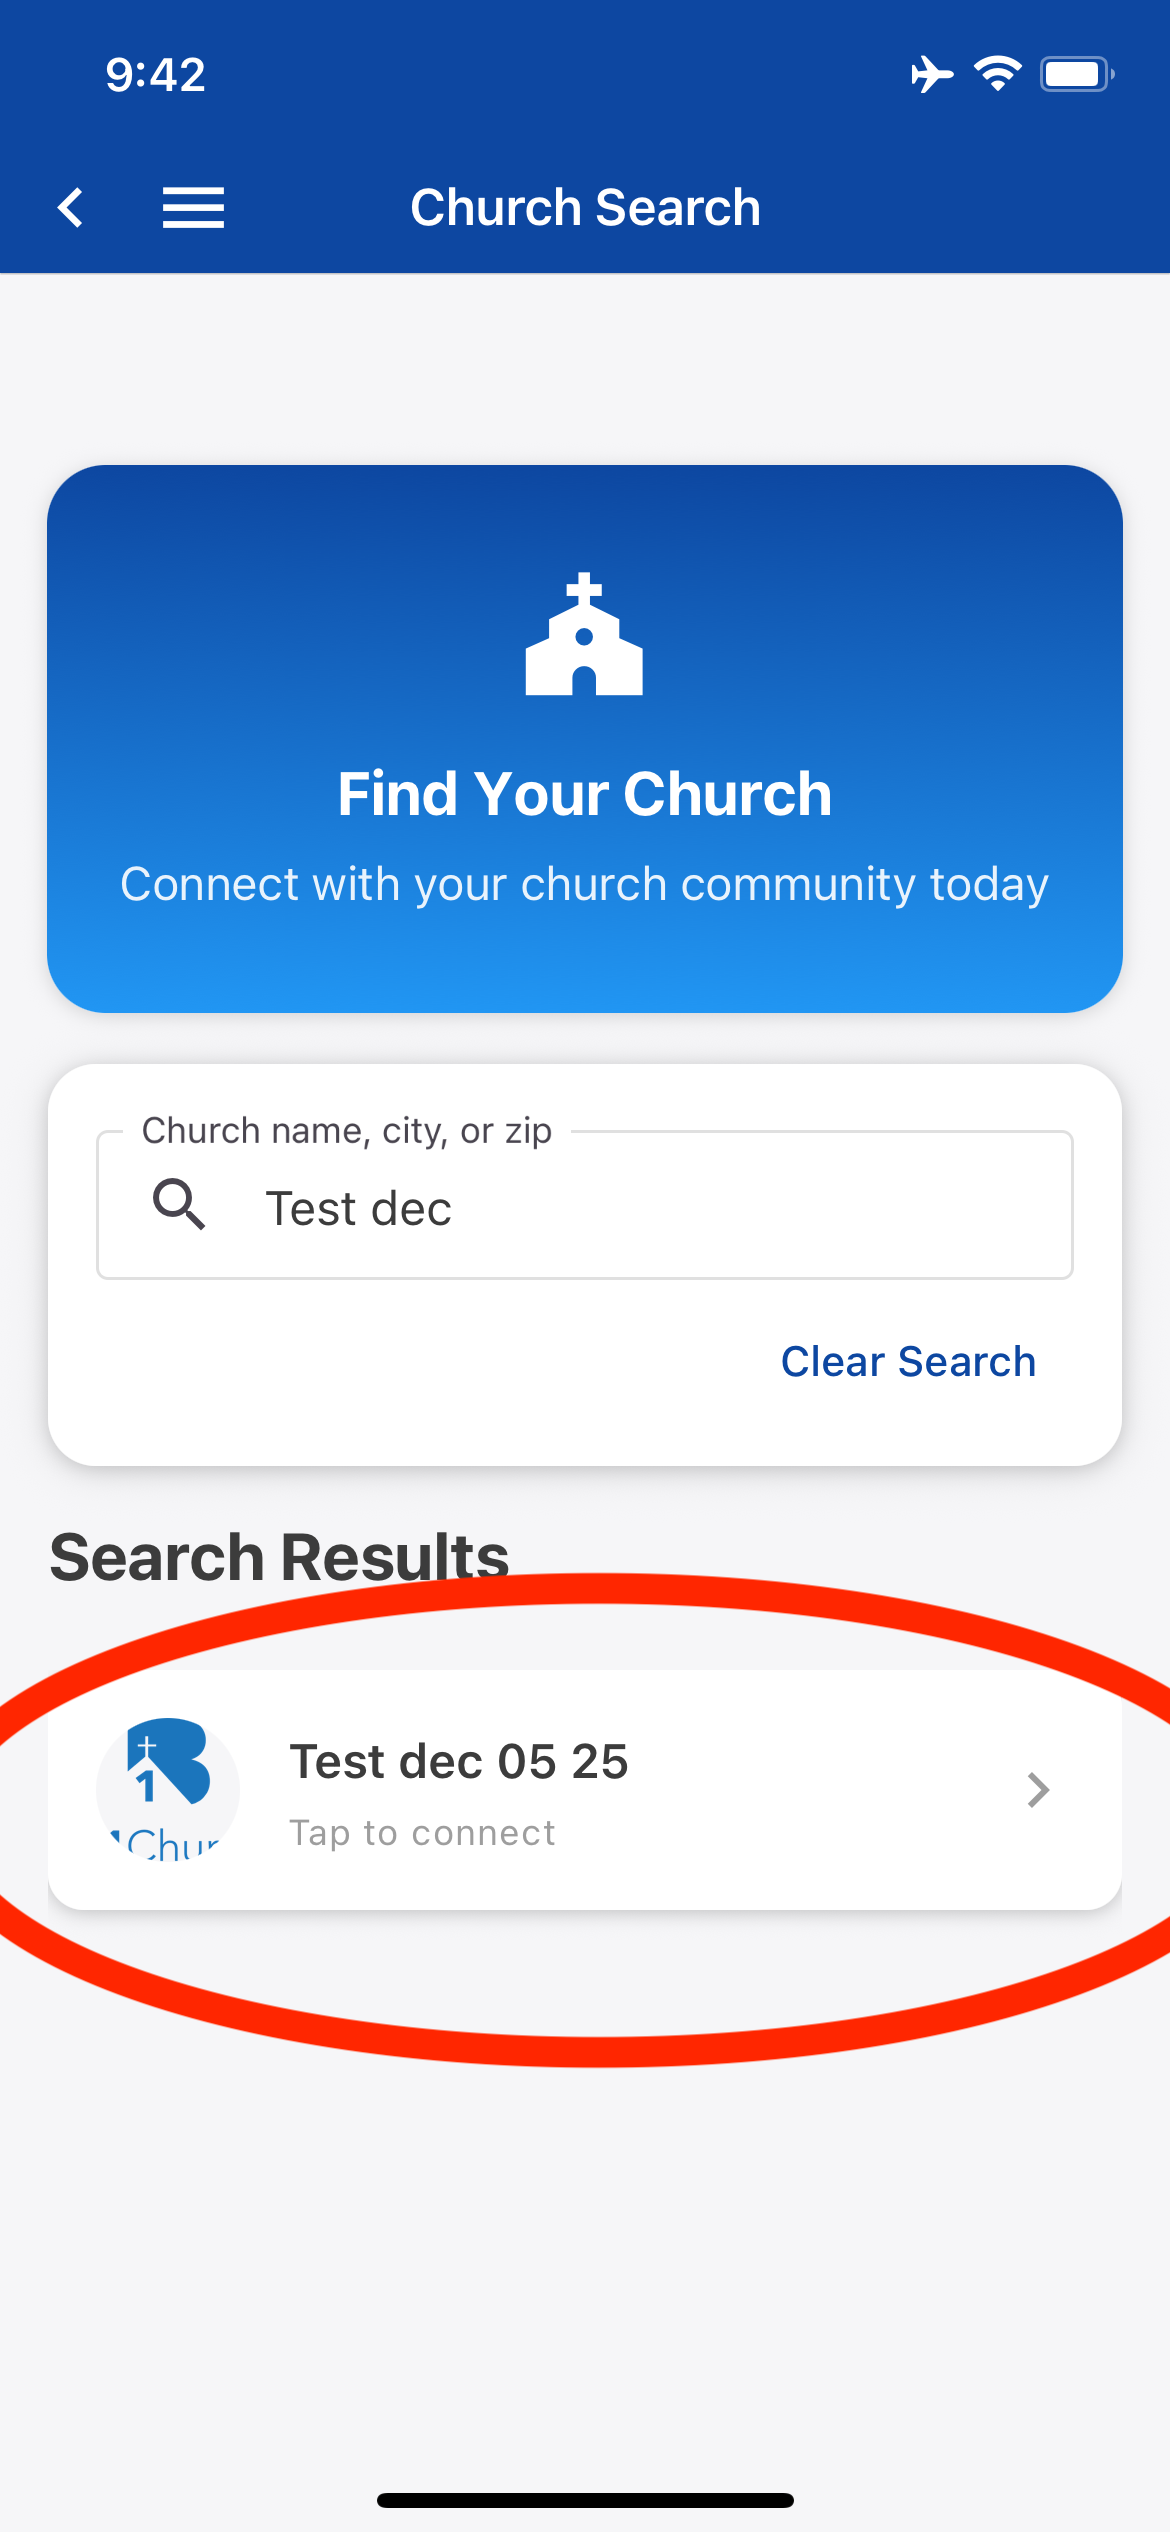
2.Open the app and you'll see the Church Search screen▼
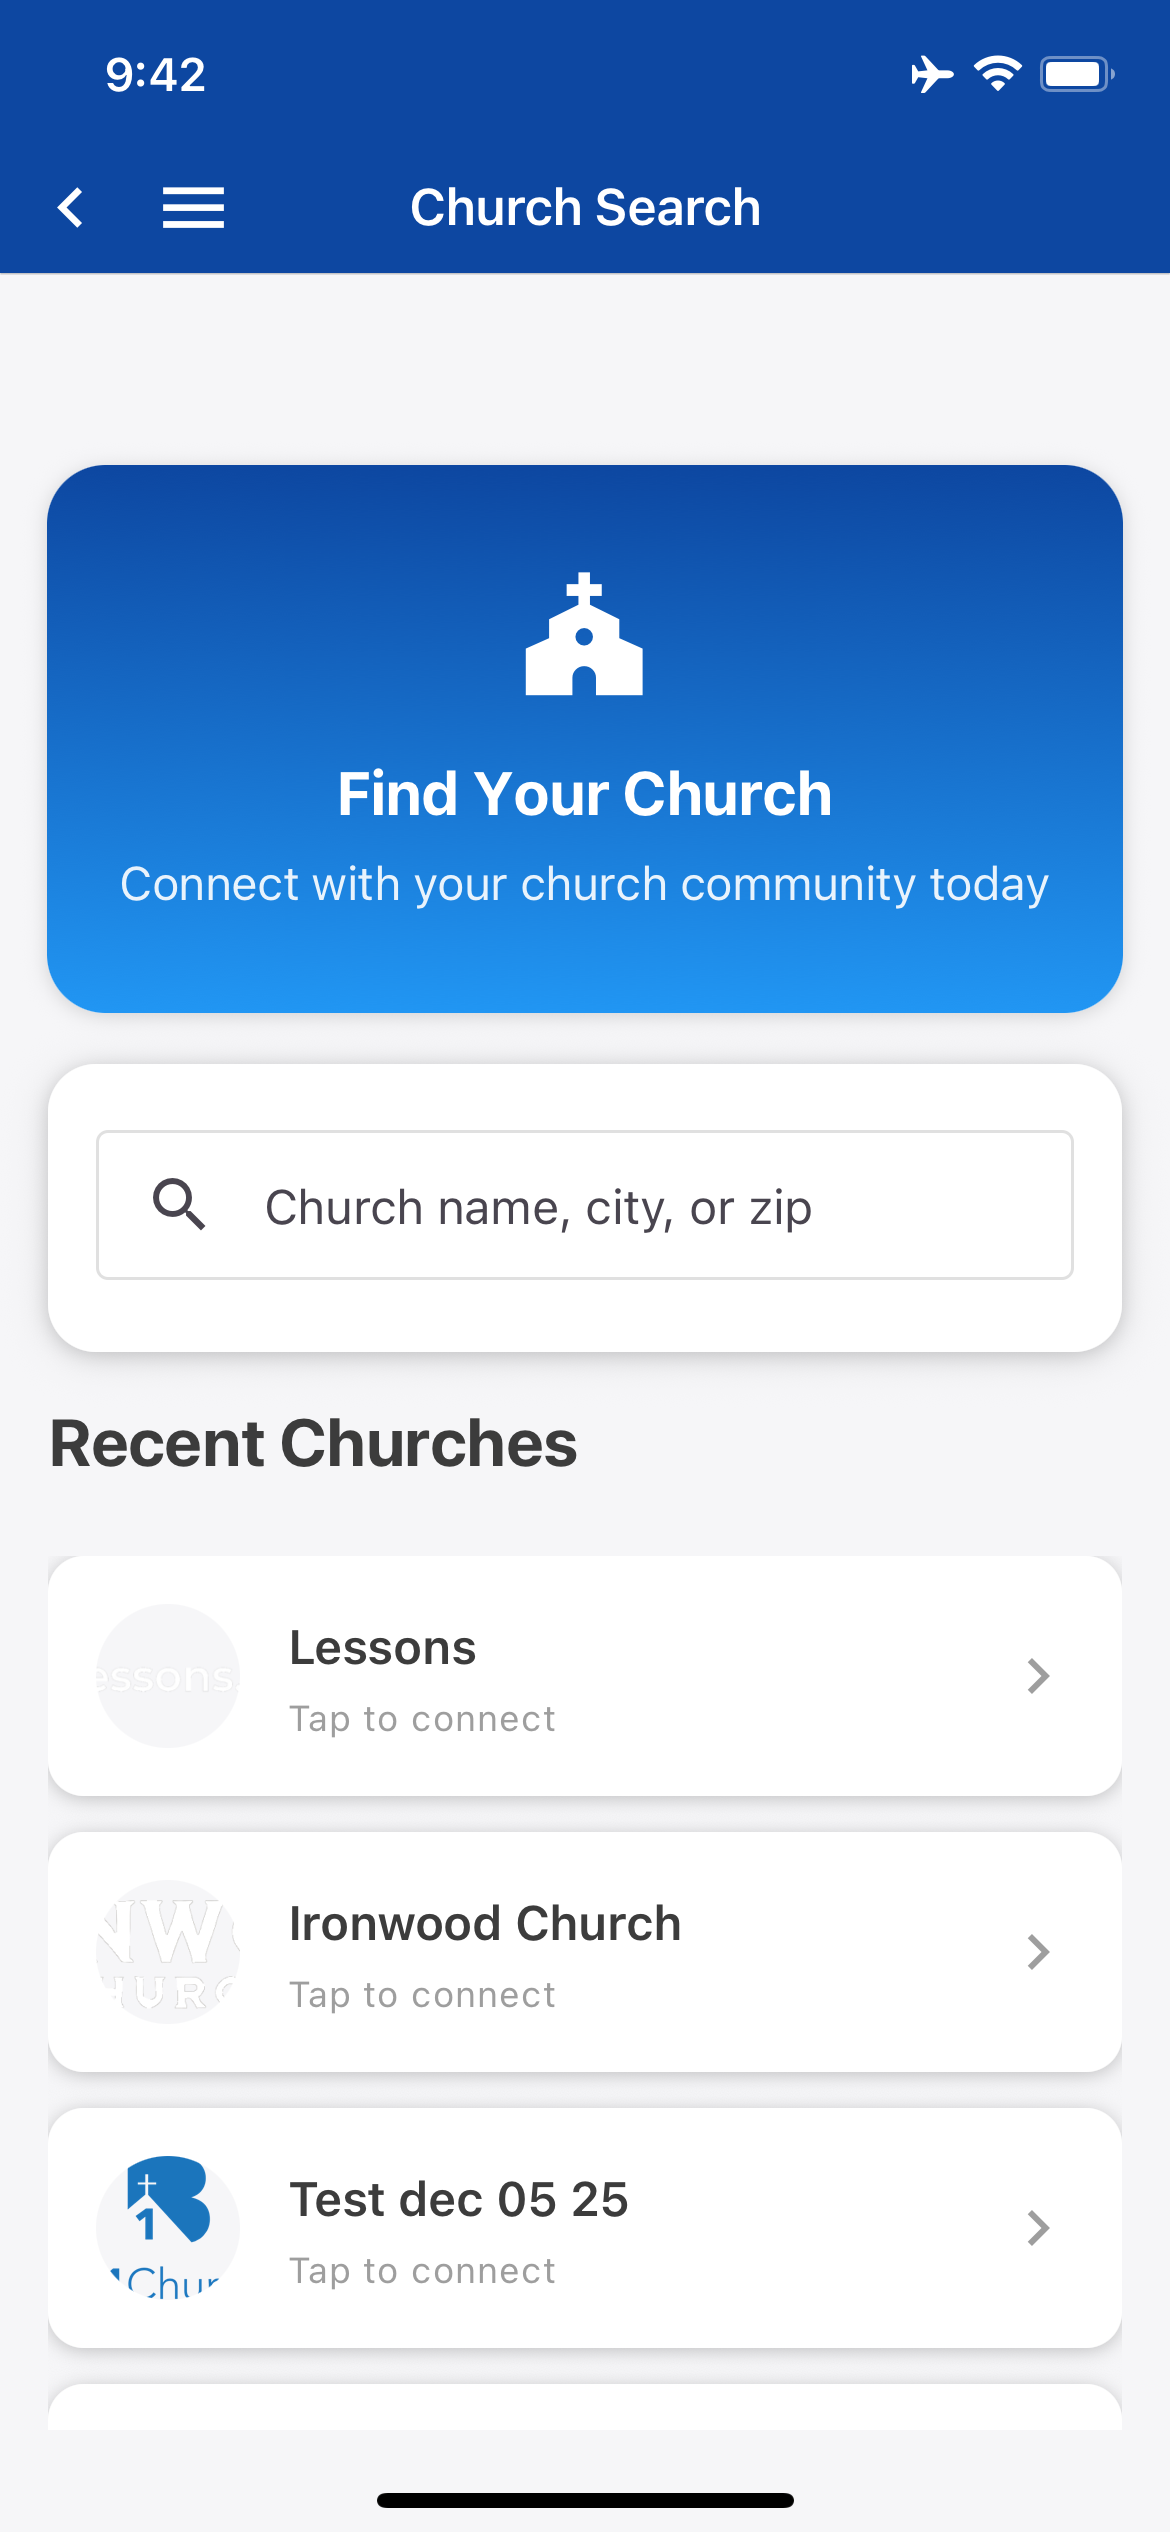
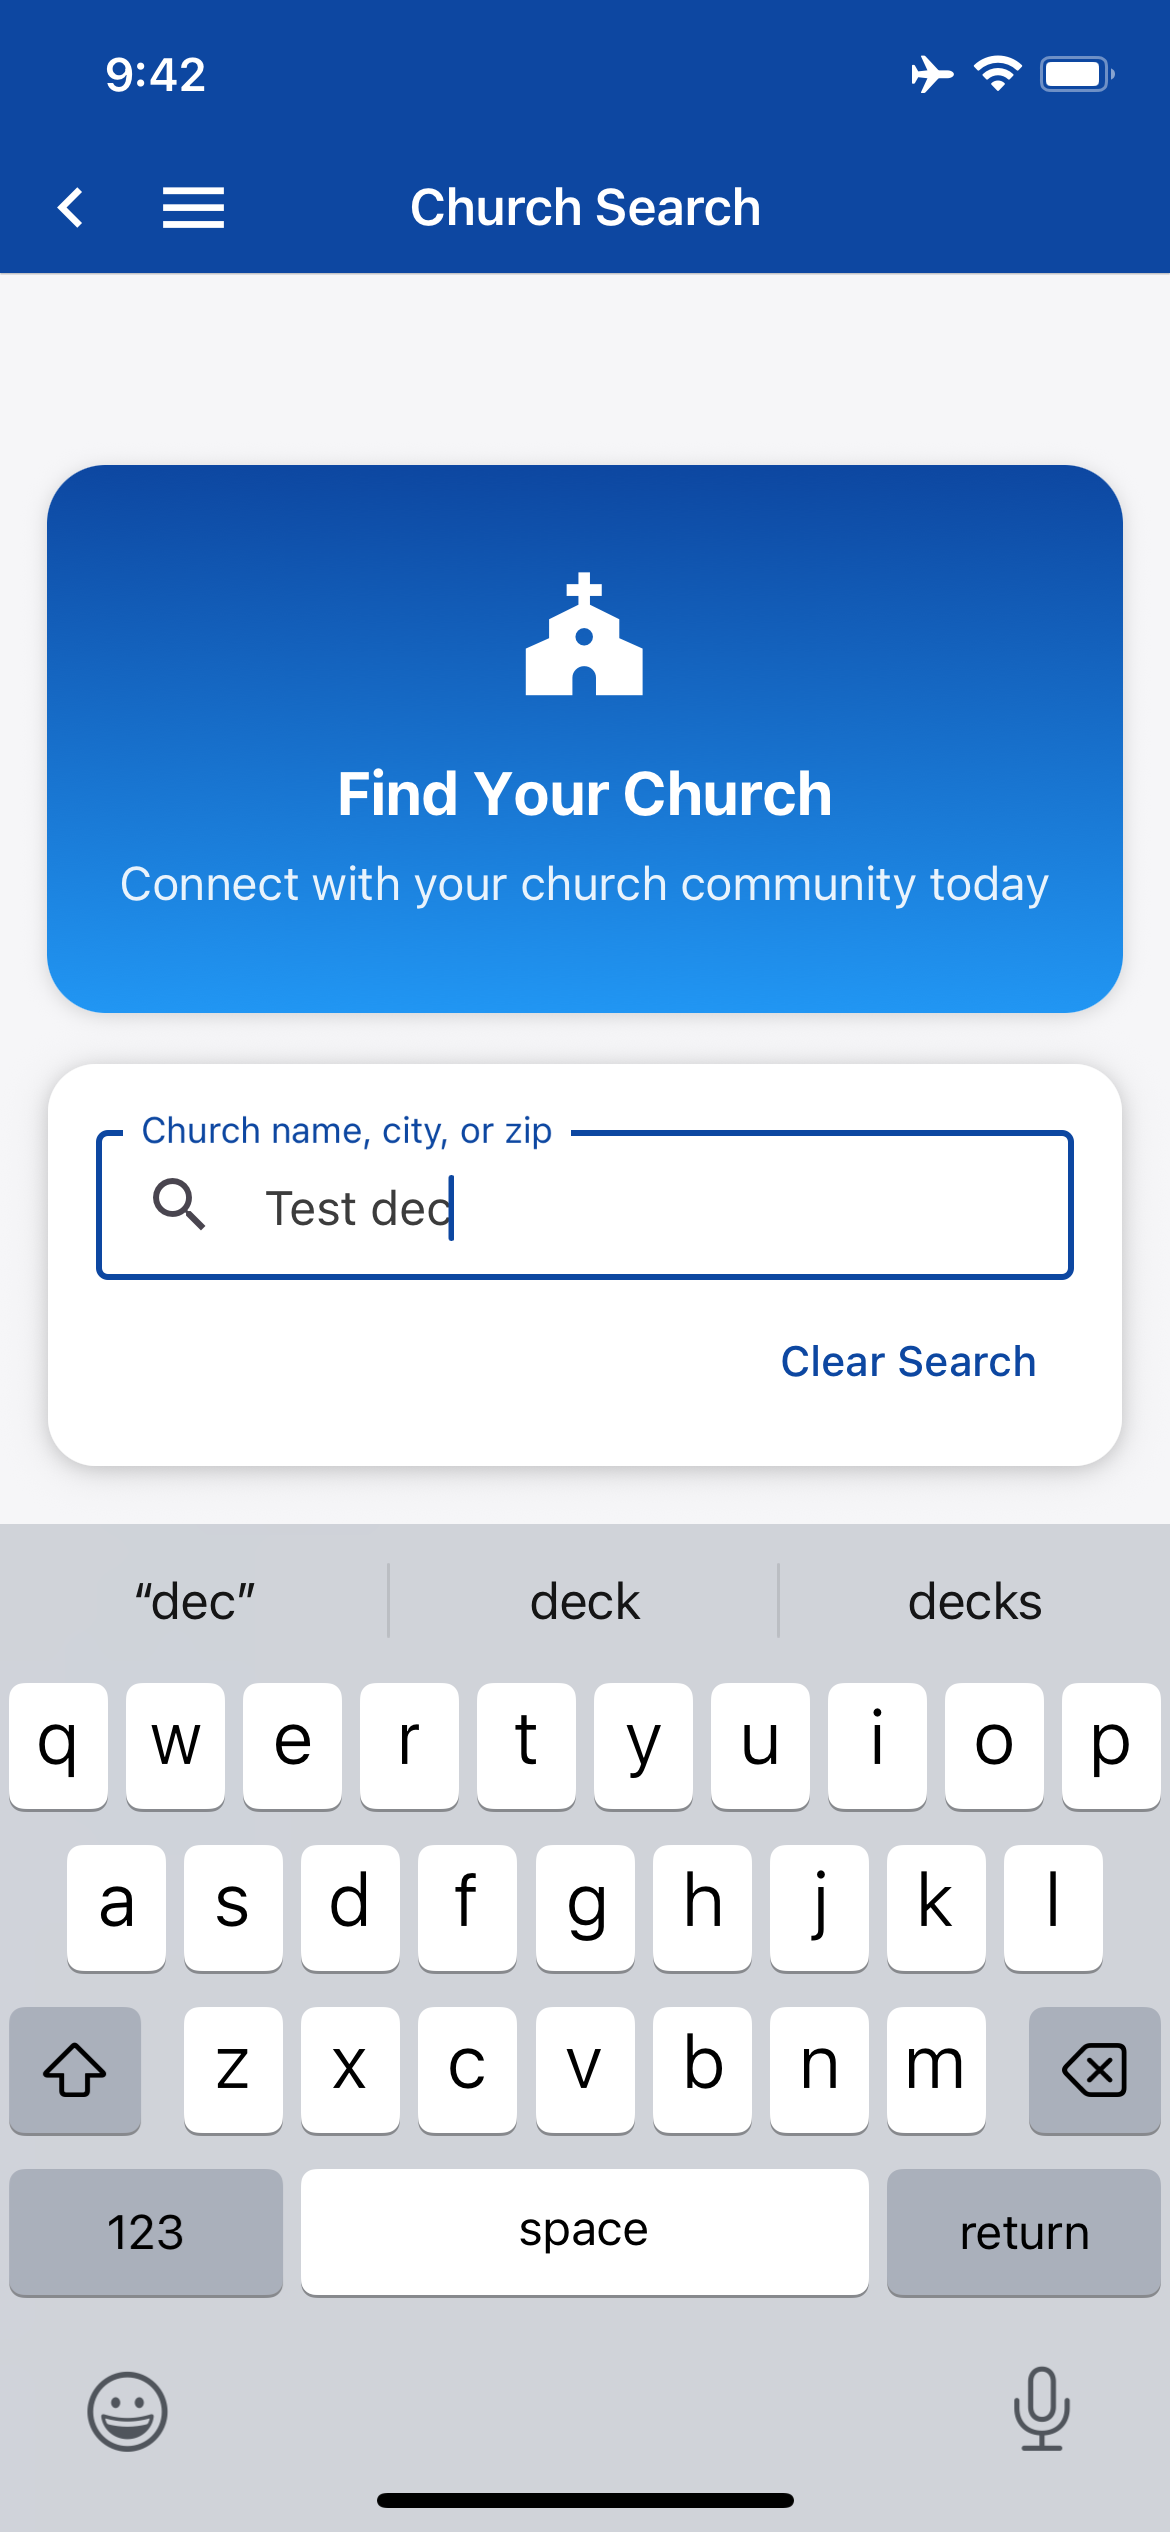
3.Type your church name in the search field▼
4.Select your church from the search results▼
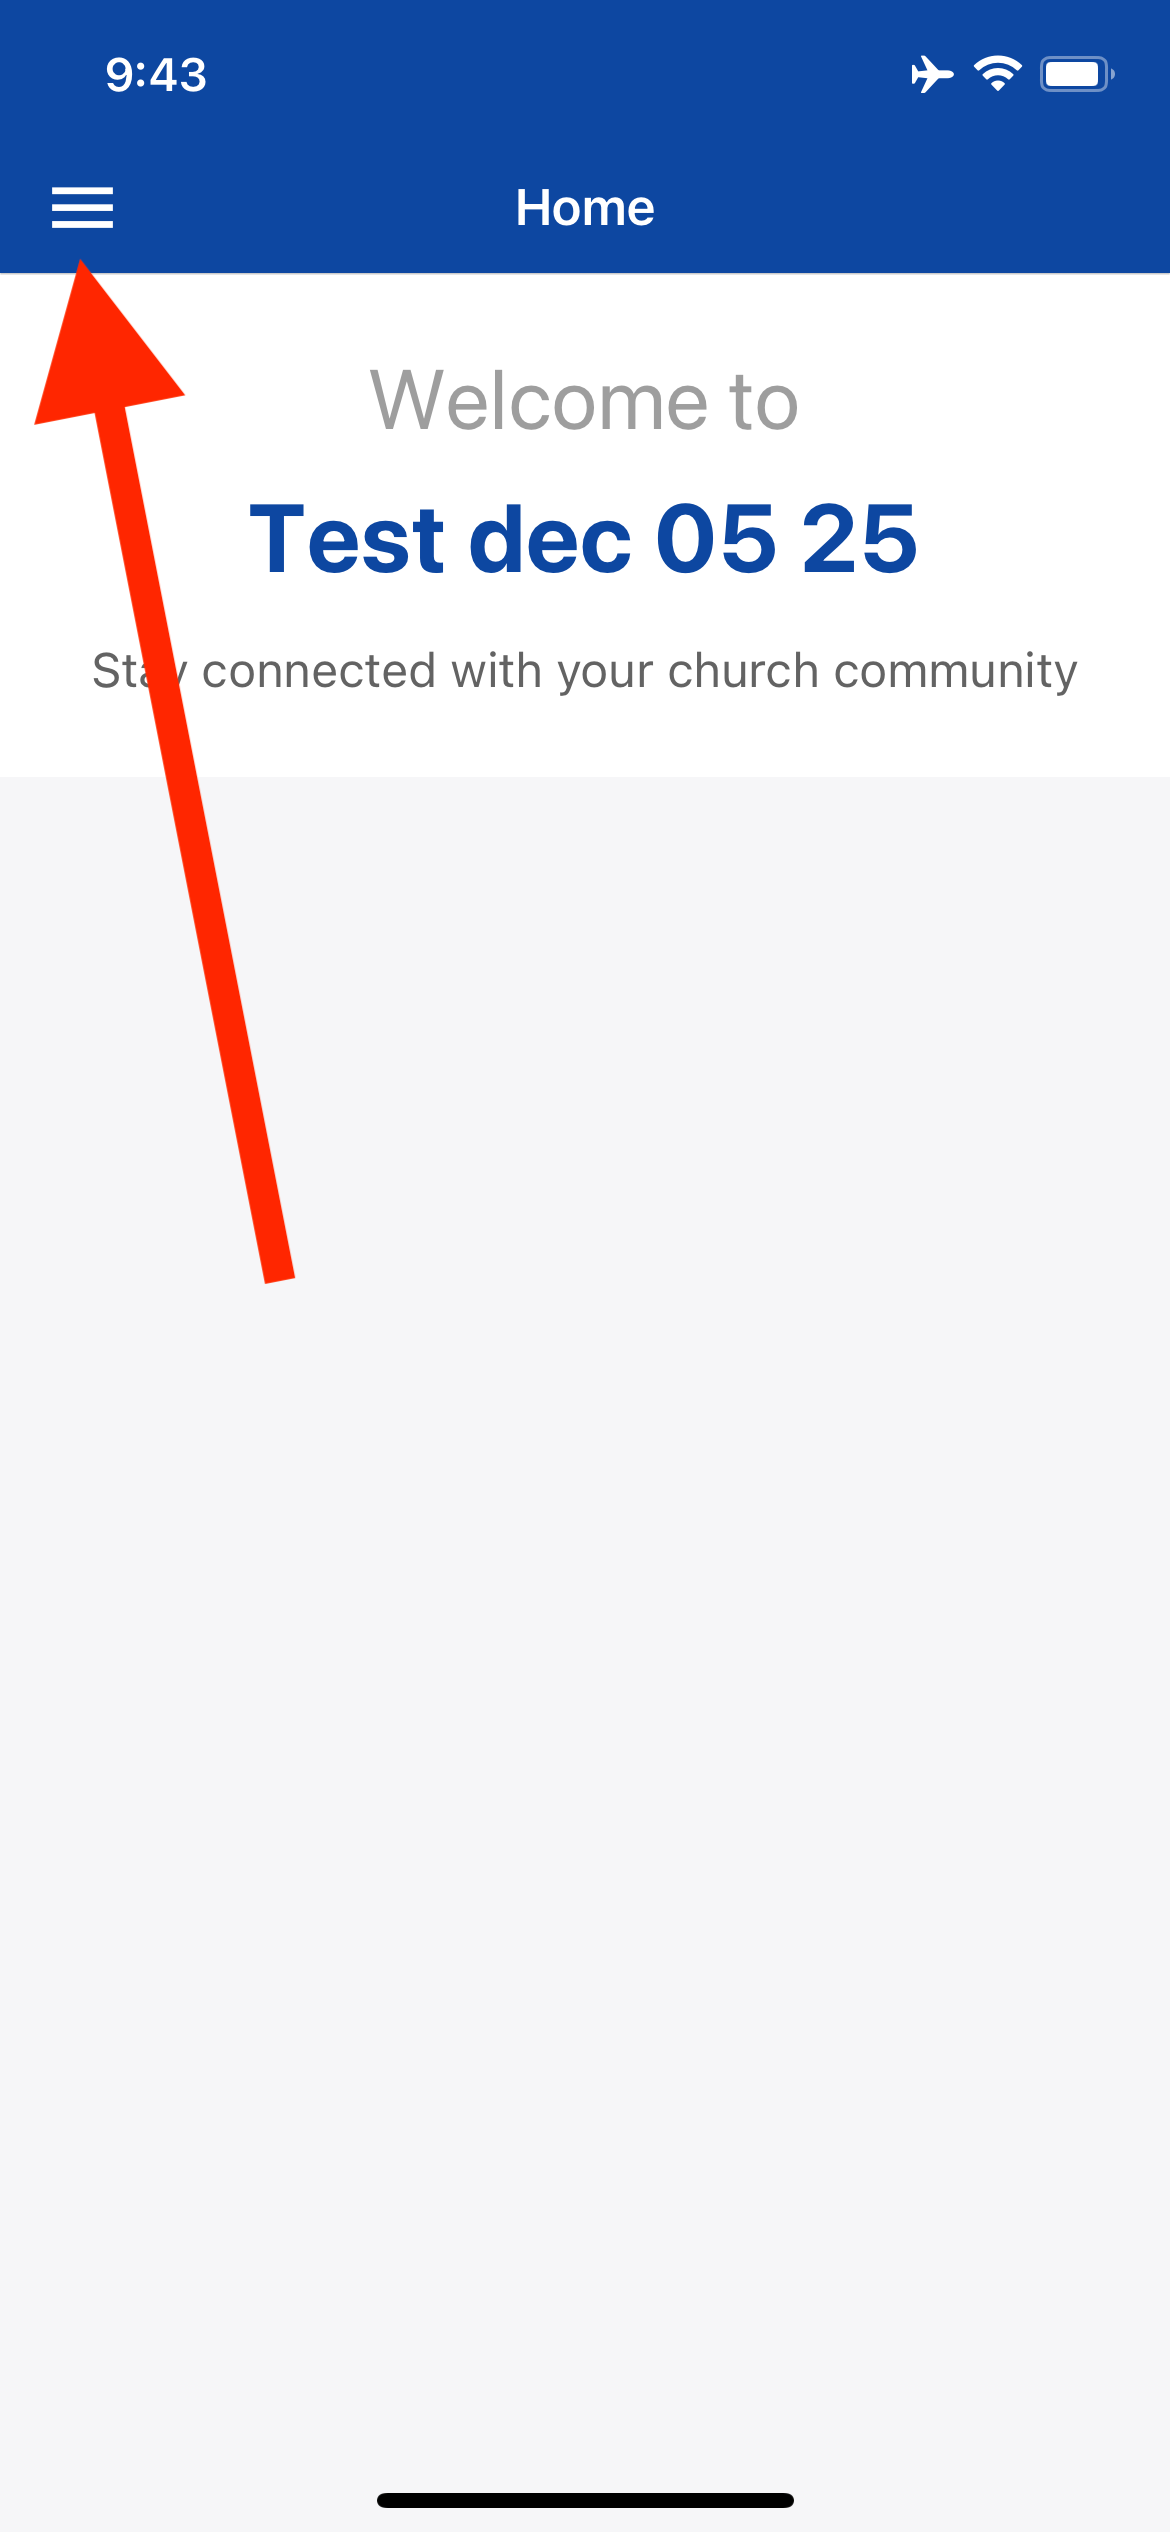
5.On the home screen, tap the menu icon in the top left corner▼
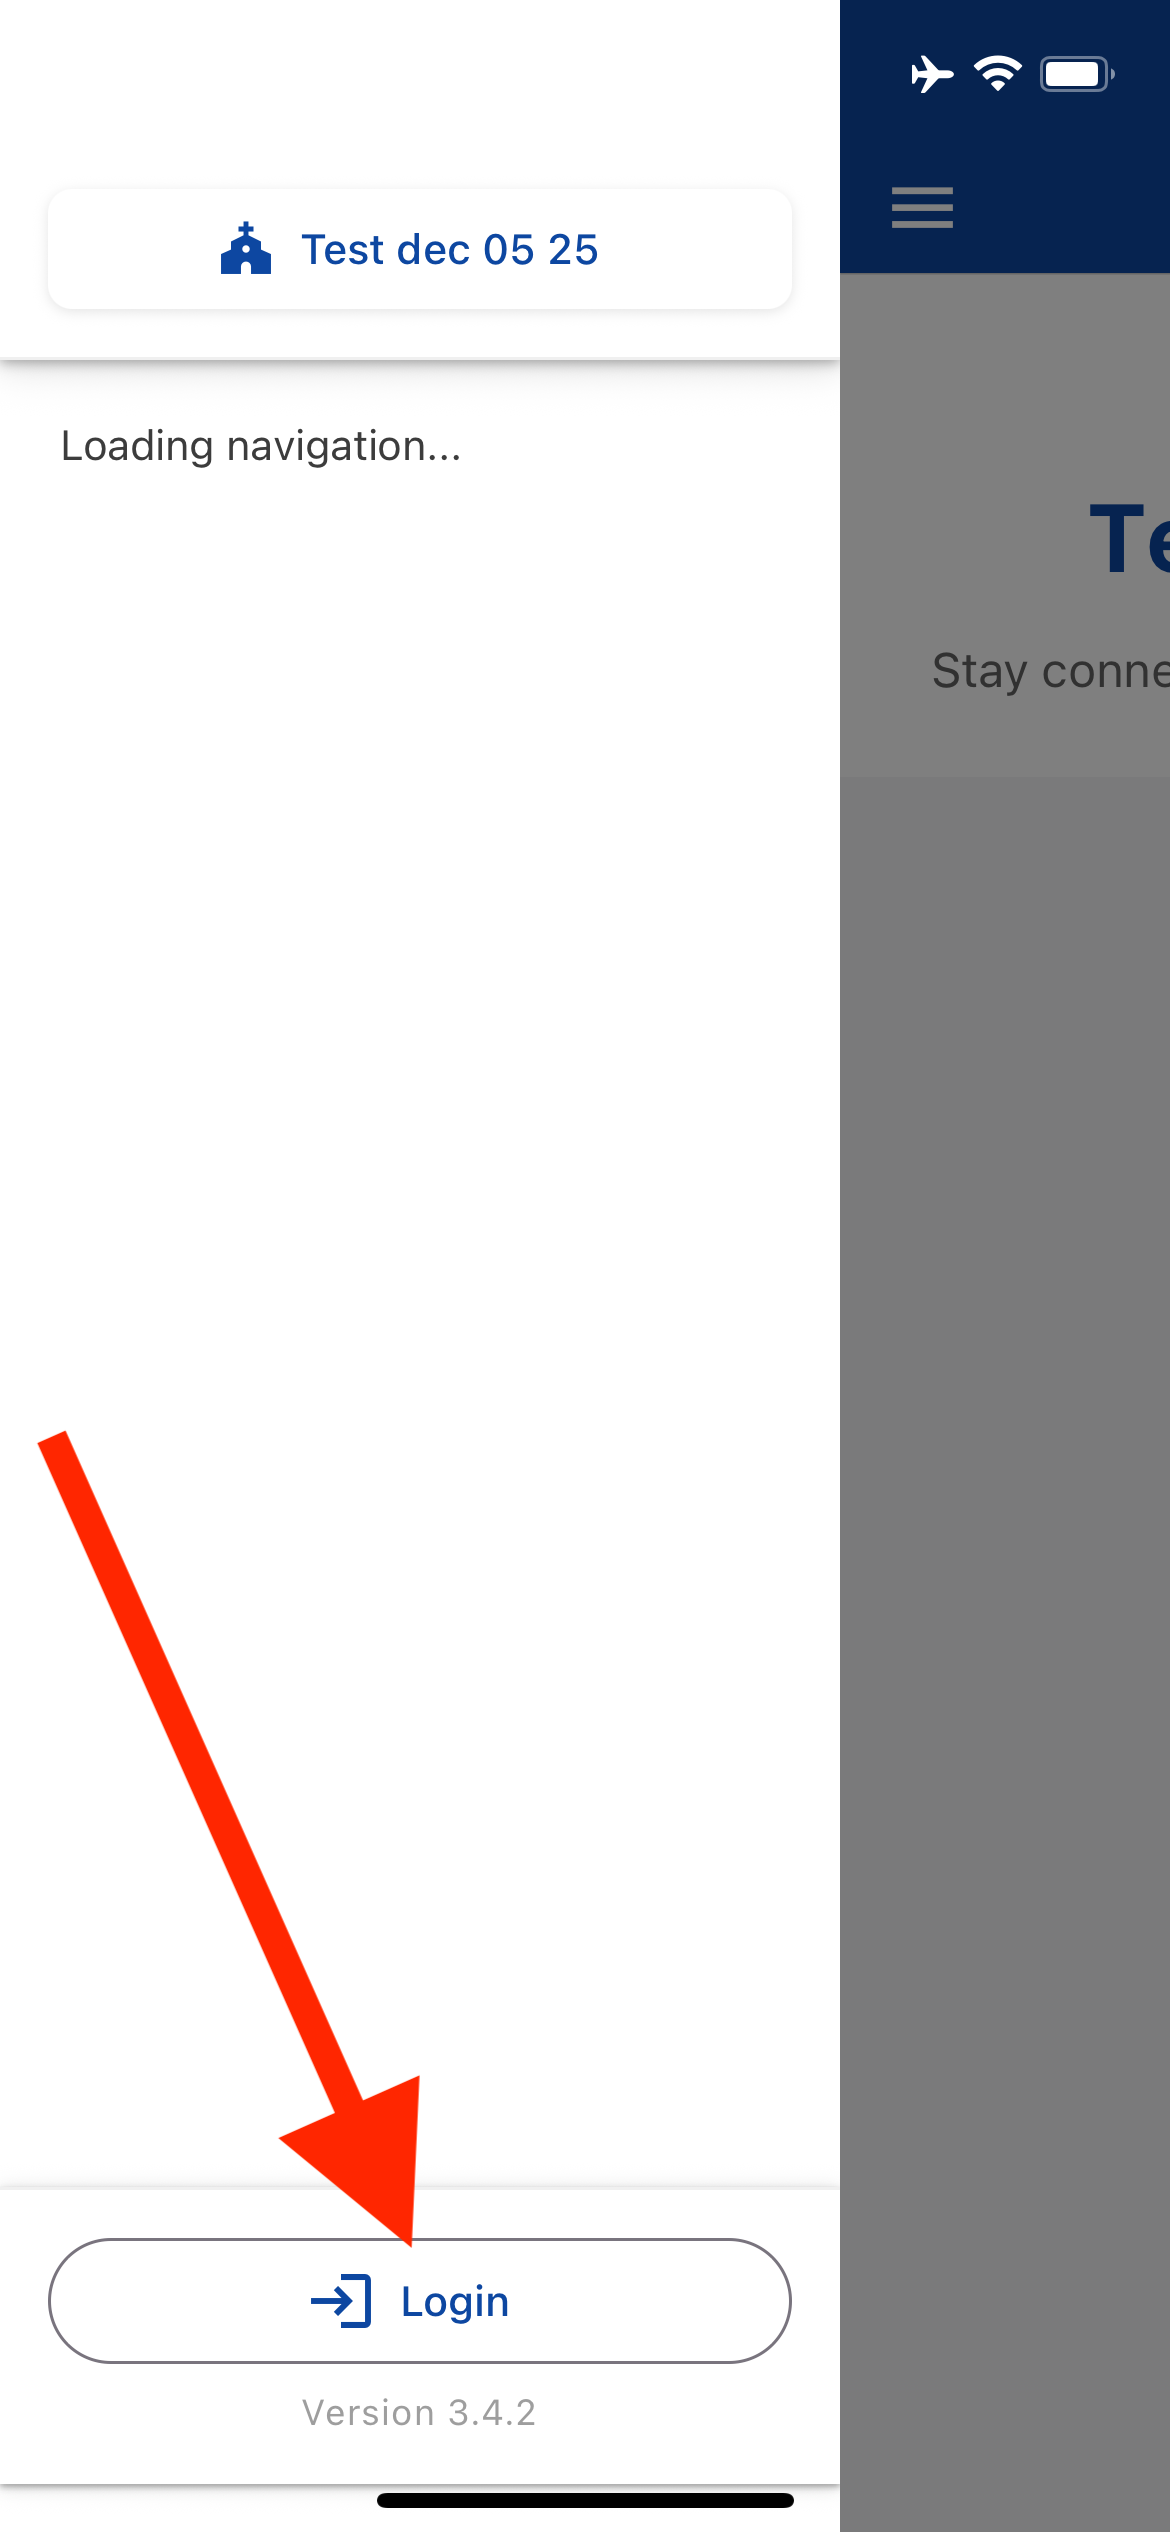
6.From the side menu, tap the Login button at the bottom▼
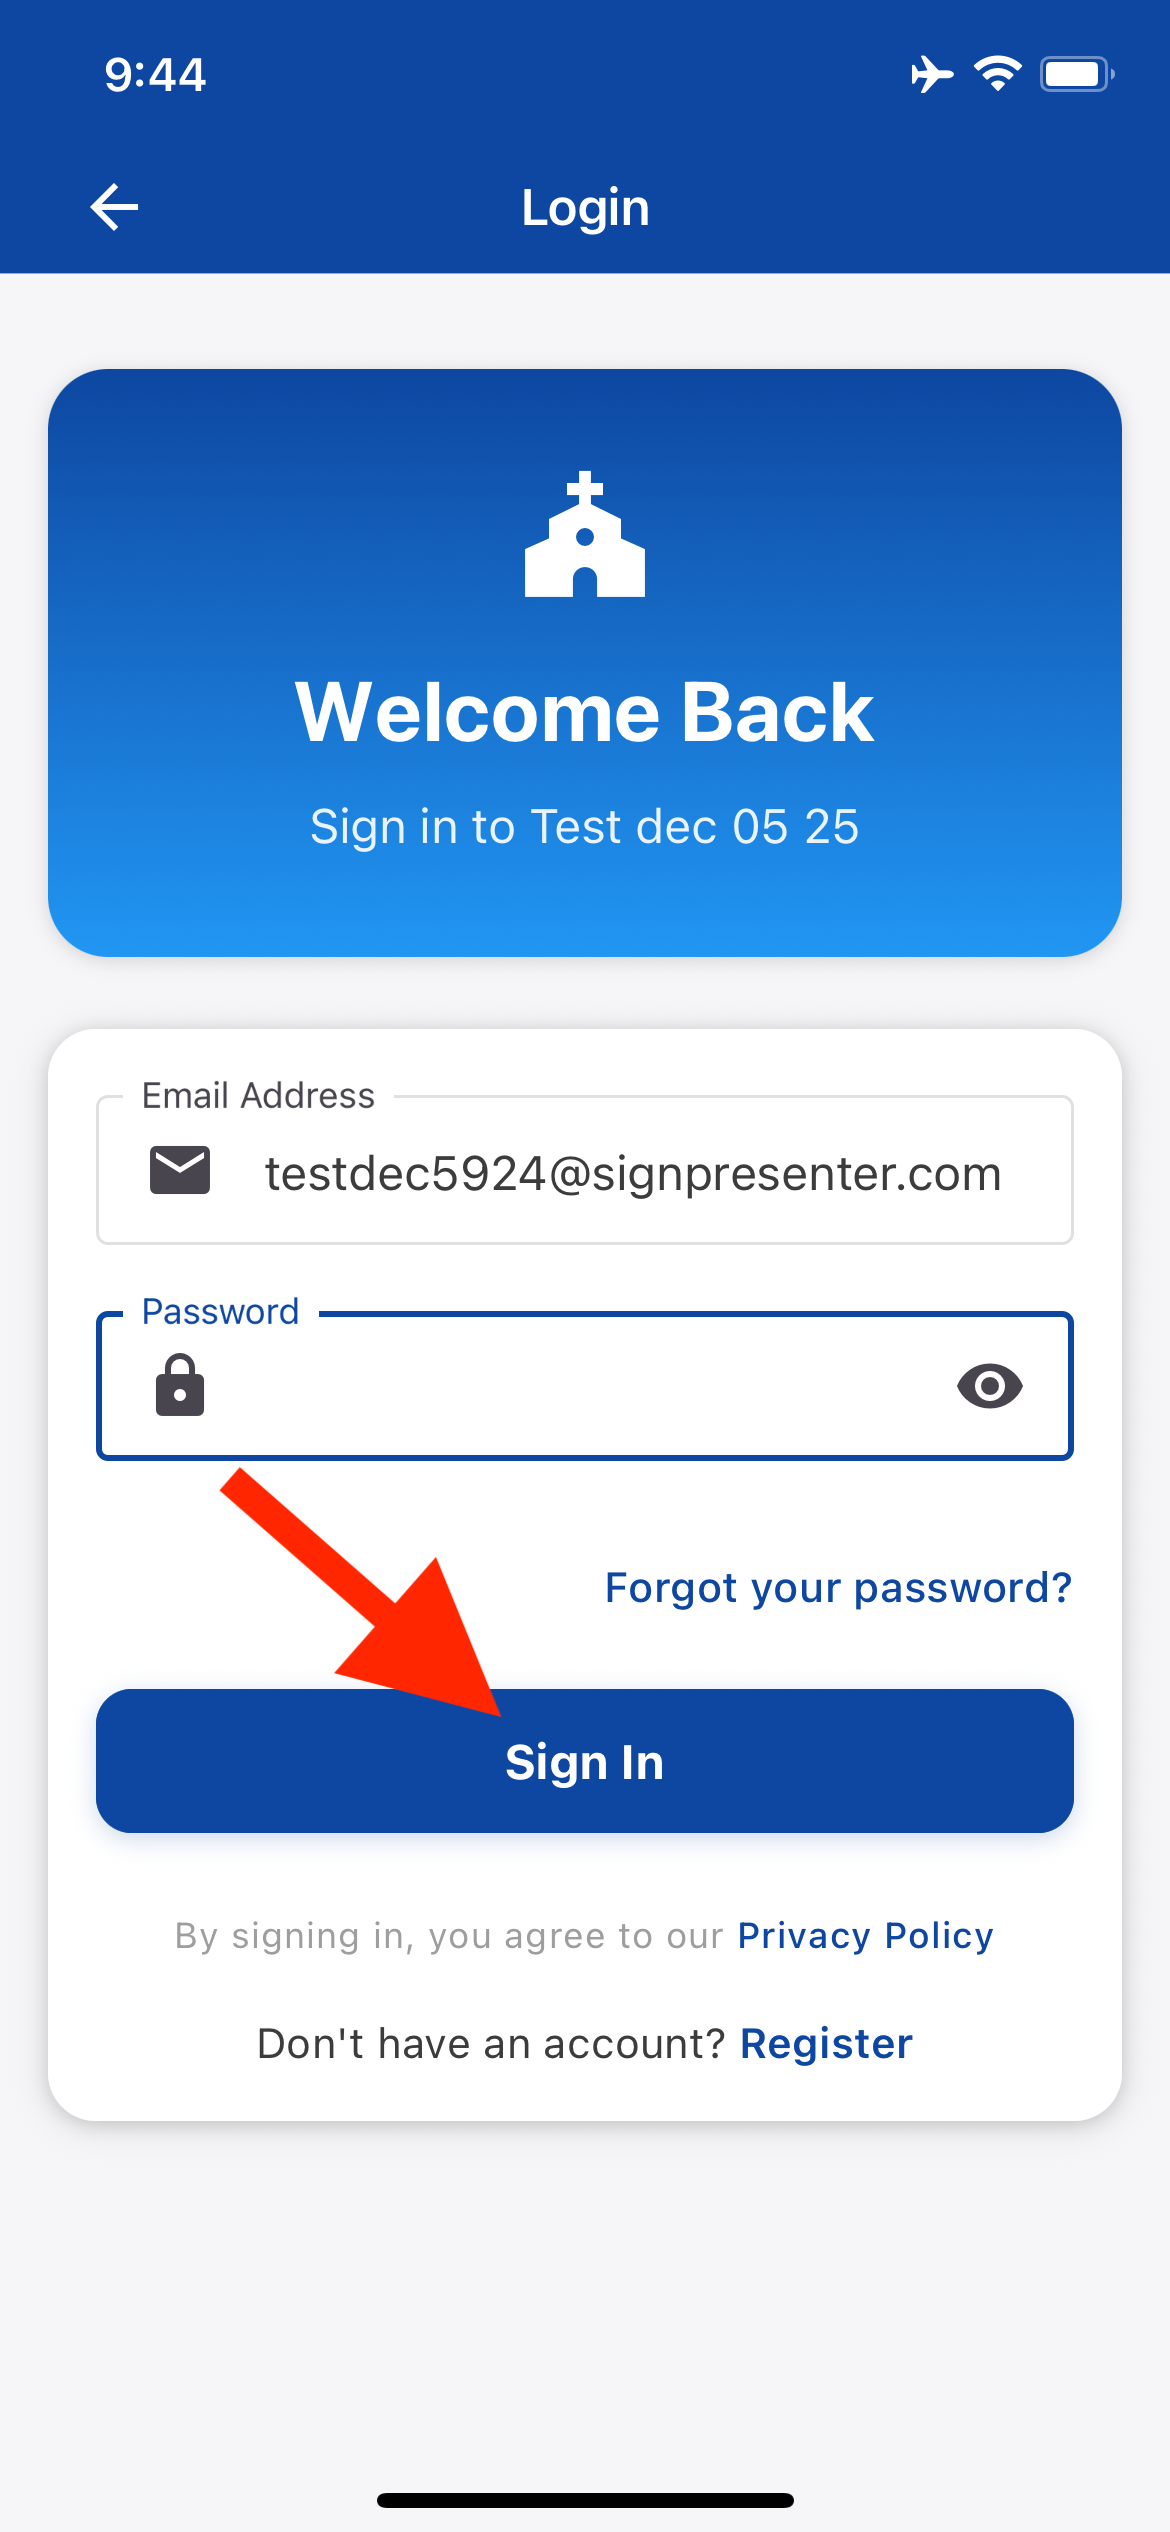
7.The login screen opens where you can sign in with your account▼
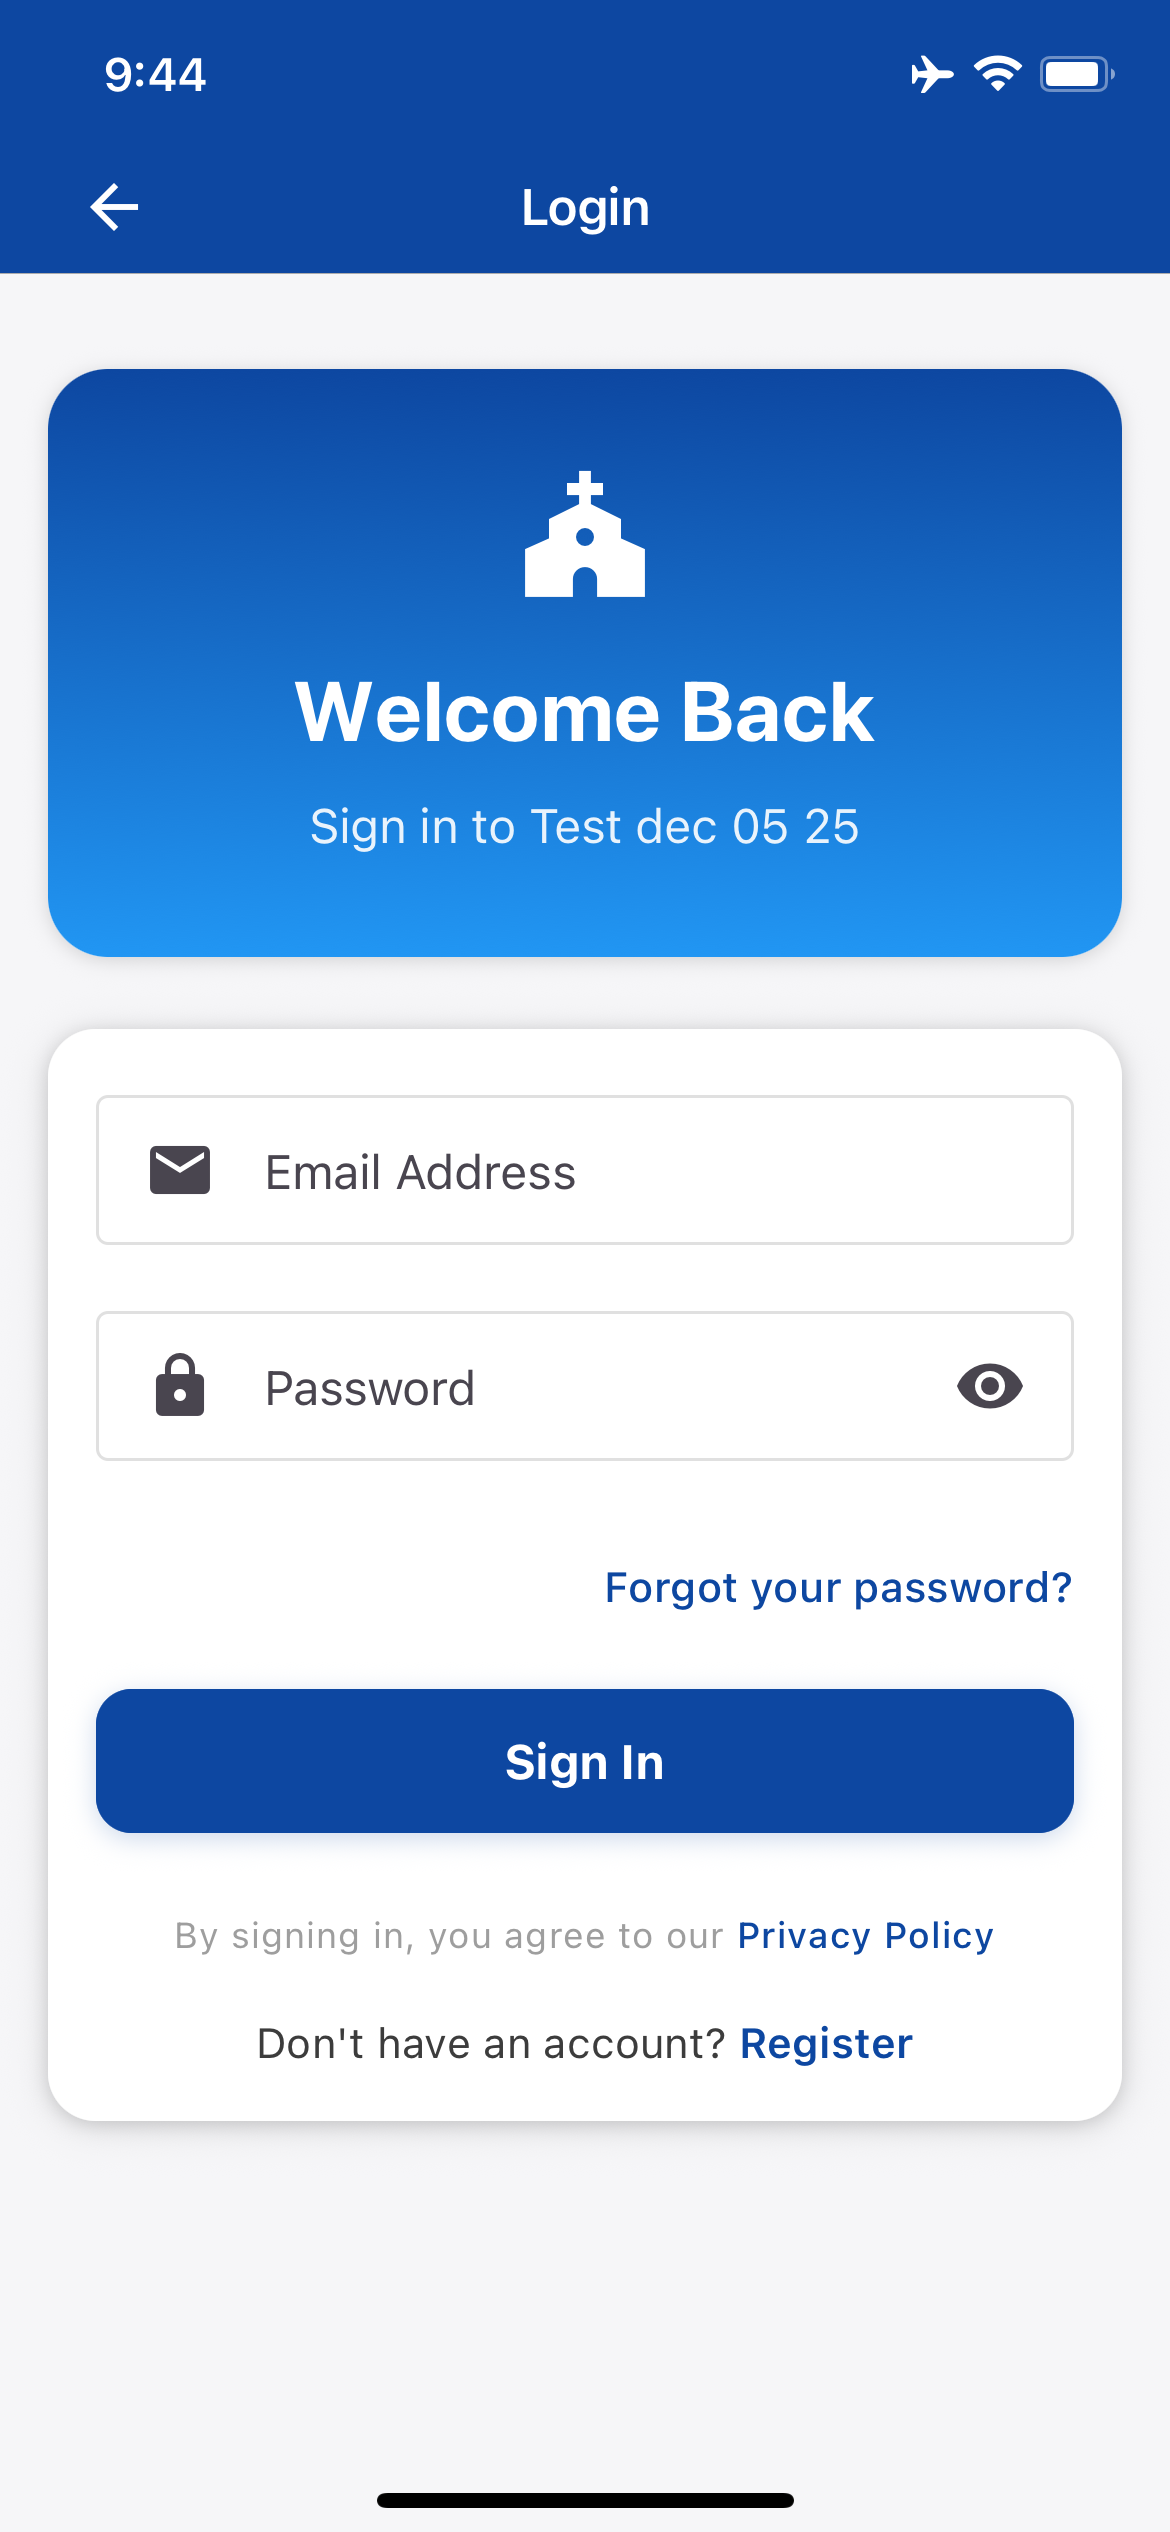
8.Enter your Lessons.church email and password, then tap Sign In▼
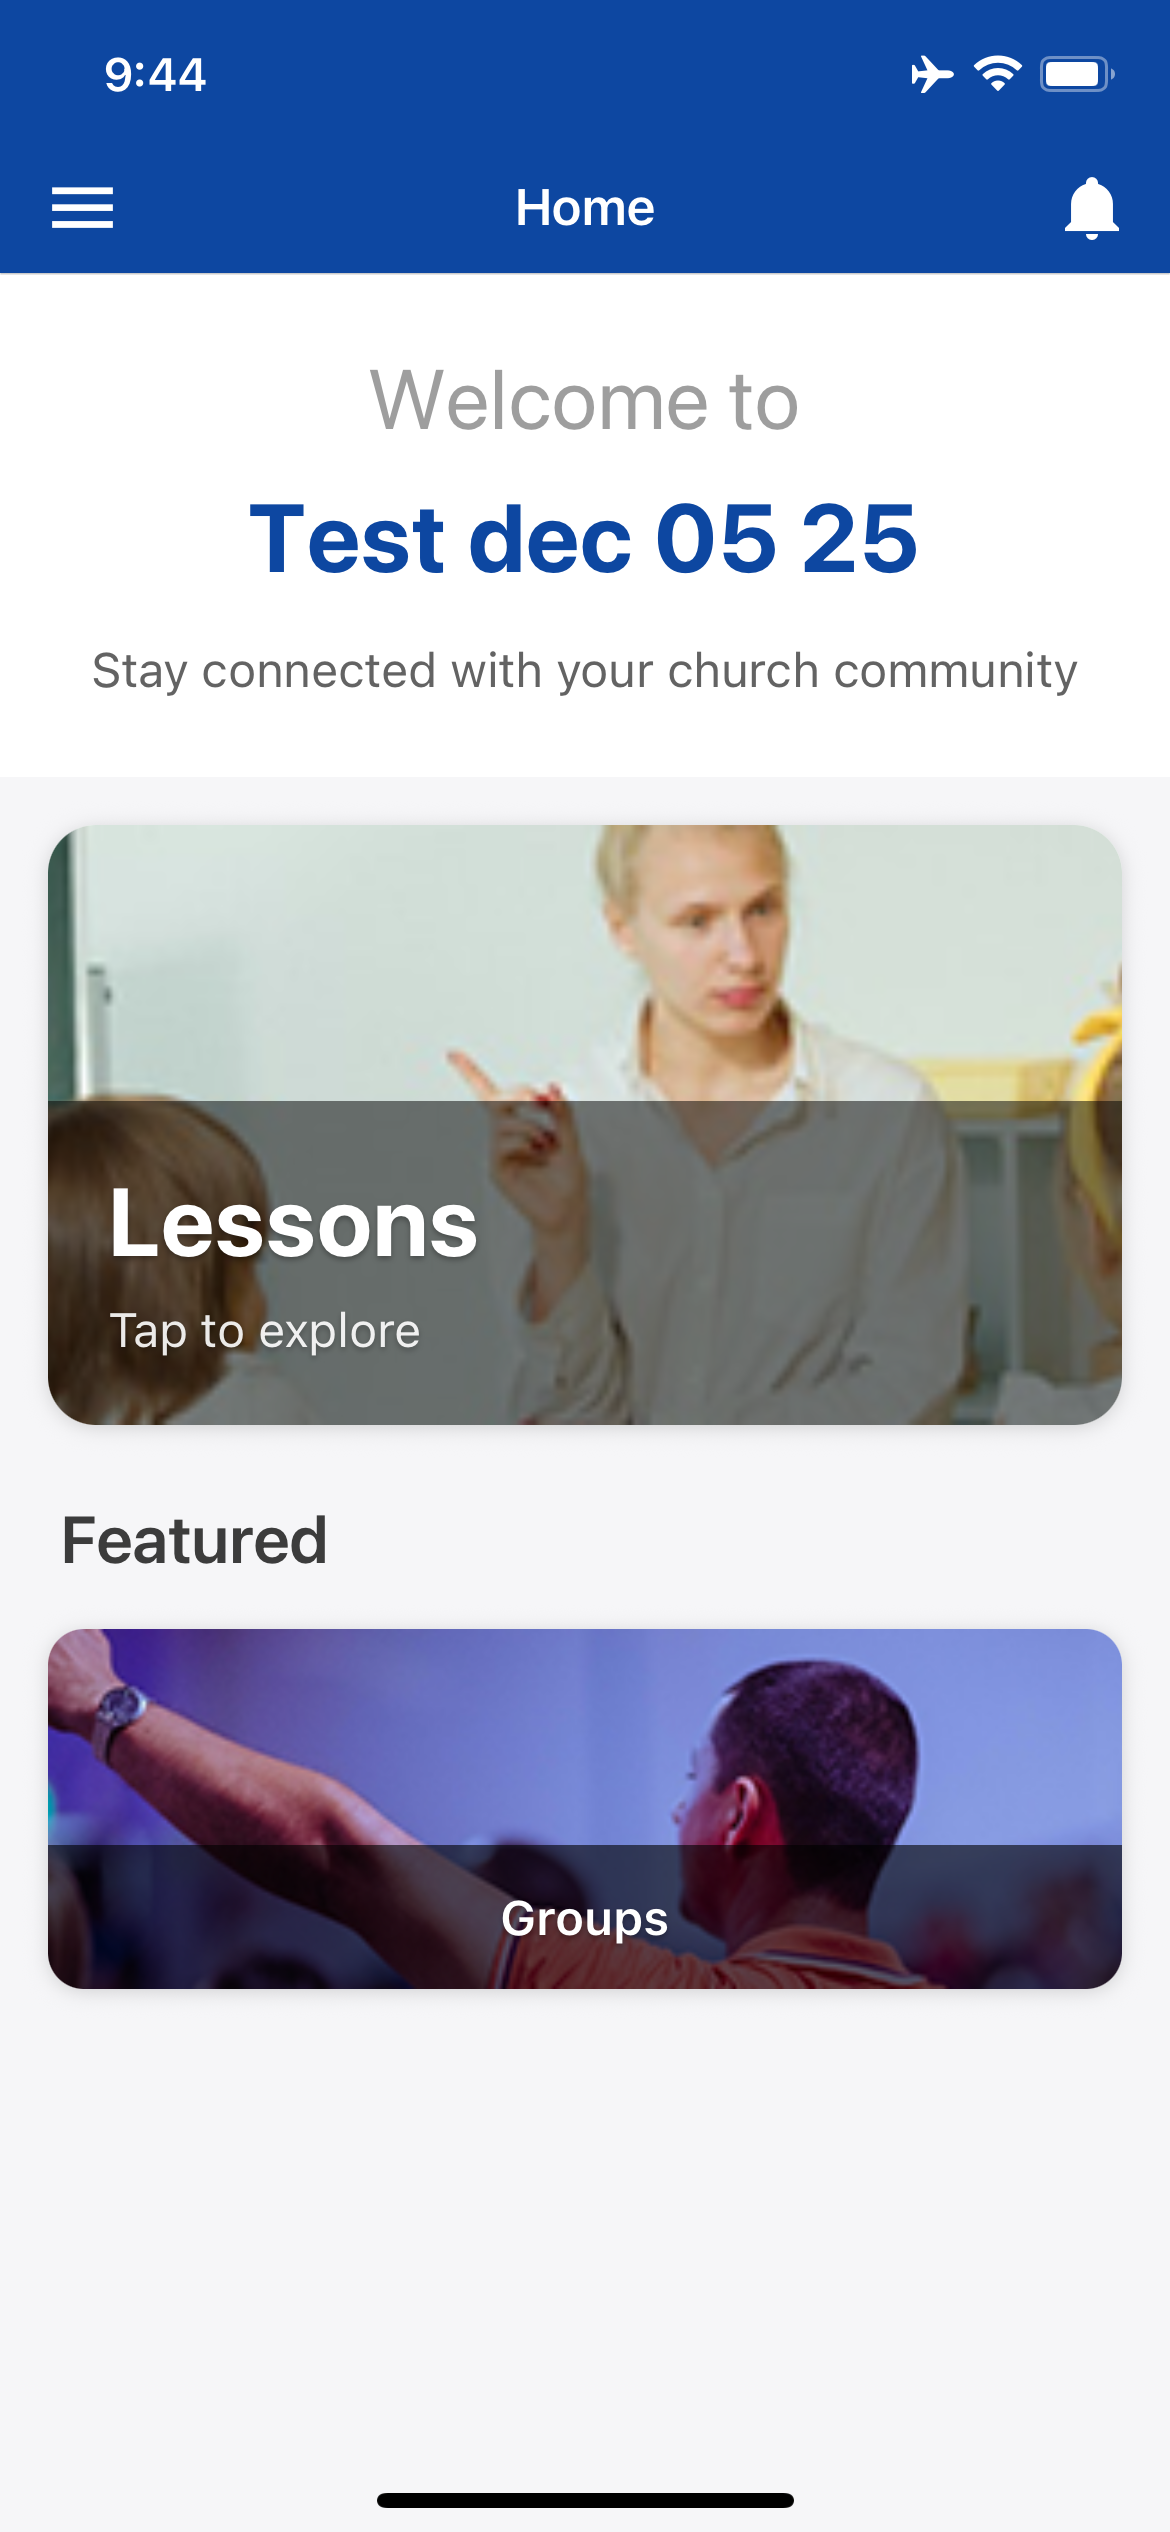
9.After logging in, you'll see your Lessons card - tap it to view lessons▼
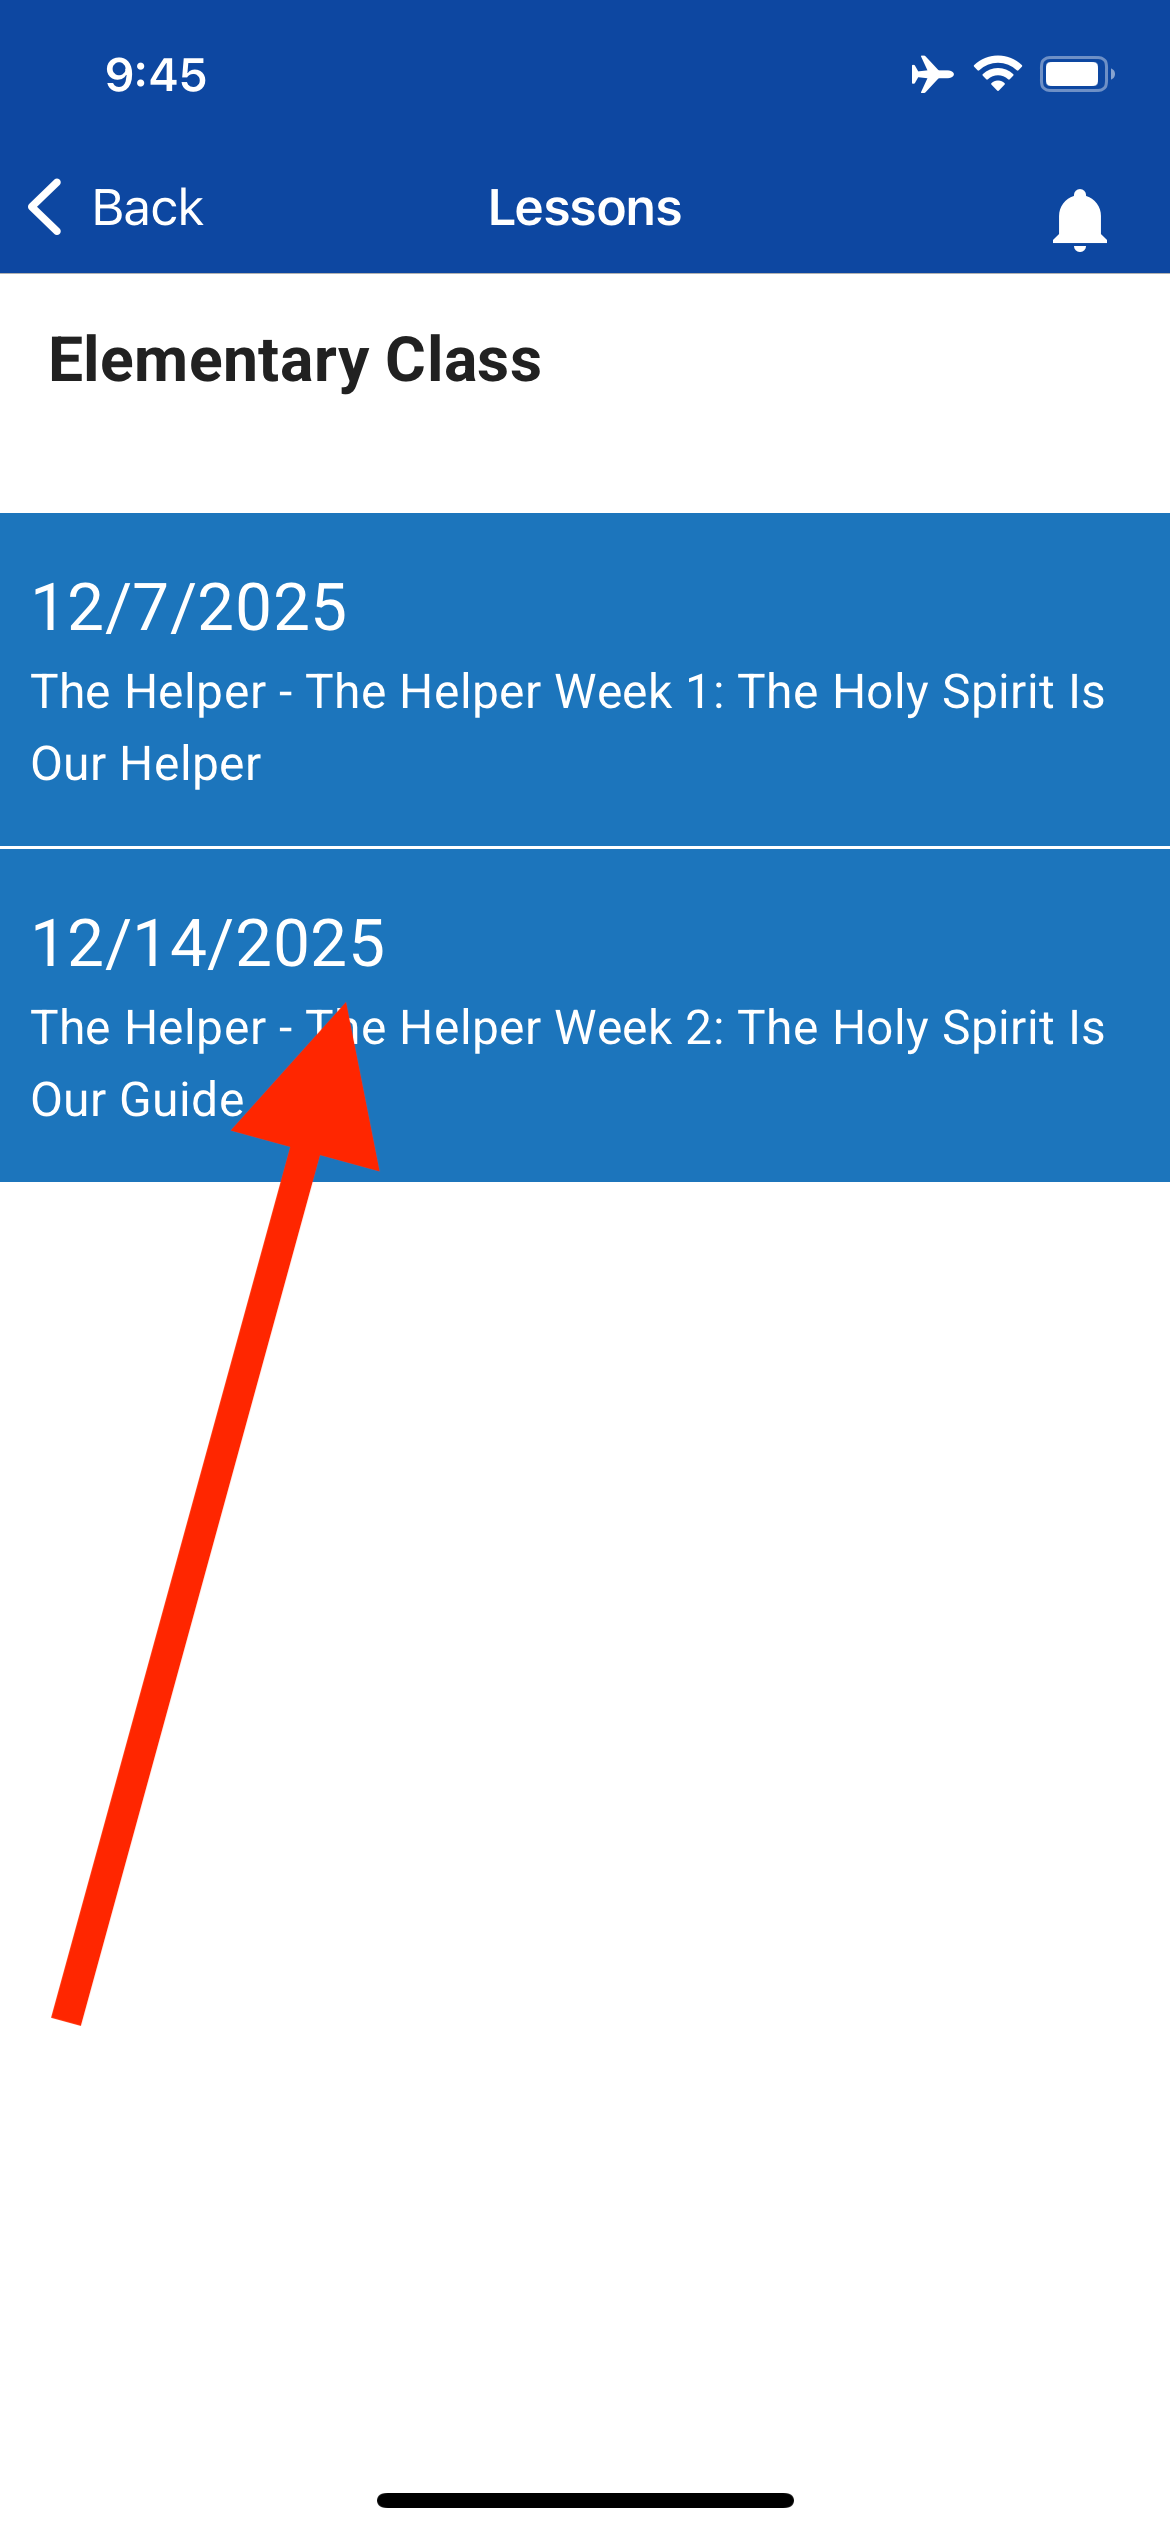
10.Select a scheduled lesson from your classrooms▼
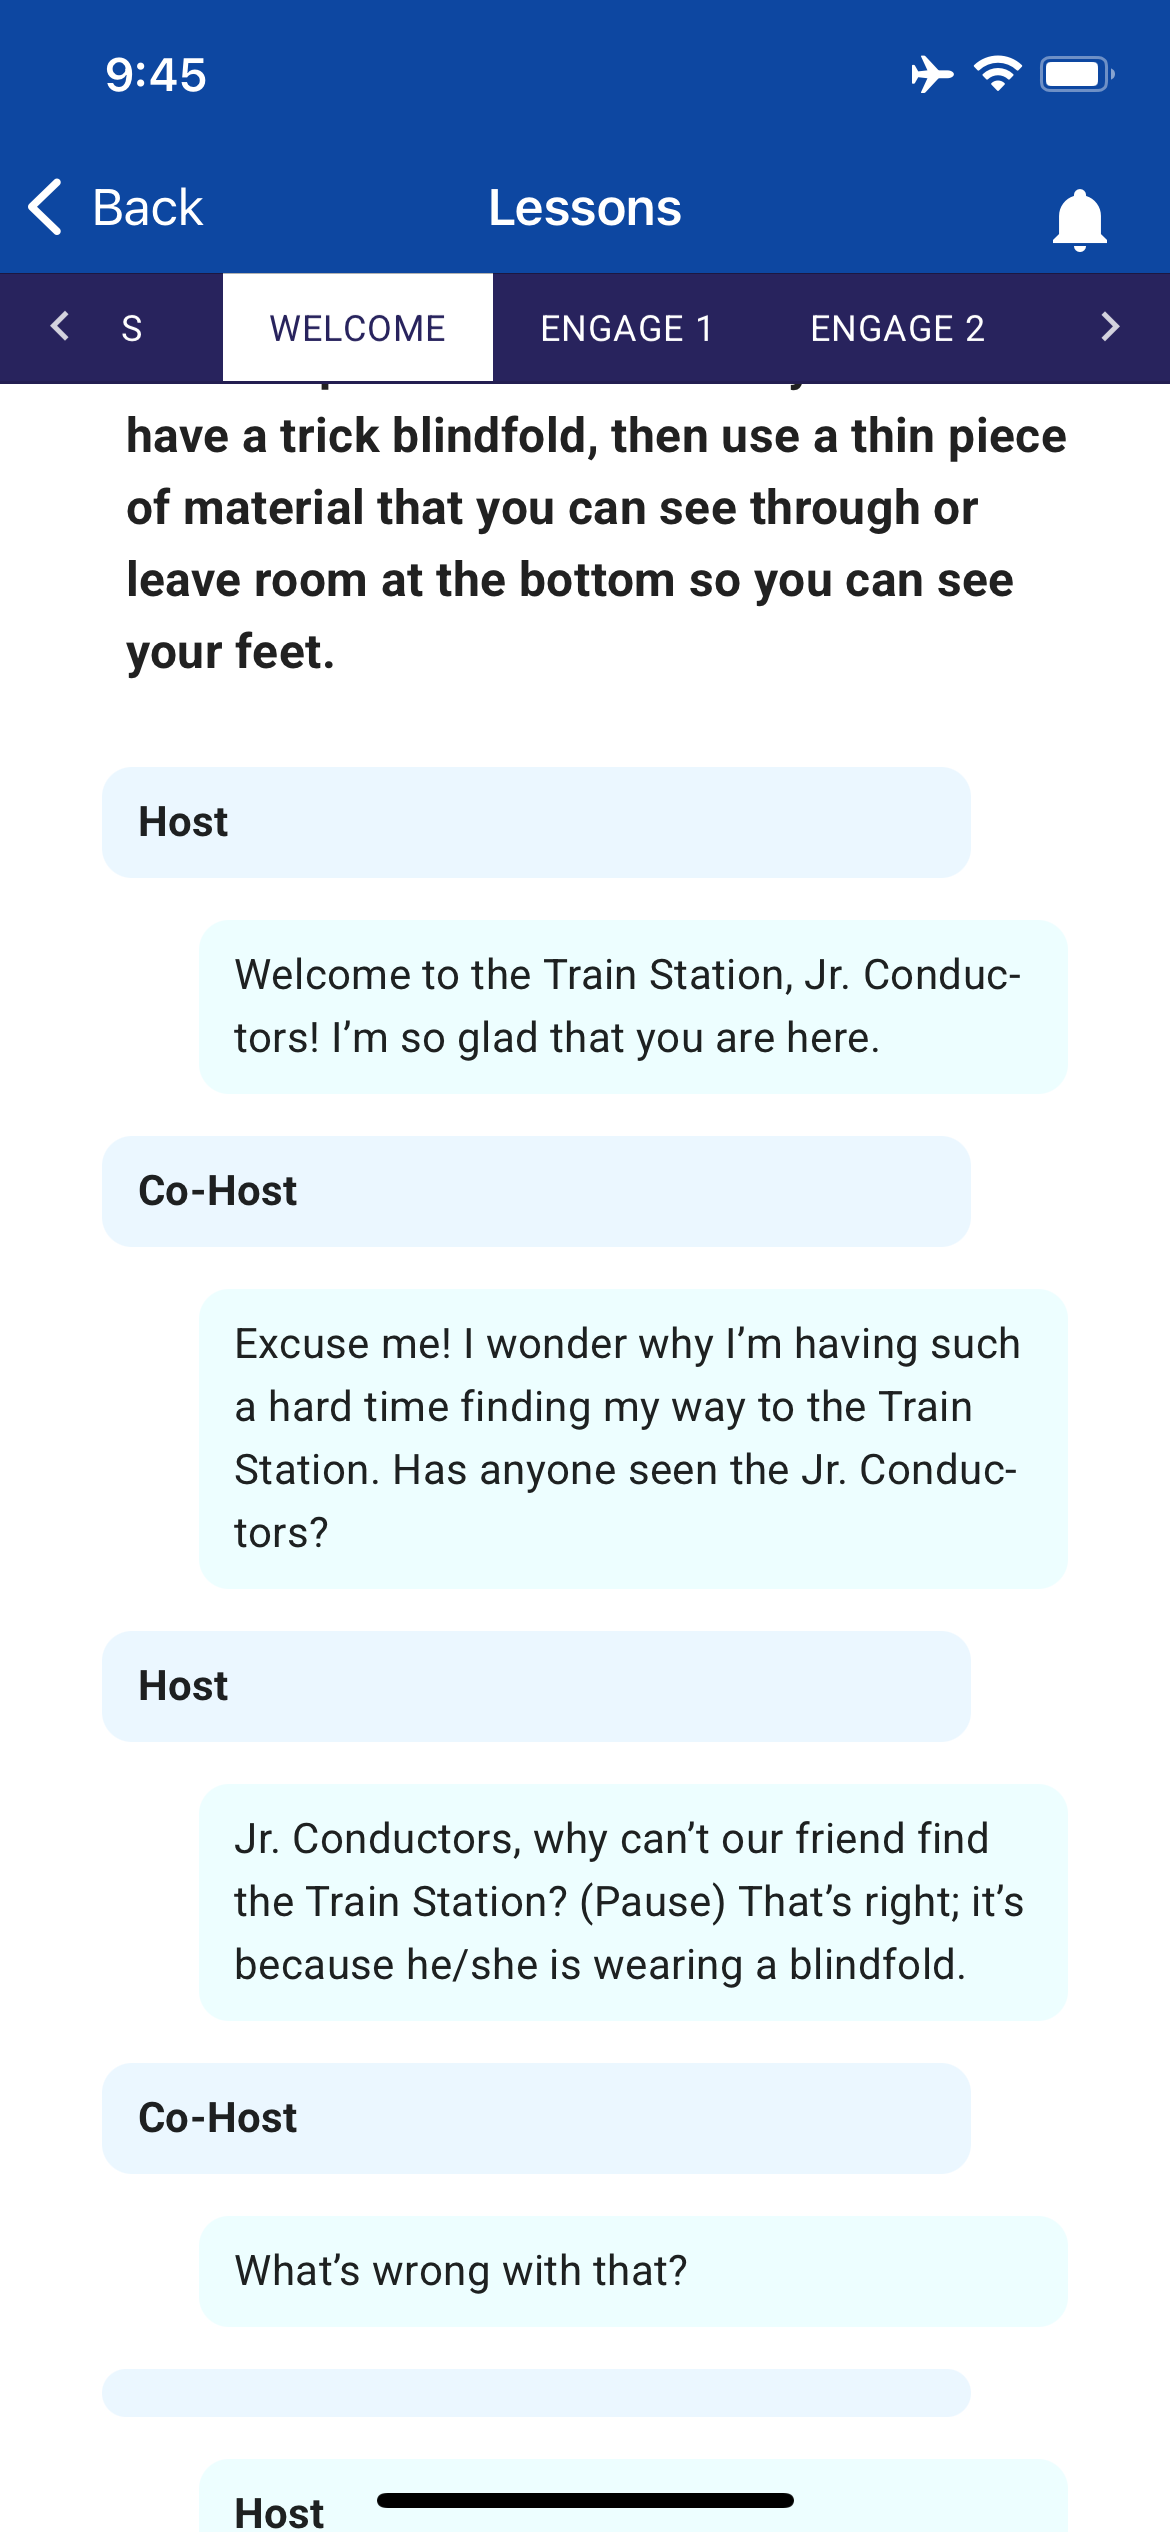
11.View the lesson with section tabs - tap any tab to jump to that section▼
Steps
1.Present lessons on any Android streaming device (Fire TV, Onn from Walmart, Android 10+)▼
2.Hold the blue mic button and say "Download Lessons Dot Church App" or search manually▼
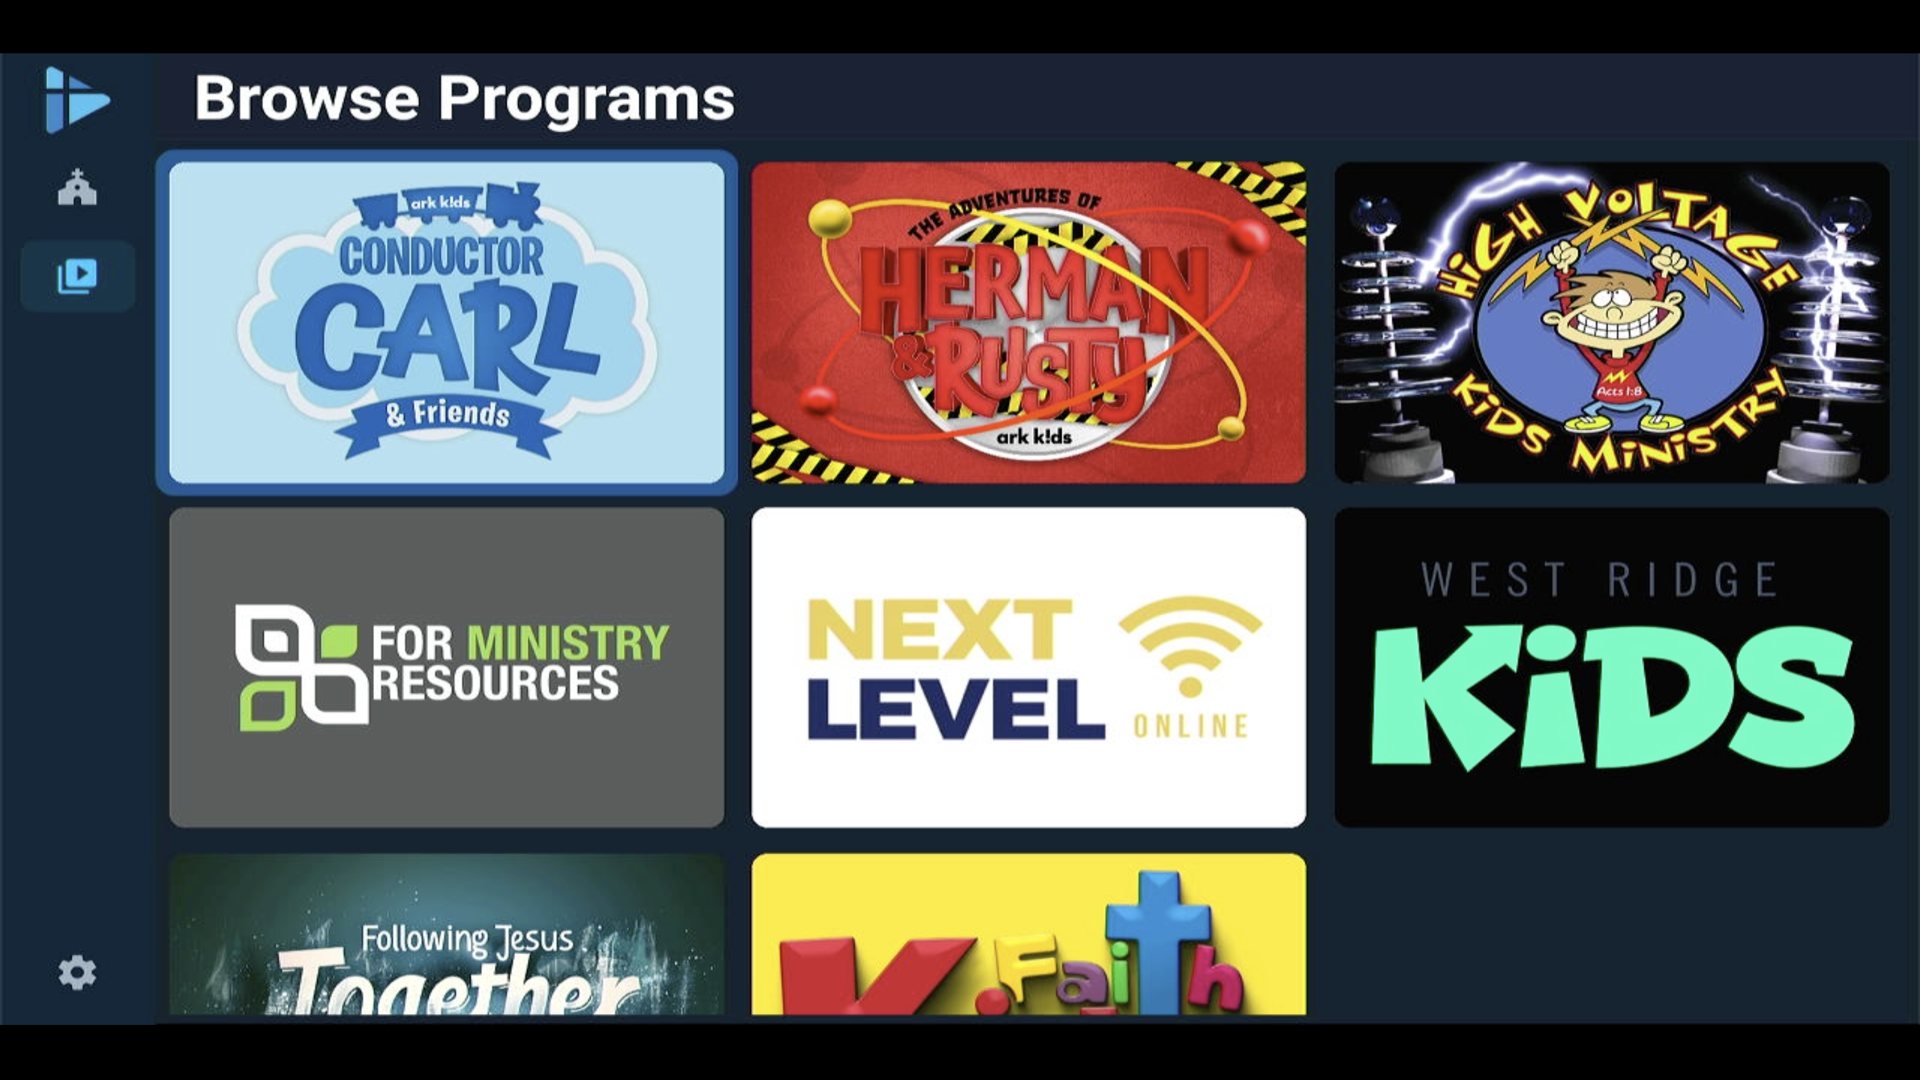
3.Open the app to see the Browse Programs screen with available curriculum▼
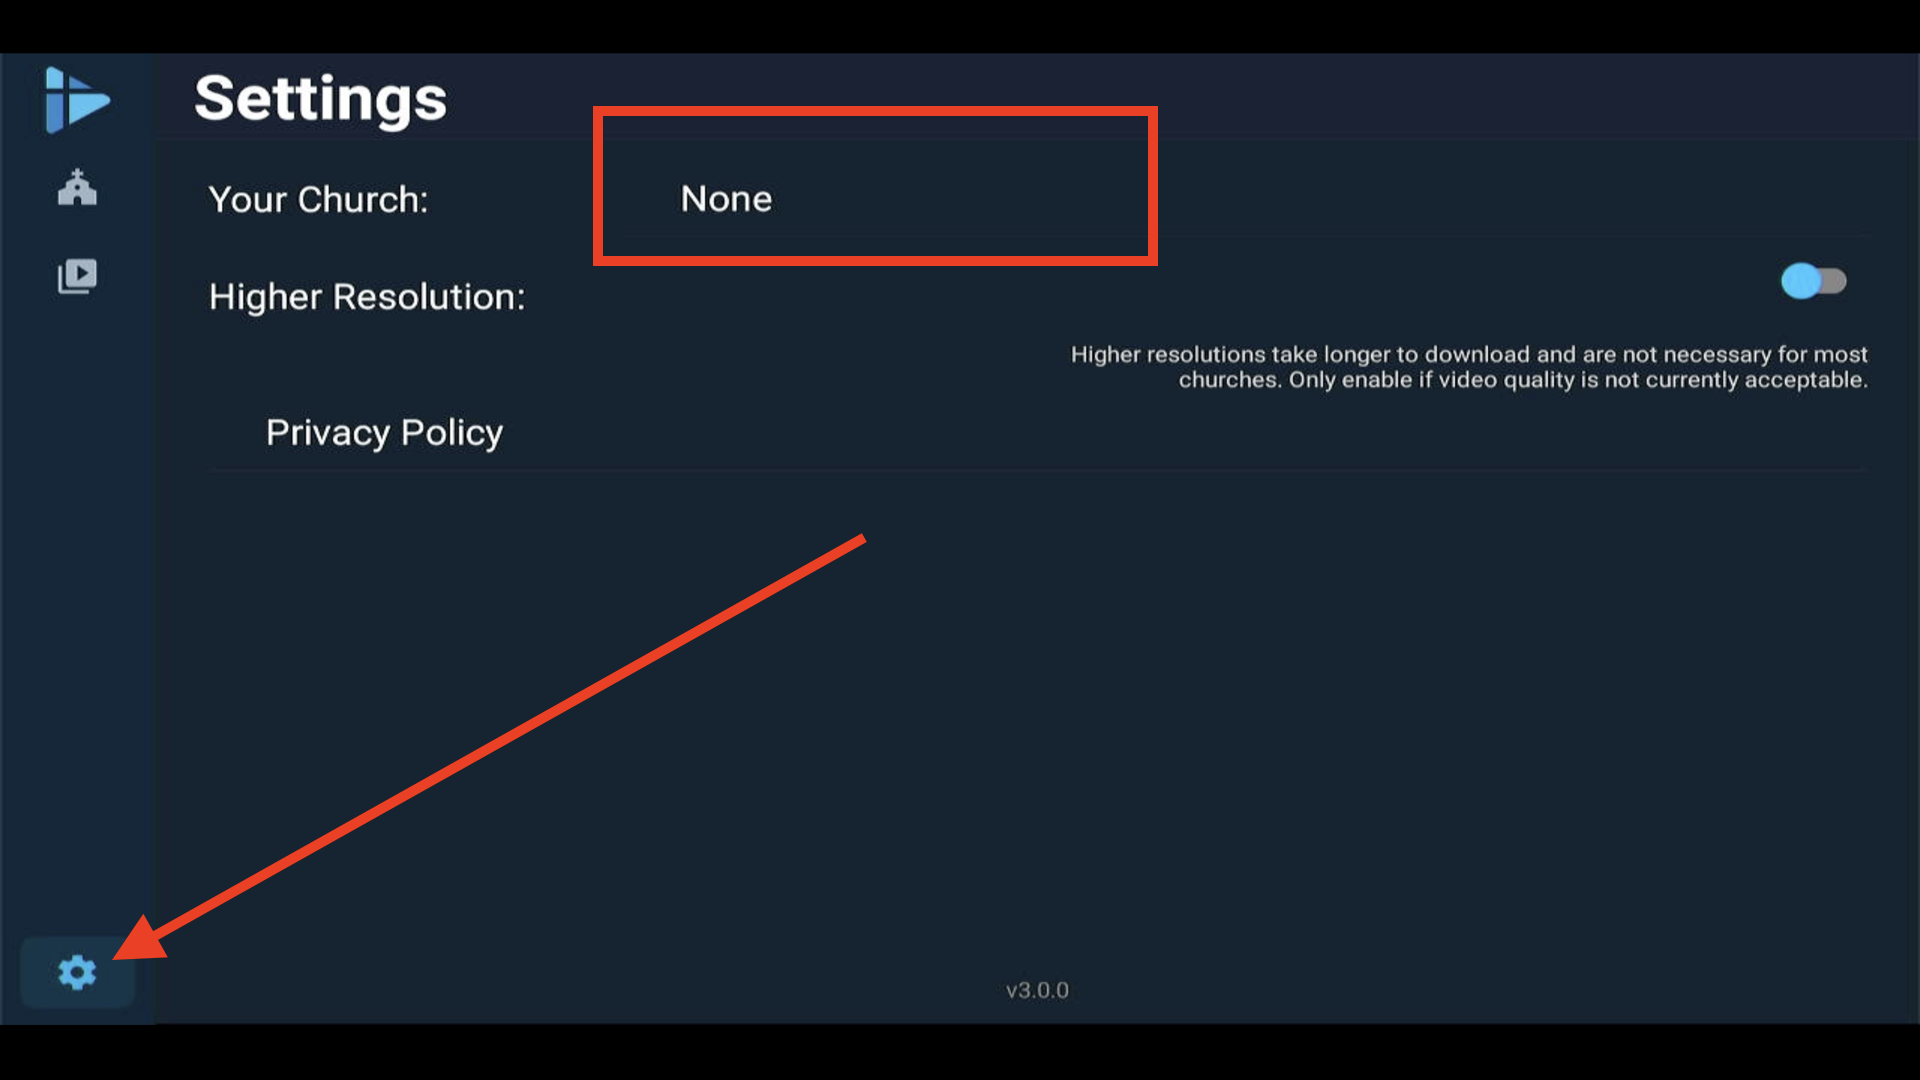
4.Go to Settings using the gear icon, then select Your Church to set it up▼
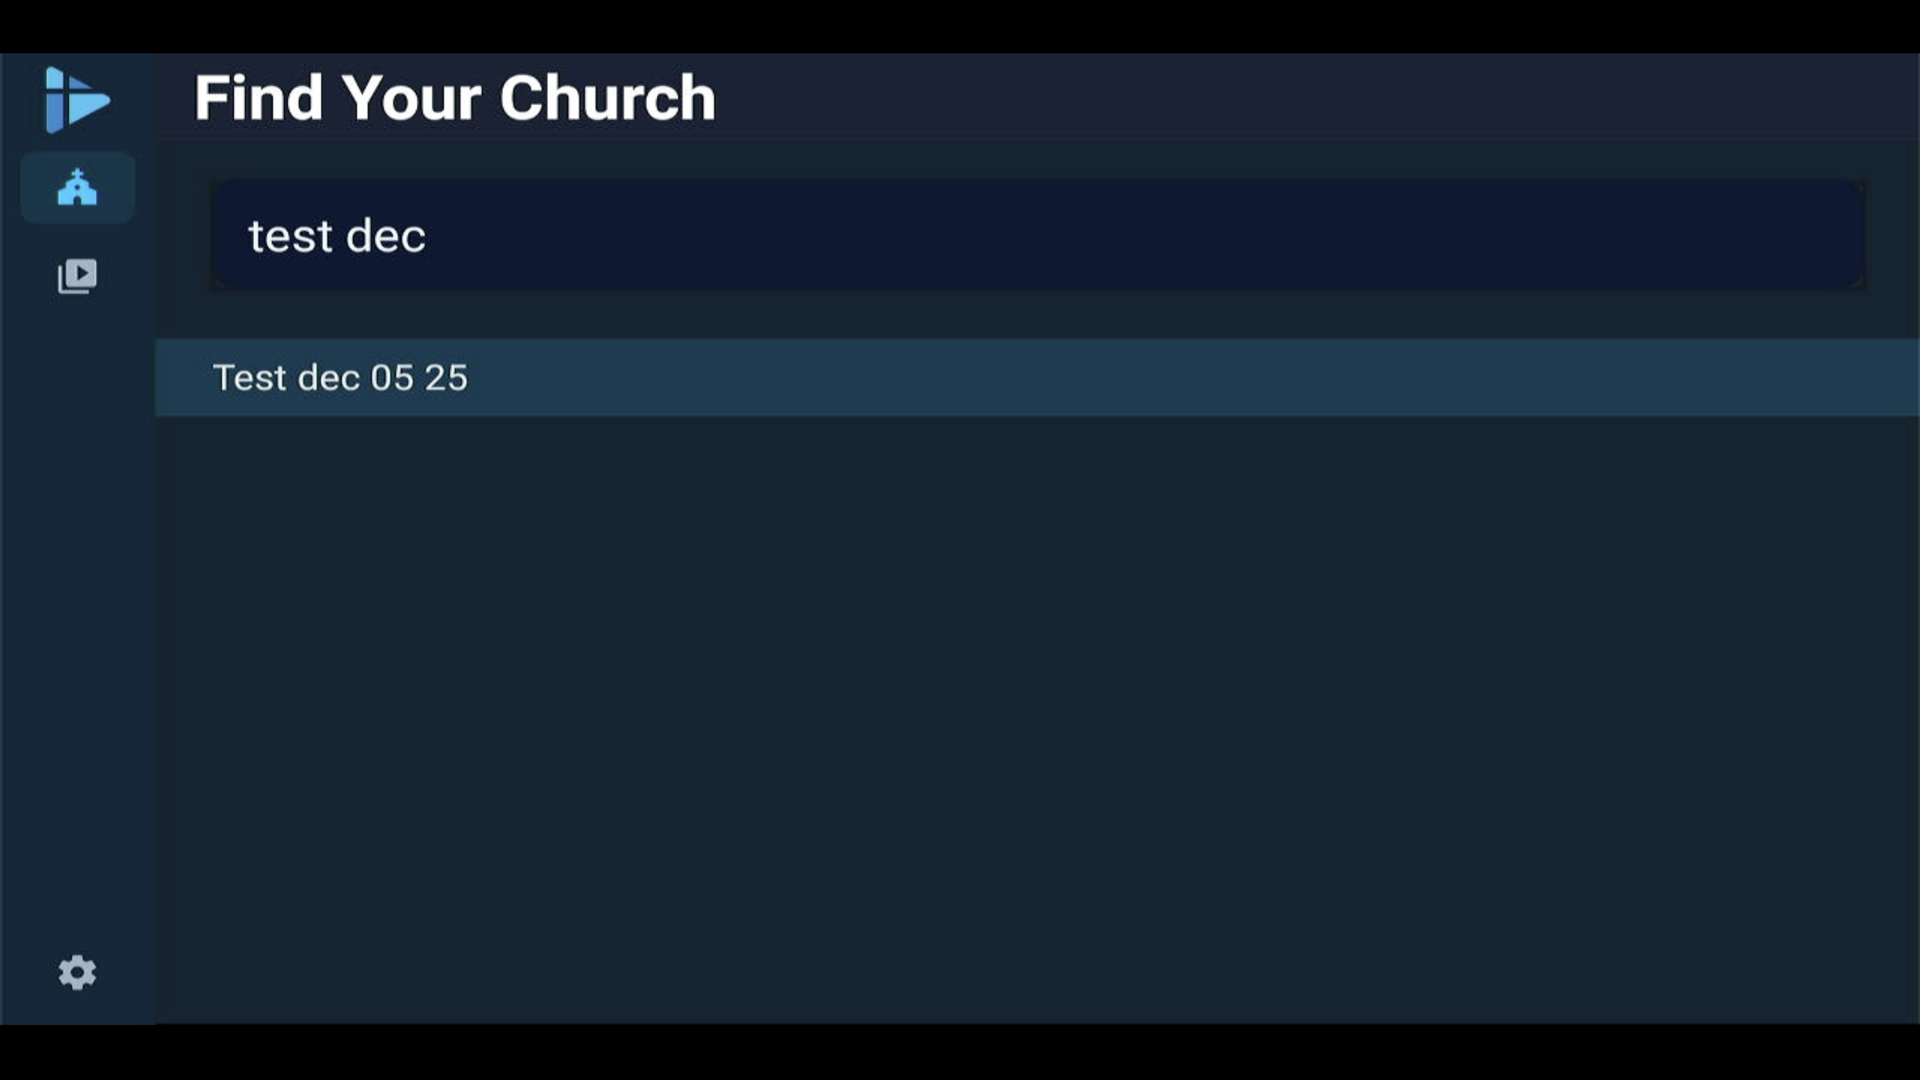
5.Type your church name or scan the QR code with your phone for easier setup▼
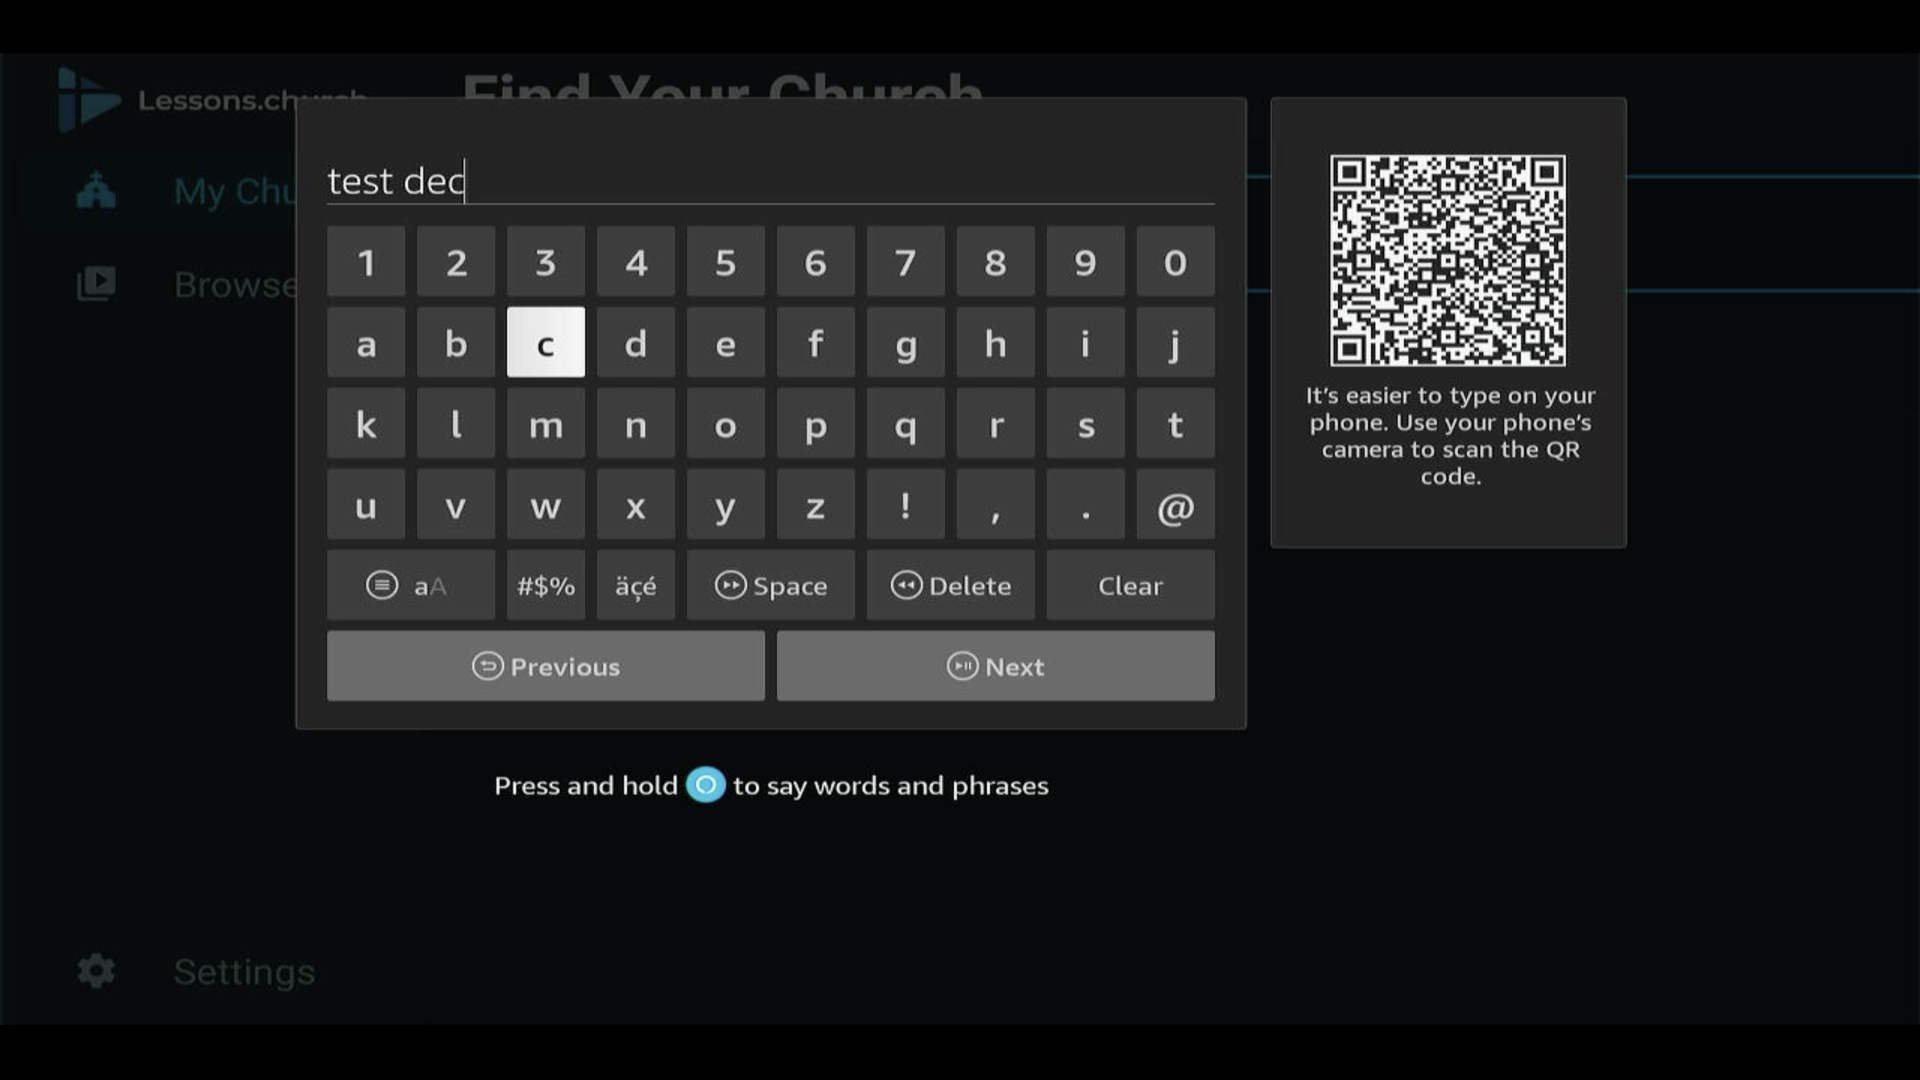
6.Select your church from the search results▼
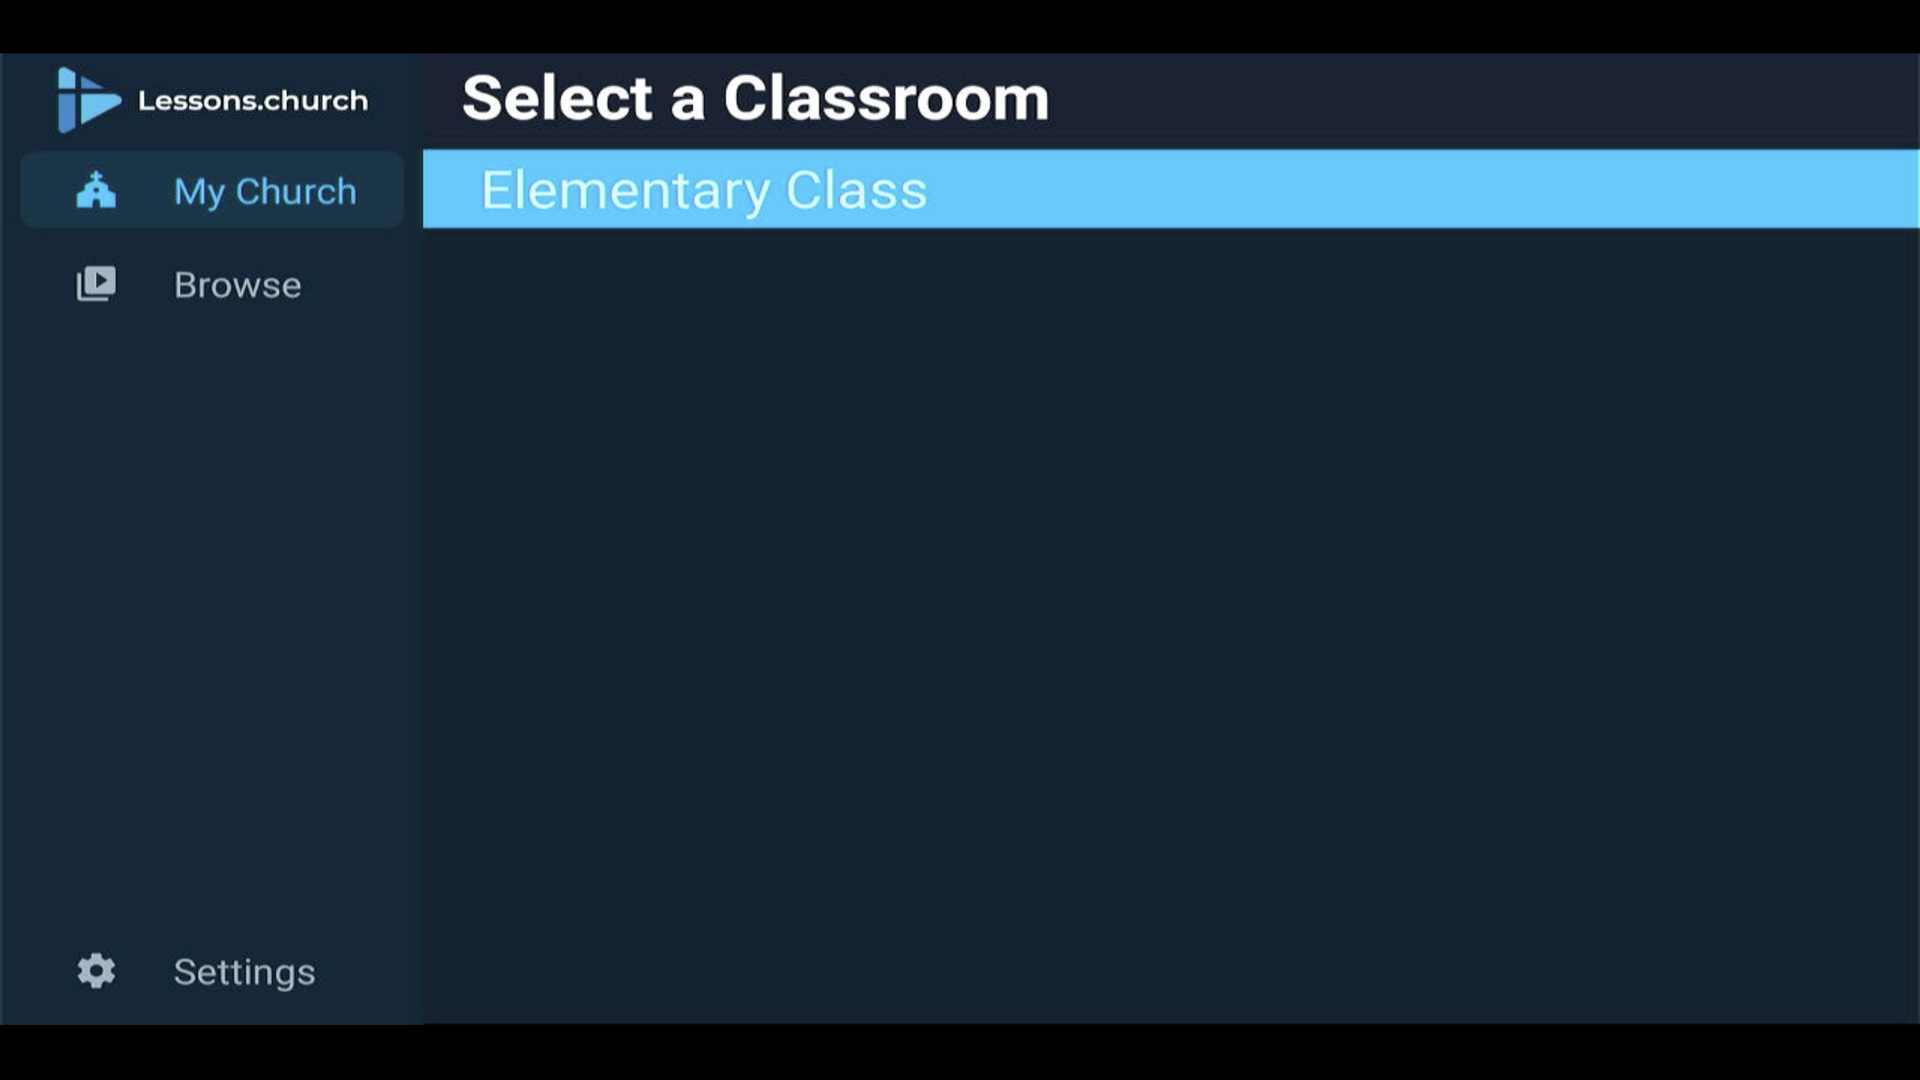
7.Choose the classroom you want to present lessons for▼
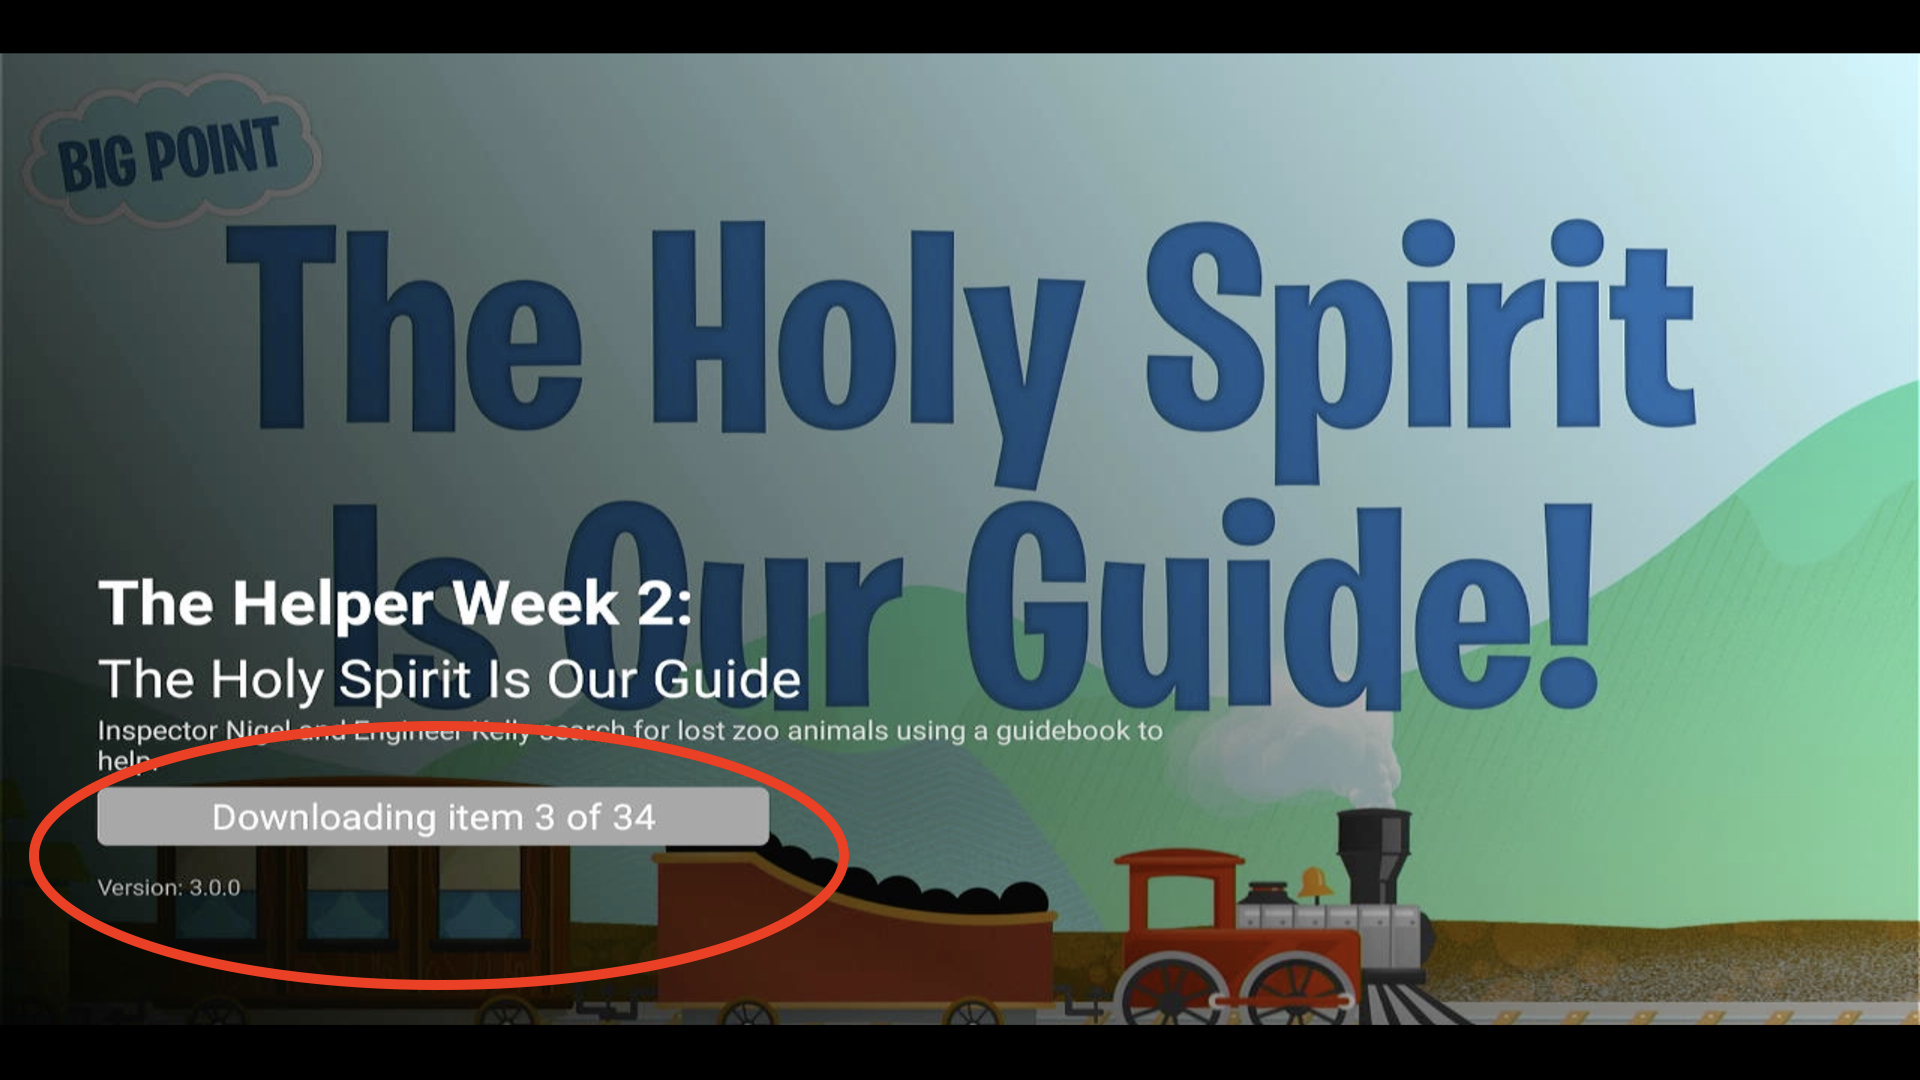
8.Wait for the lesson to download - this allows offline playback▼
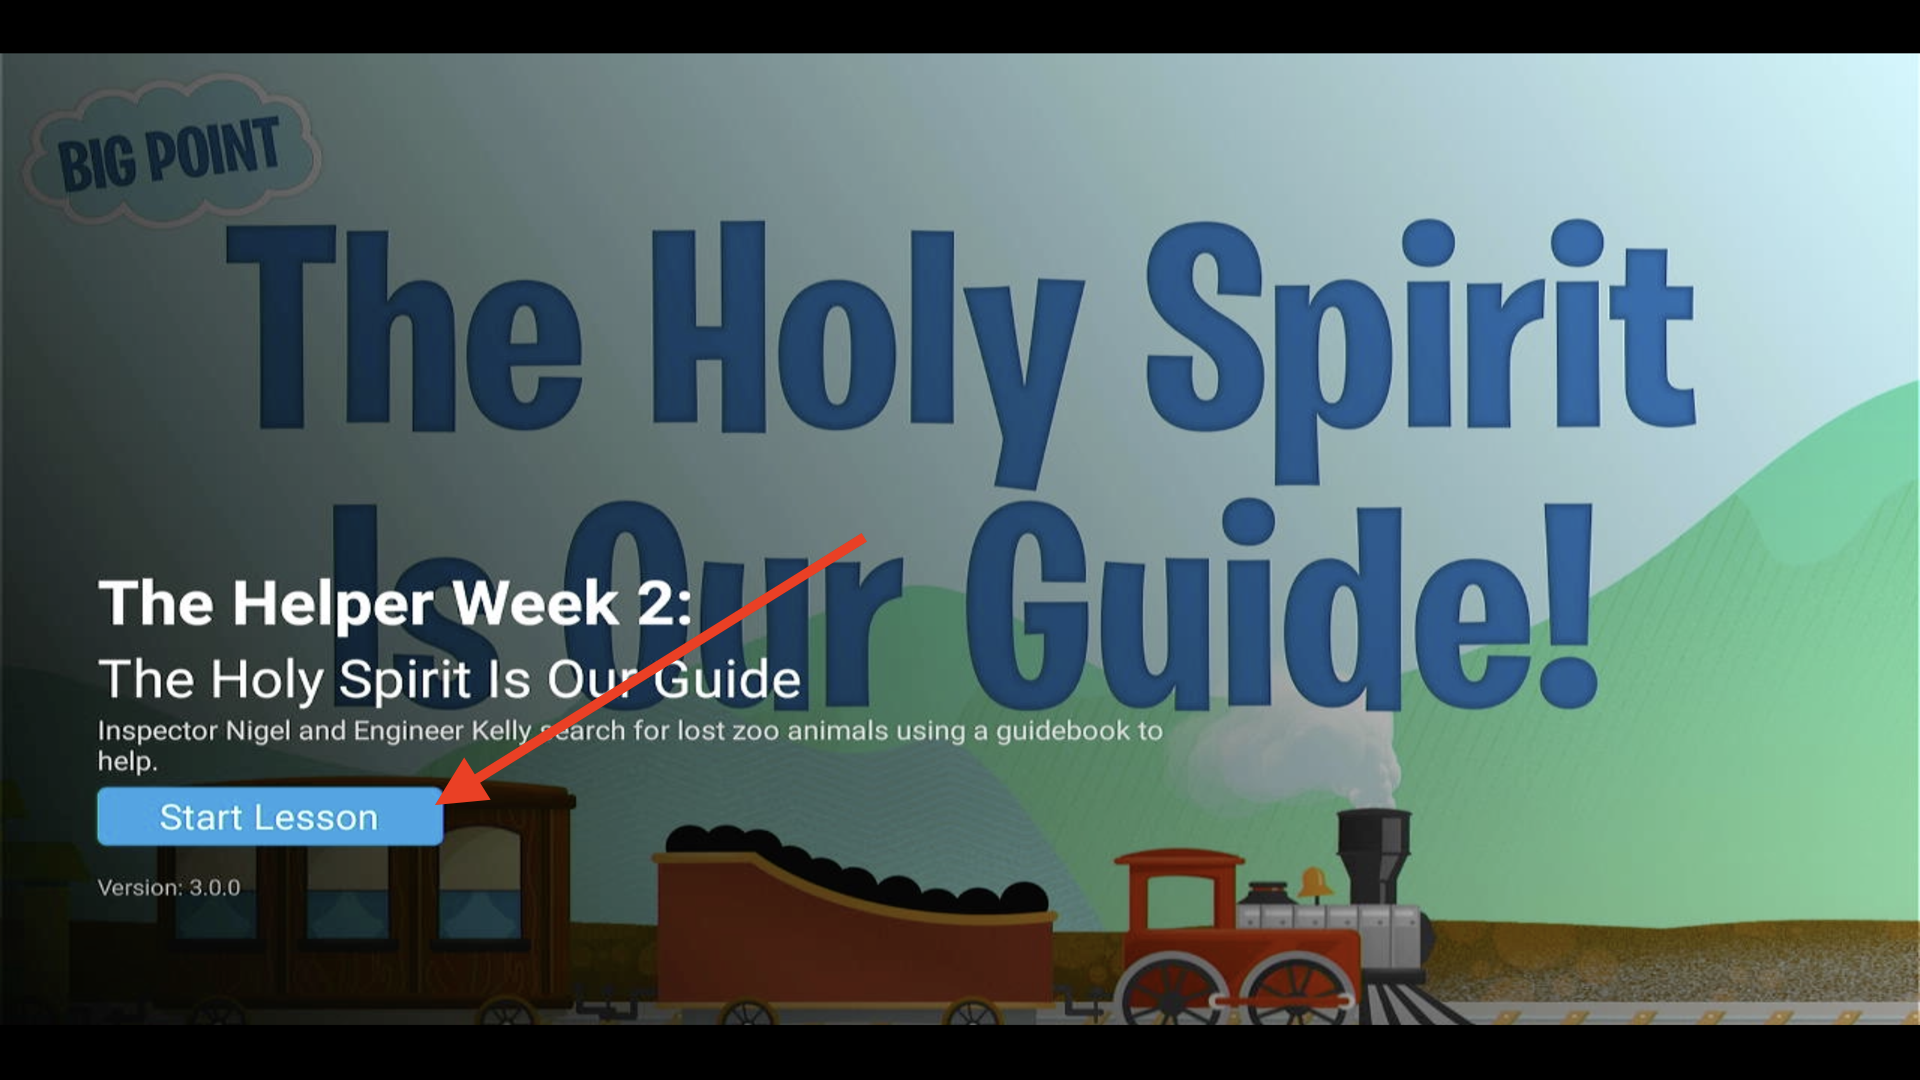
9.Once downloaded, select Start Lesson to begin presenting▼
10.Your lesson is now playing on the big screen▼

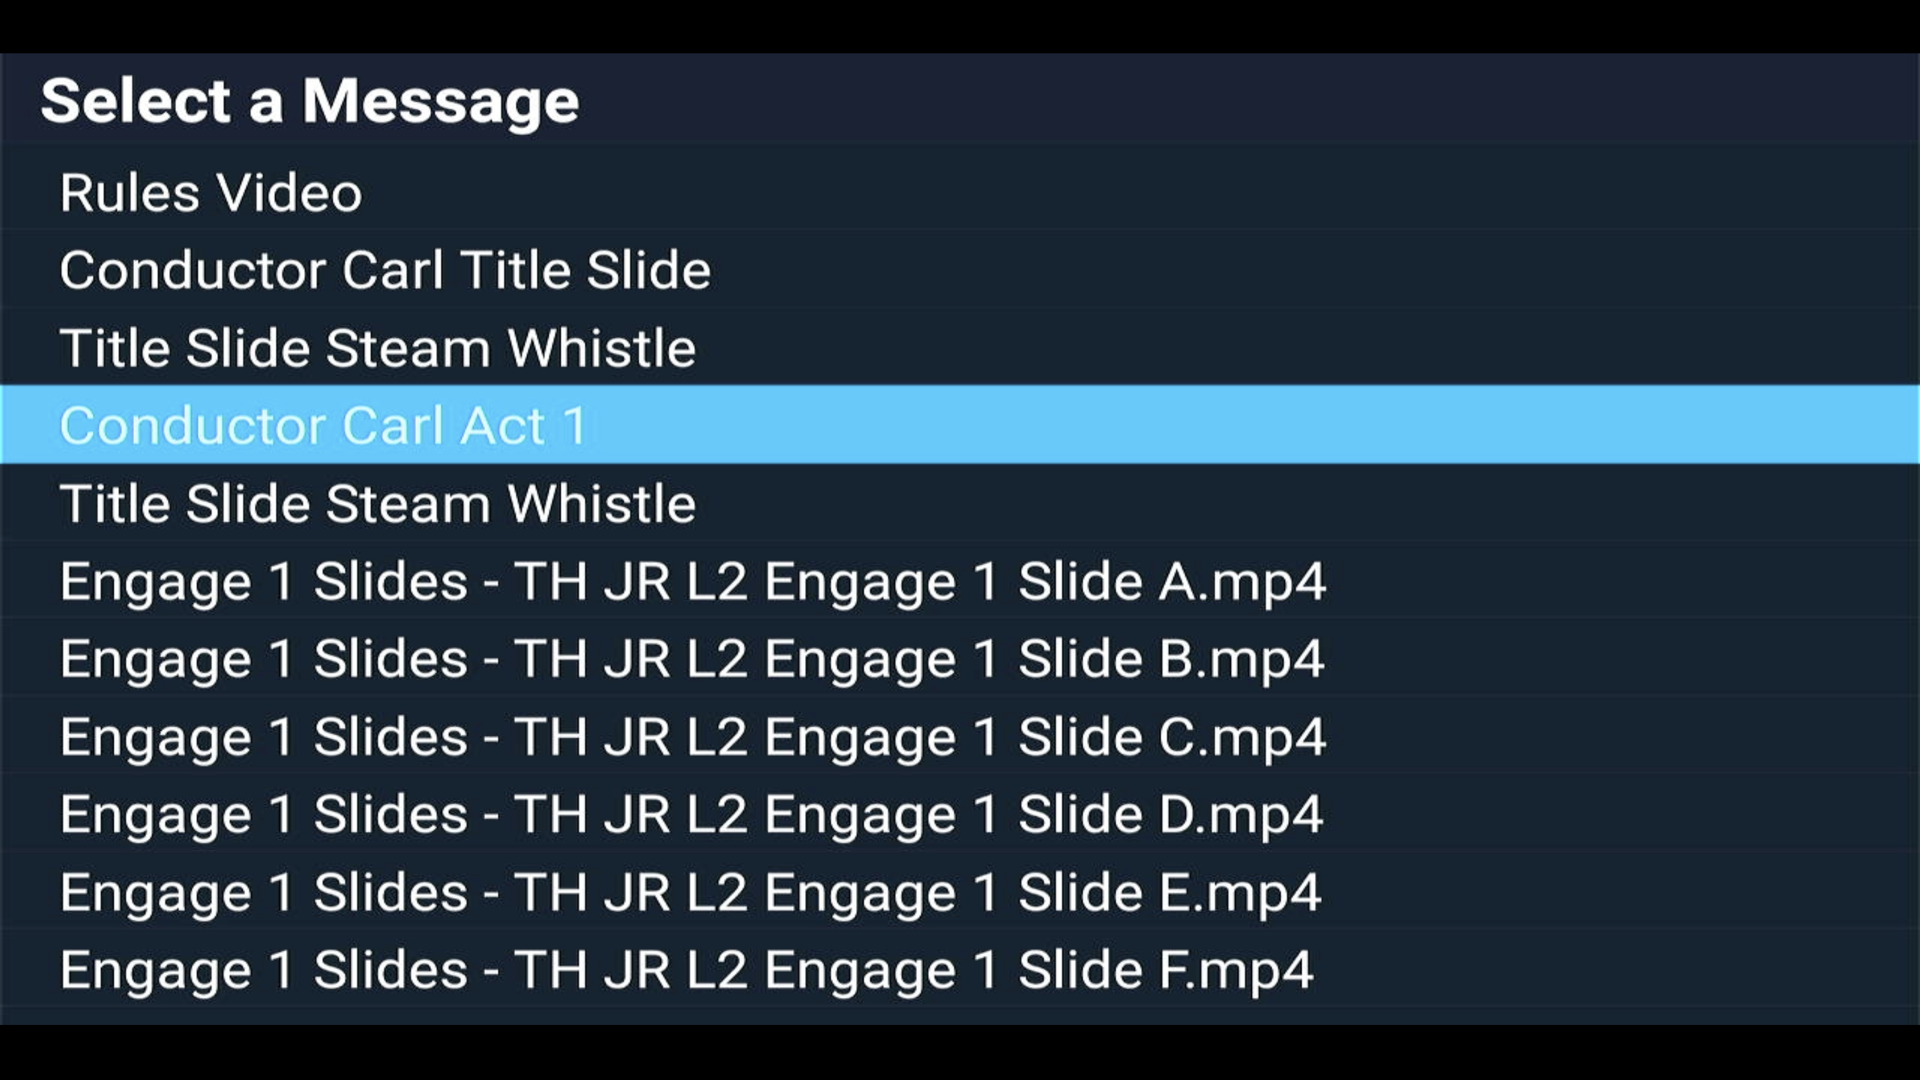
11.Press the up arrow to see all videos - select any to jump directly to it▼
12.Use your remote to play, pause, and navigate through the lesson▼

Steps
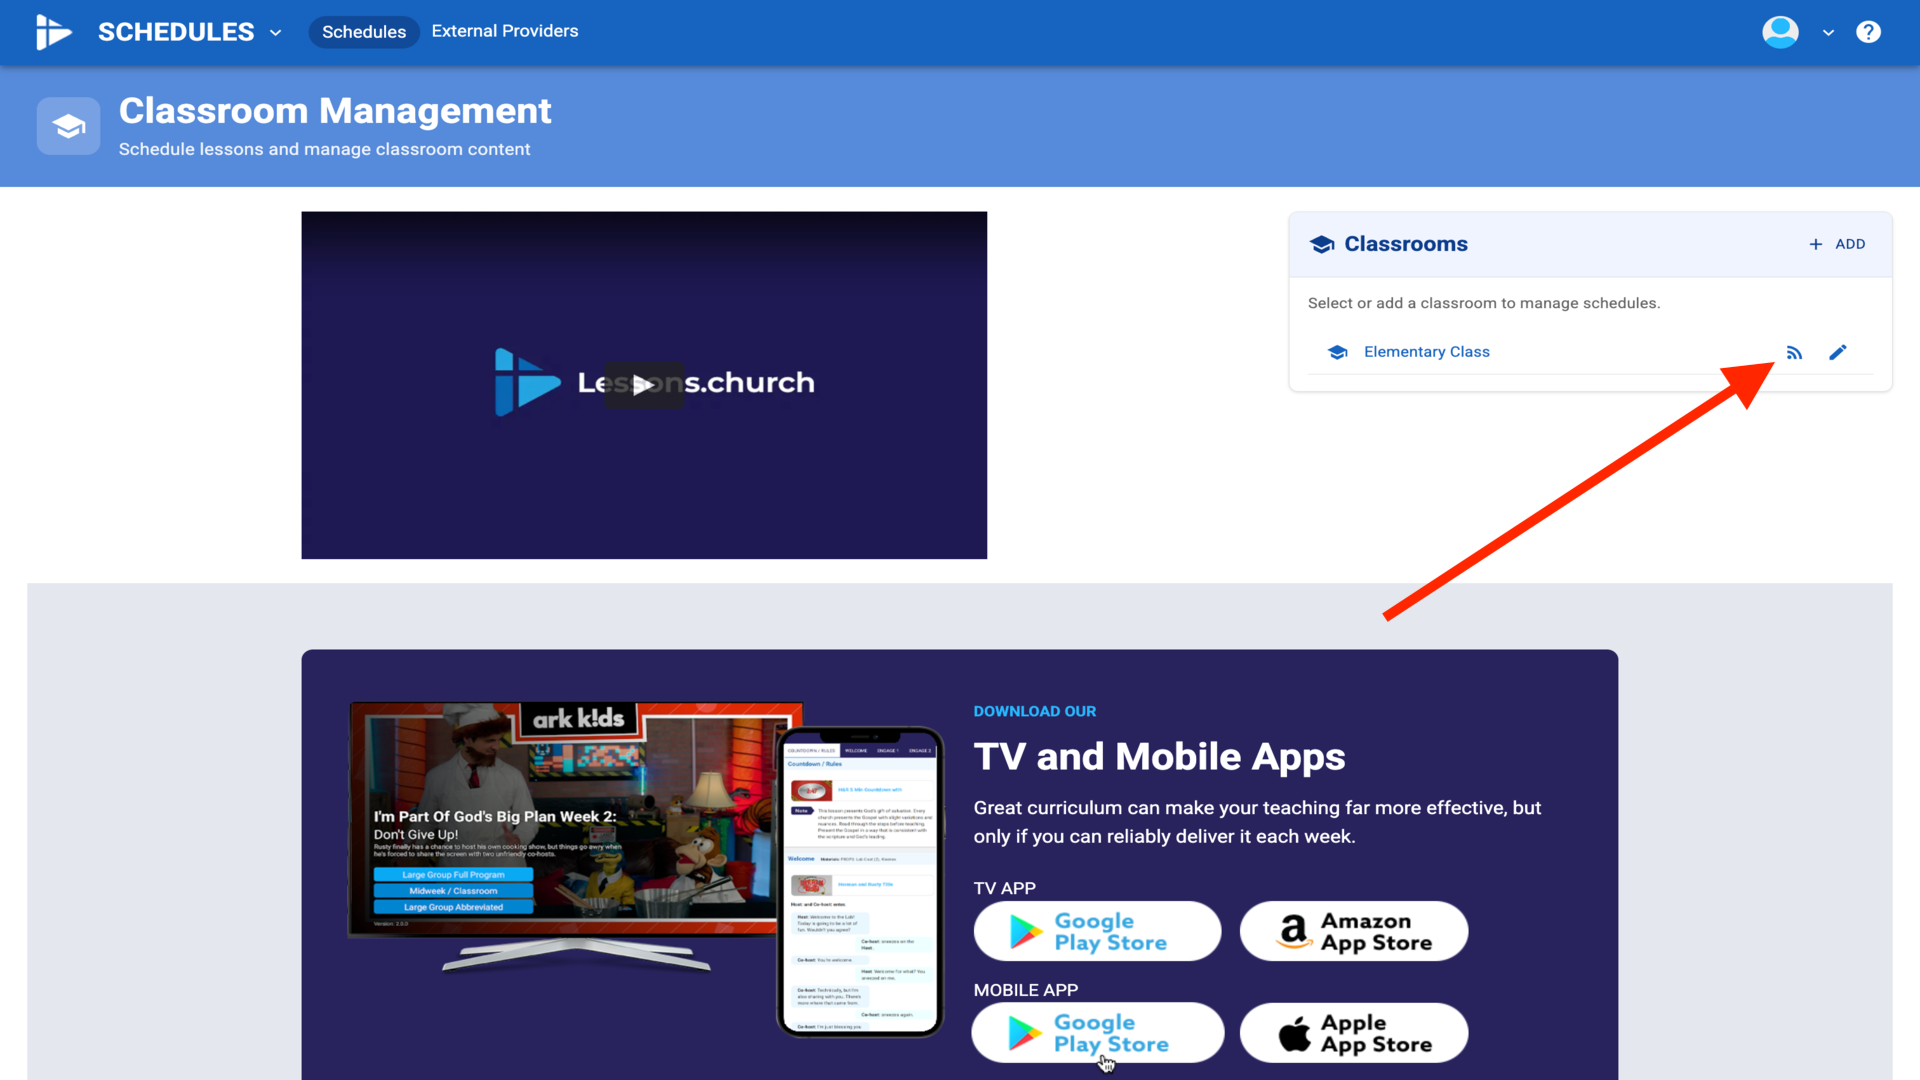
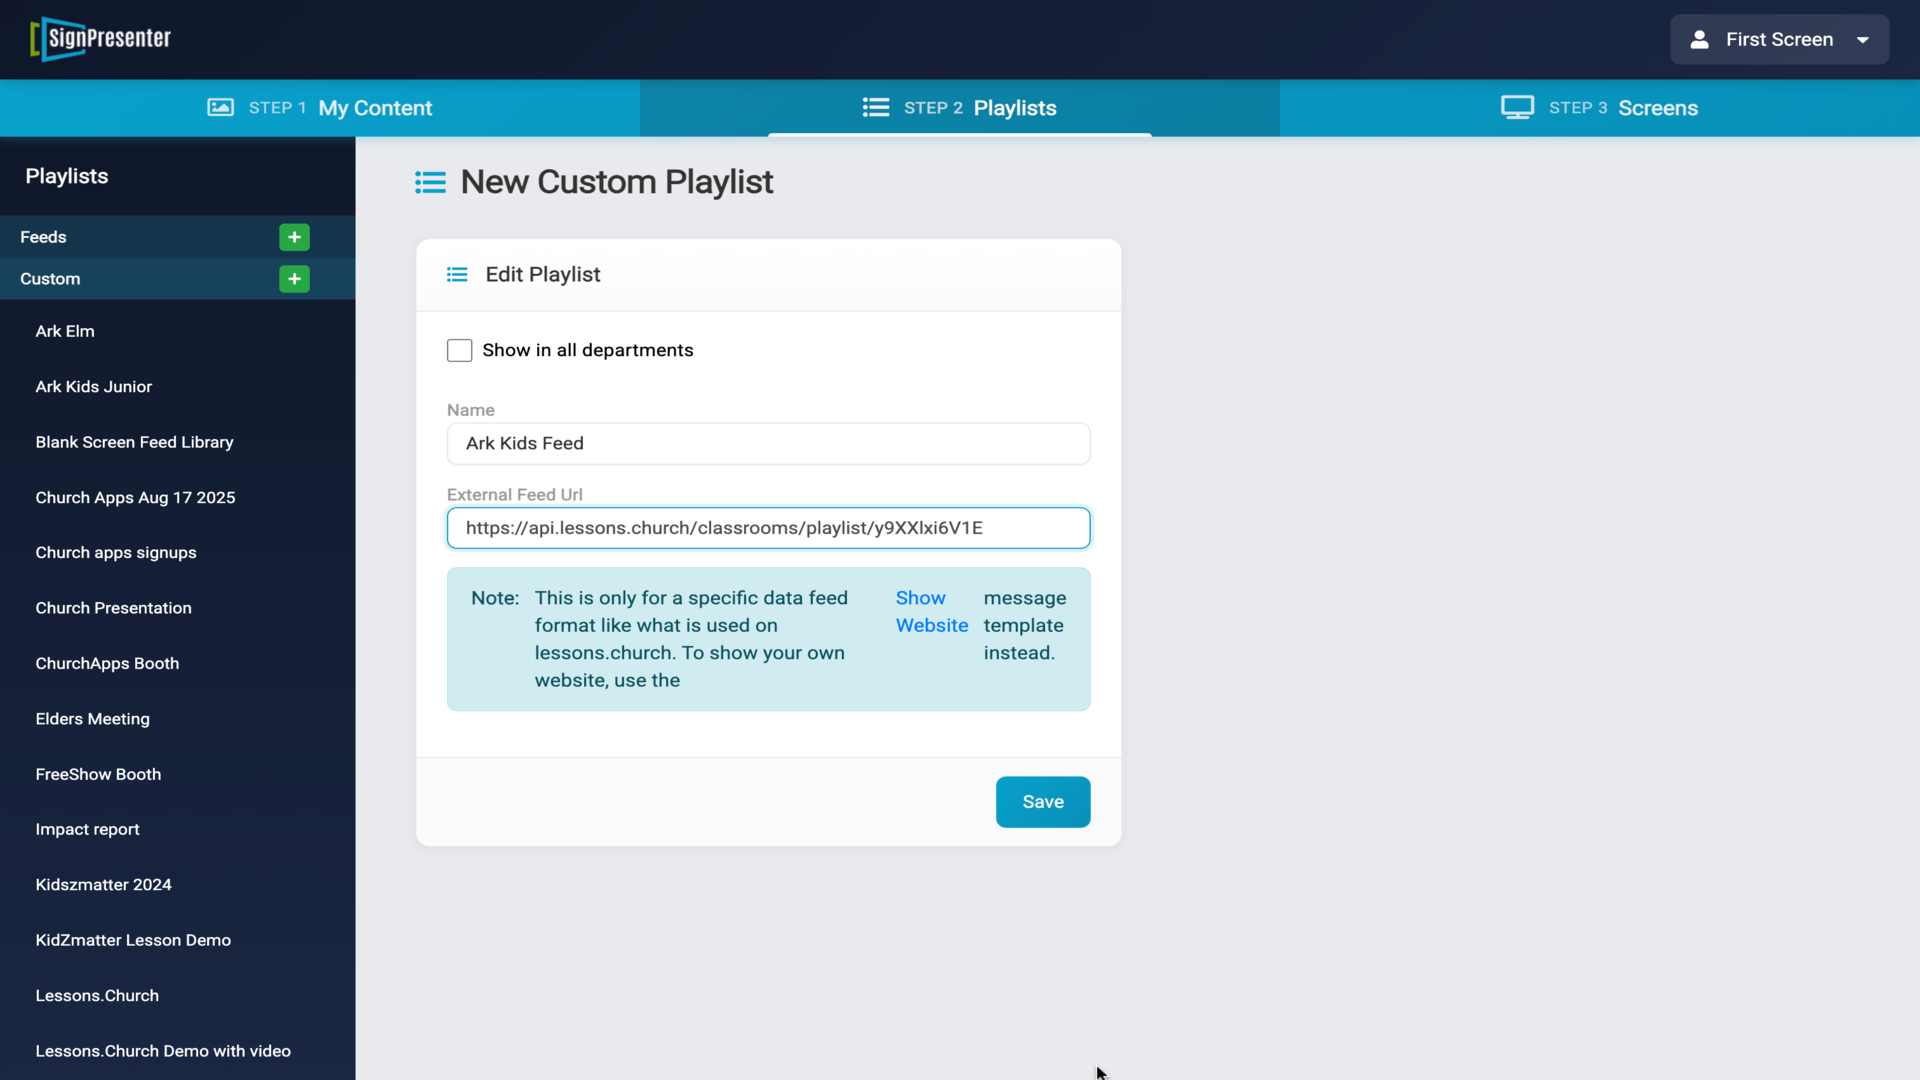
1.In Lessons.church, click the RSS icon next to your classroom (use correct venue)▼
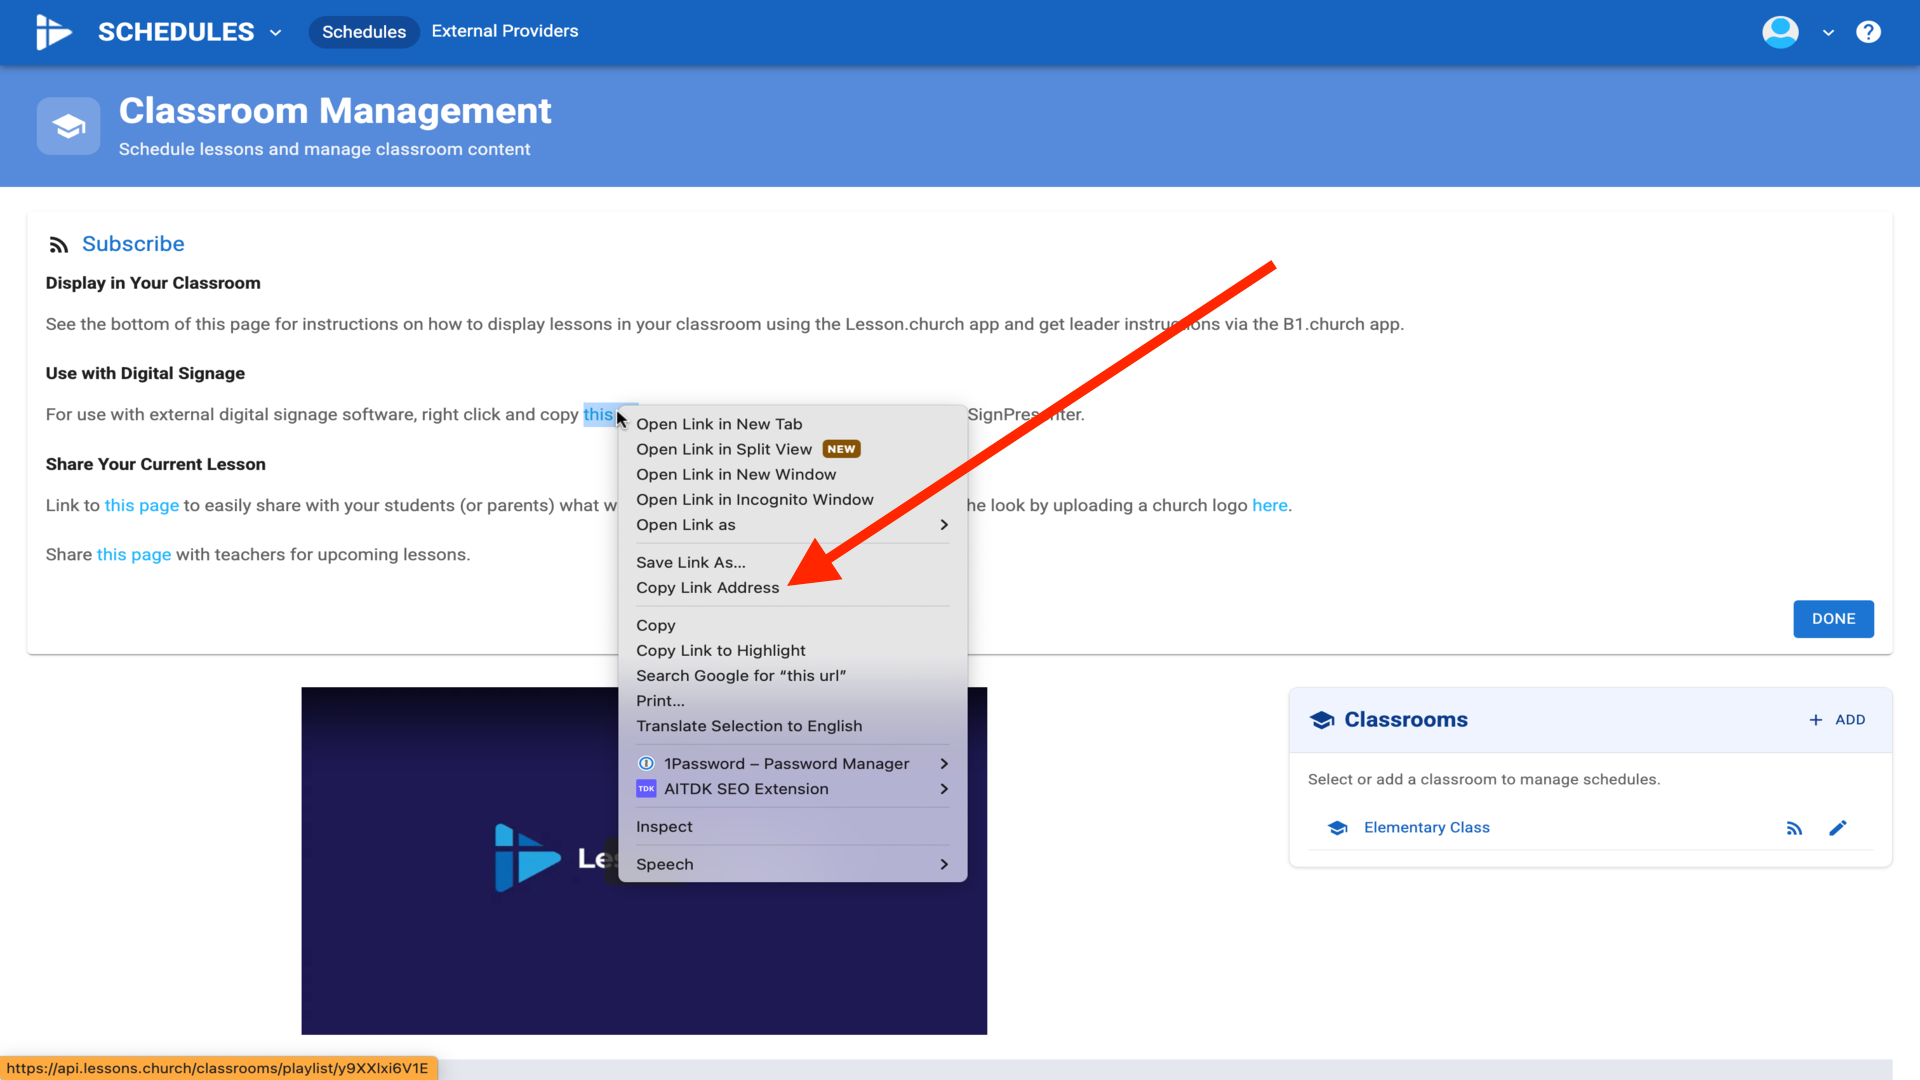
2.Right-click "this url" and select Copy Link Address▼
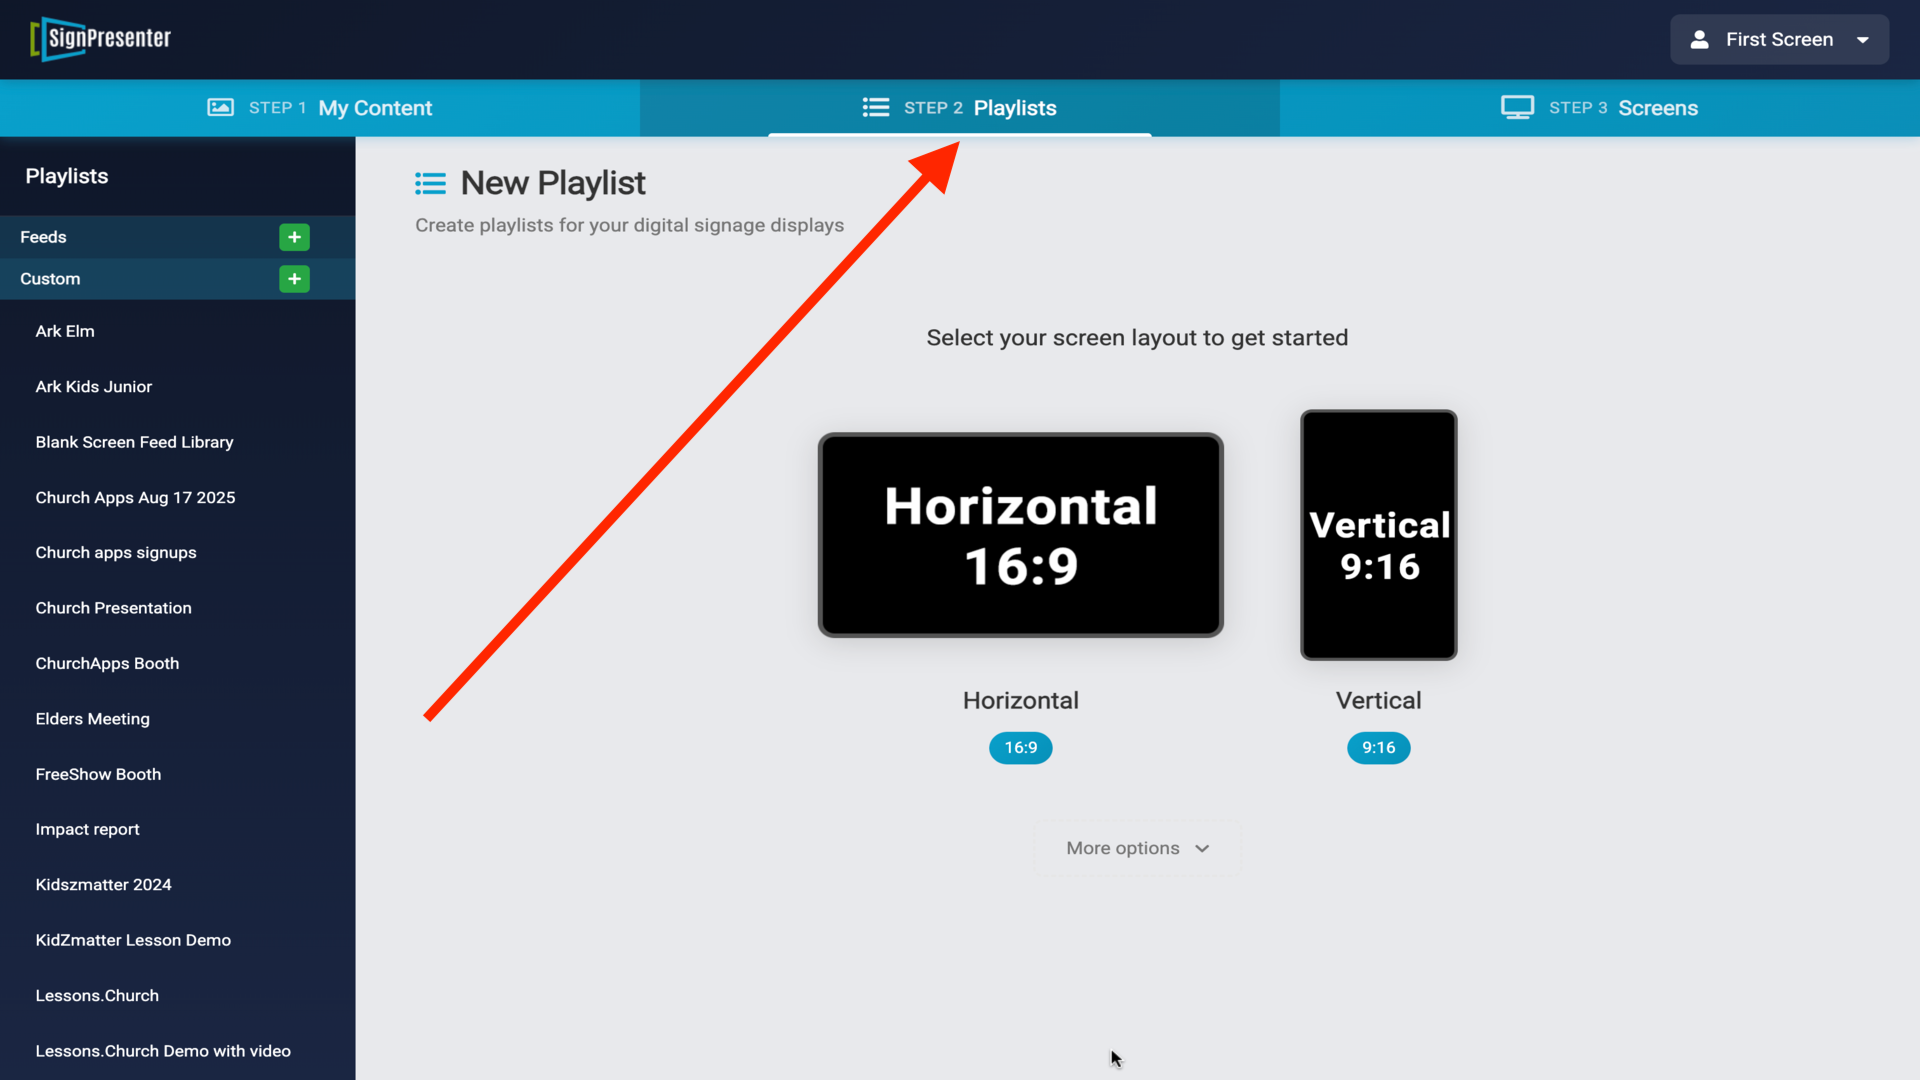
3.In SignPresenter, go to Playlists tab and select Horizontal▼
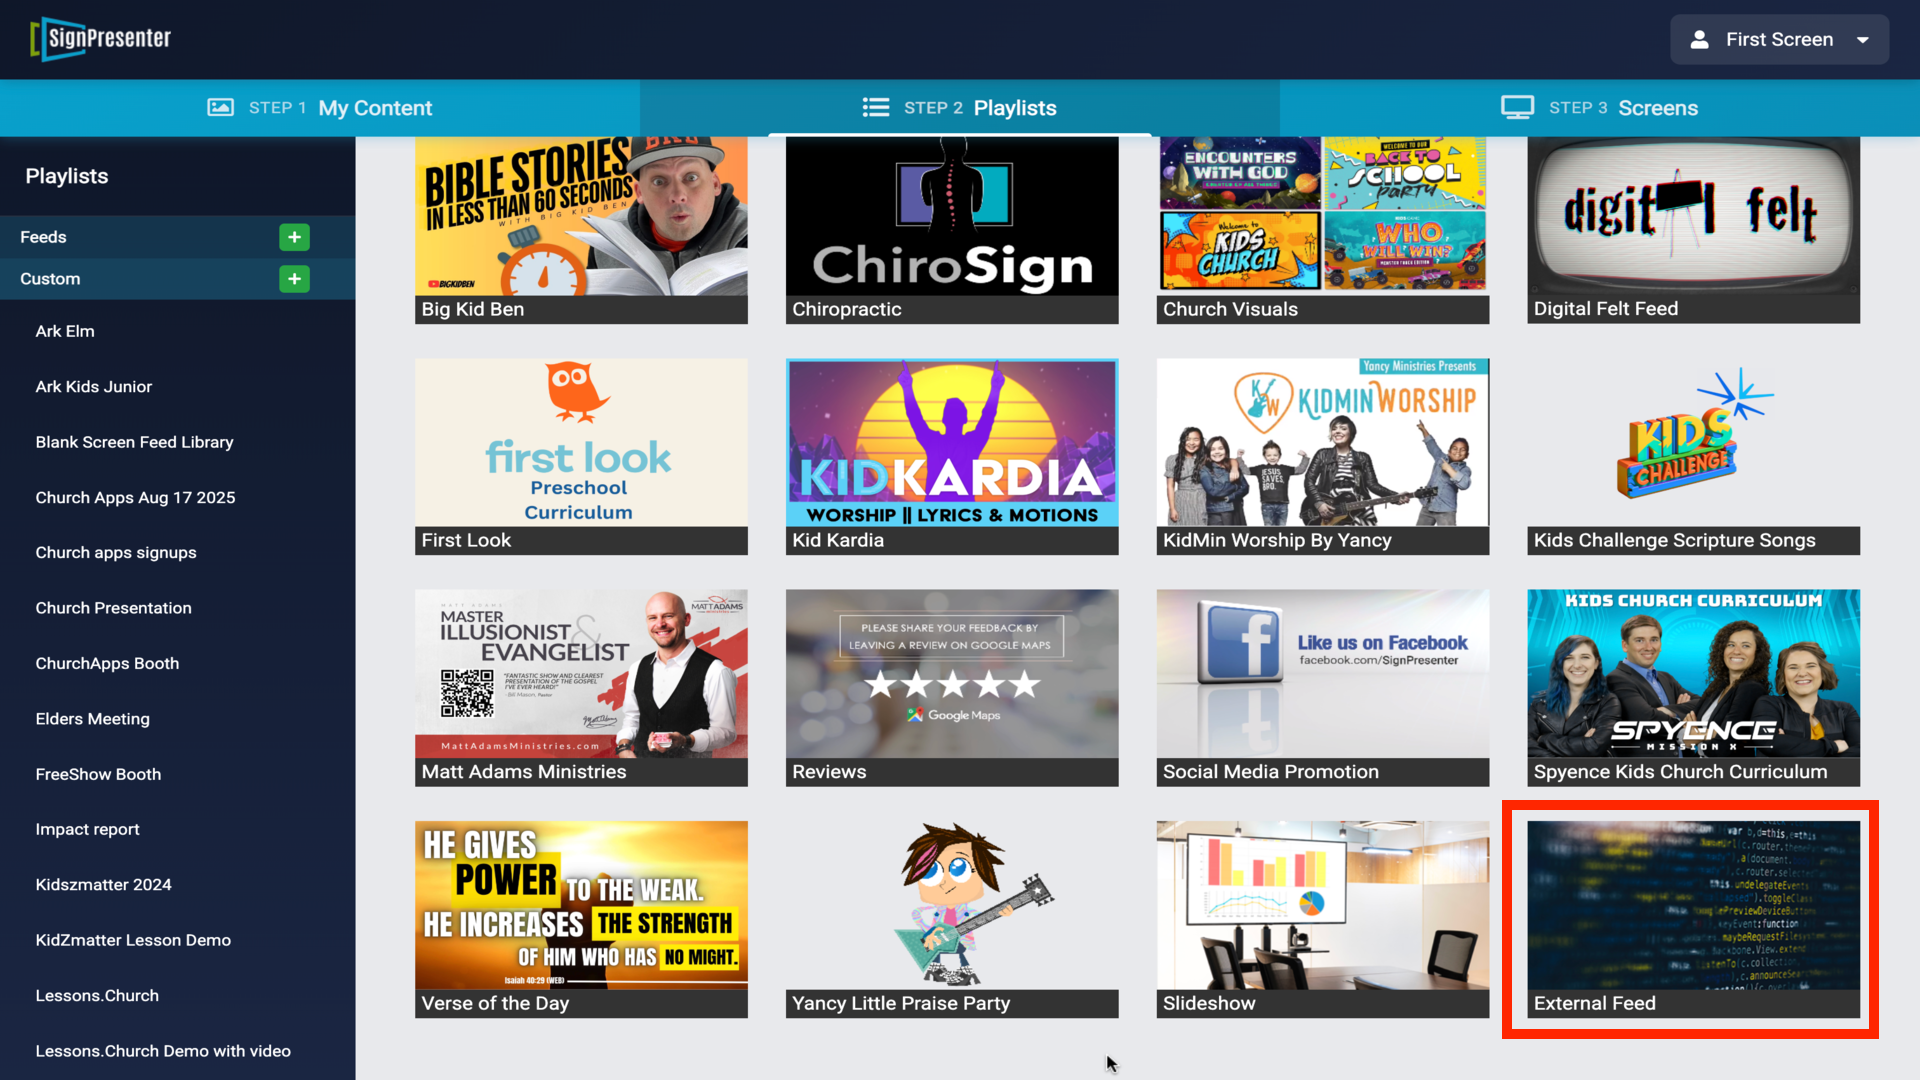
4.Choose External Feed, or subscribe to bigBigWorship and other feeds for later use▼
5.Name your playlist and paste the feed URL, then click Save▼
6.Select a pre-built feed, or click Create a New Custom Playlist▼
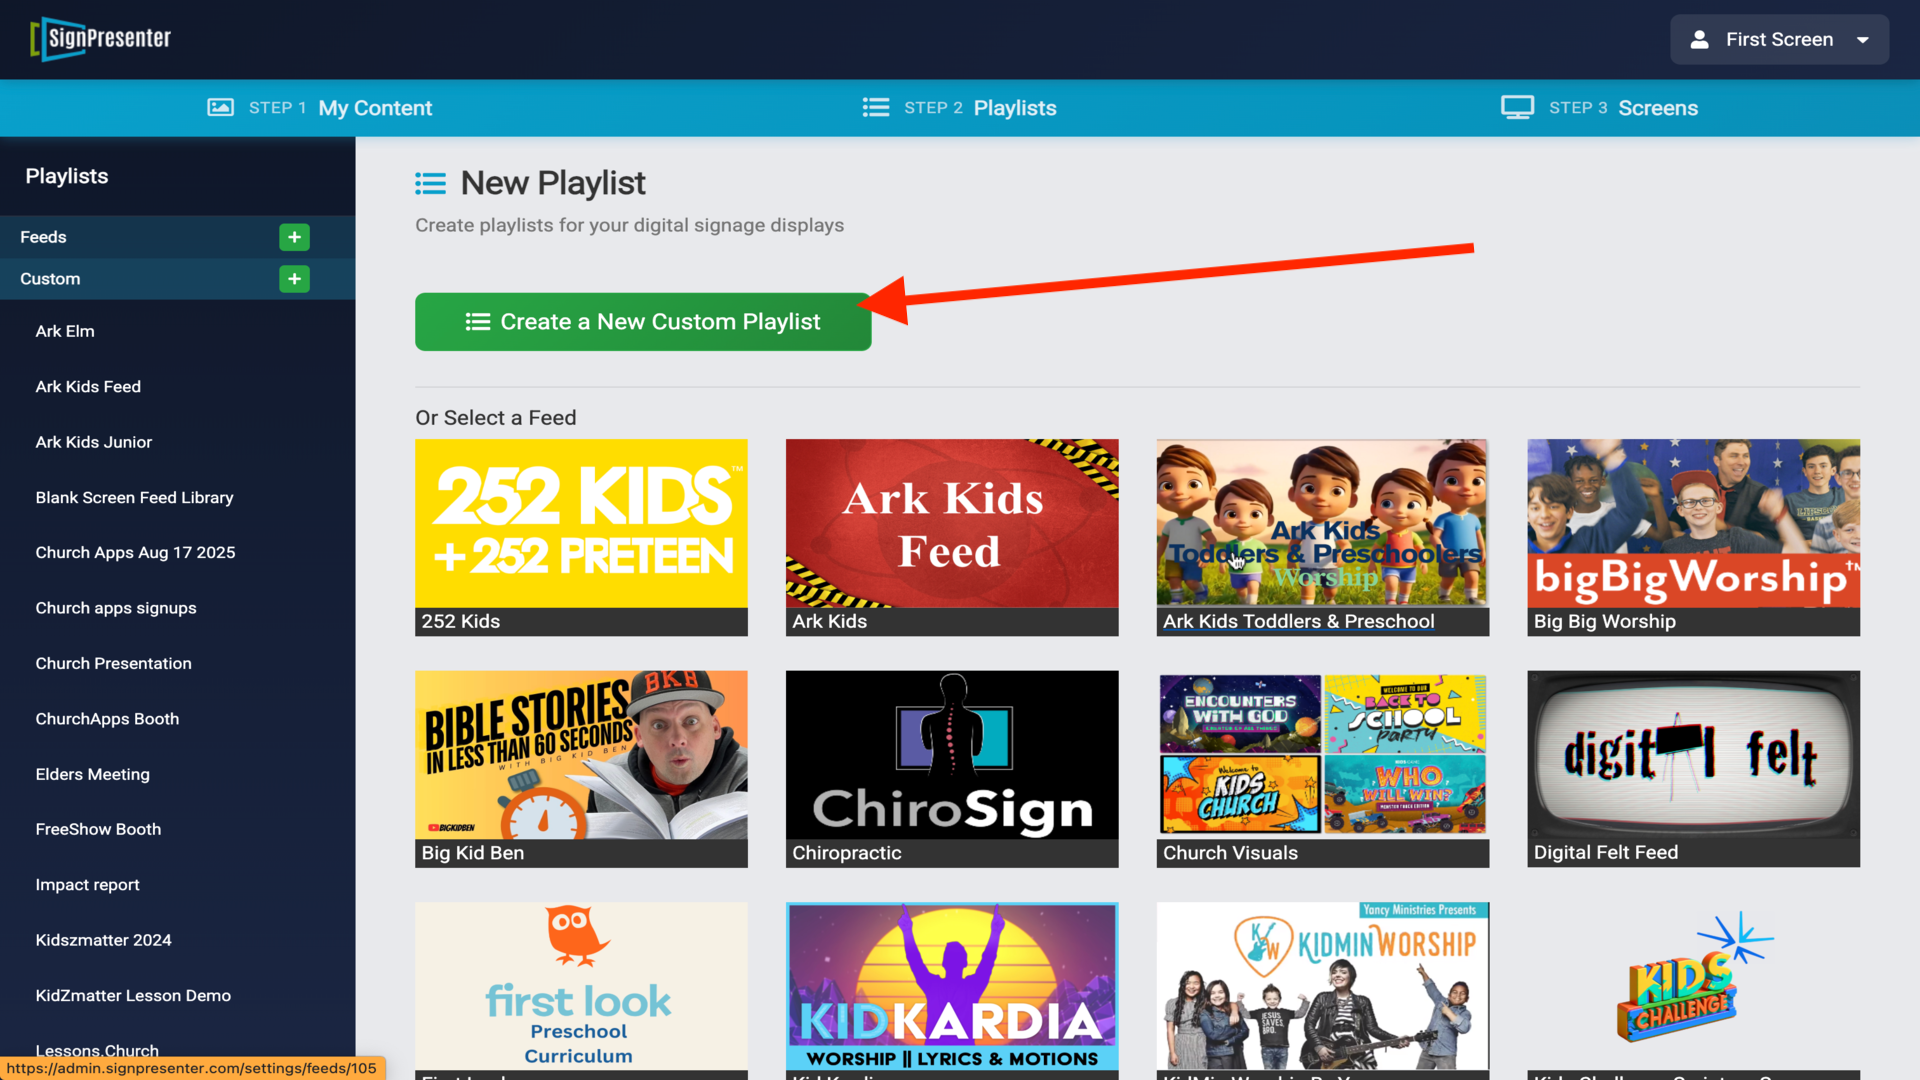
7.Name your custom playlist (e.g., Preschool) - add slides and playlists to it▼
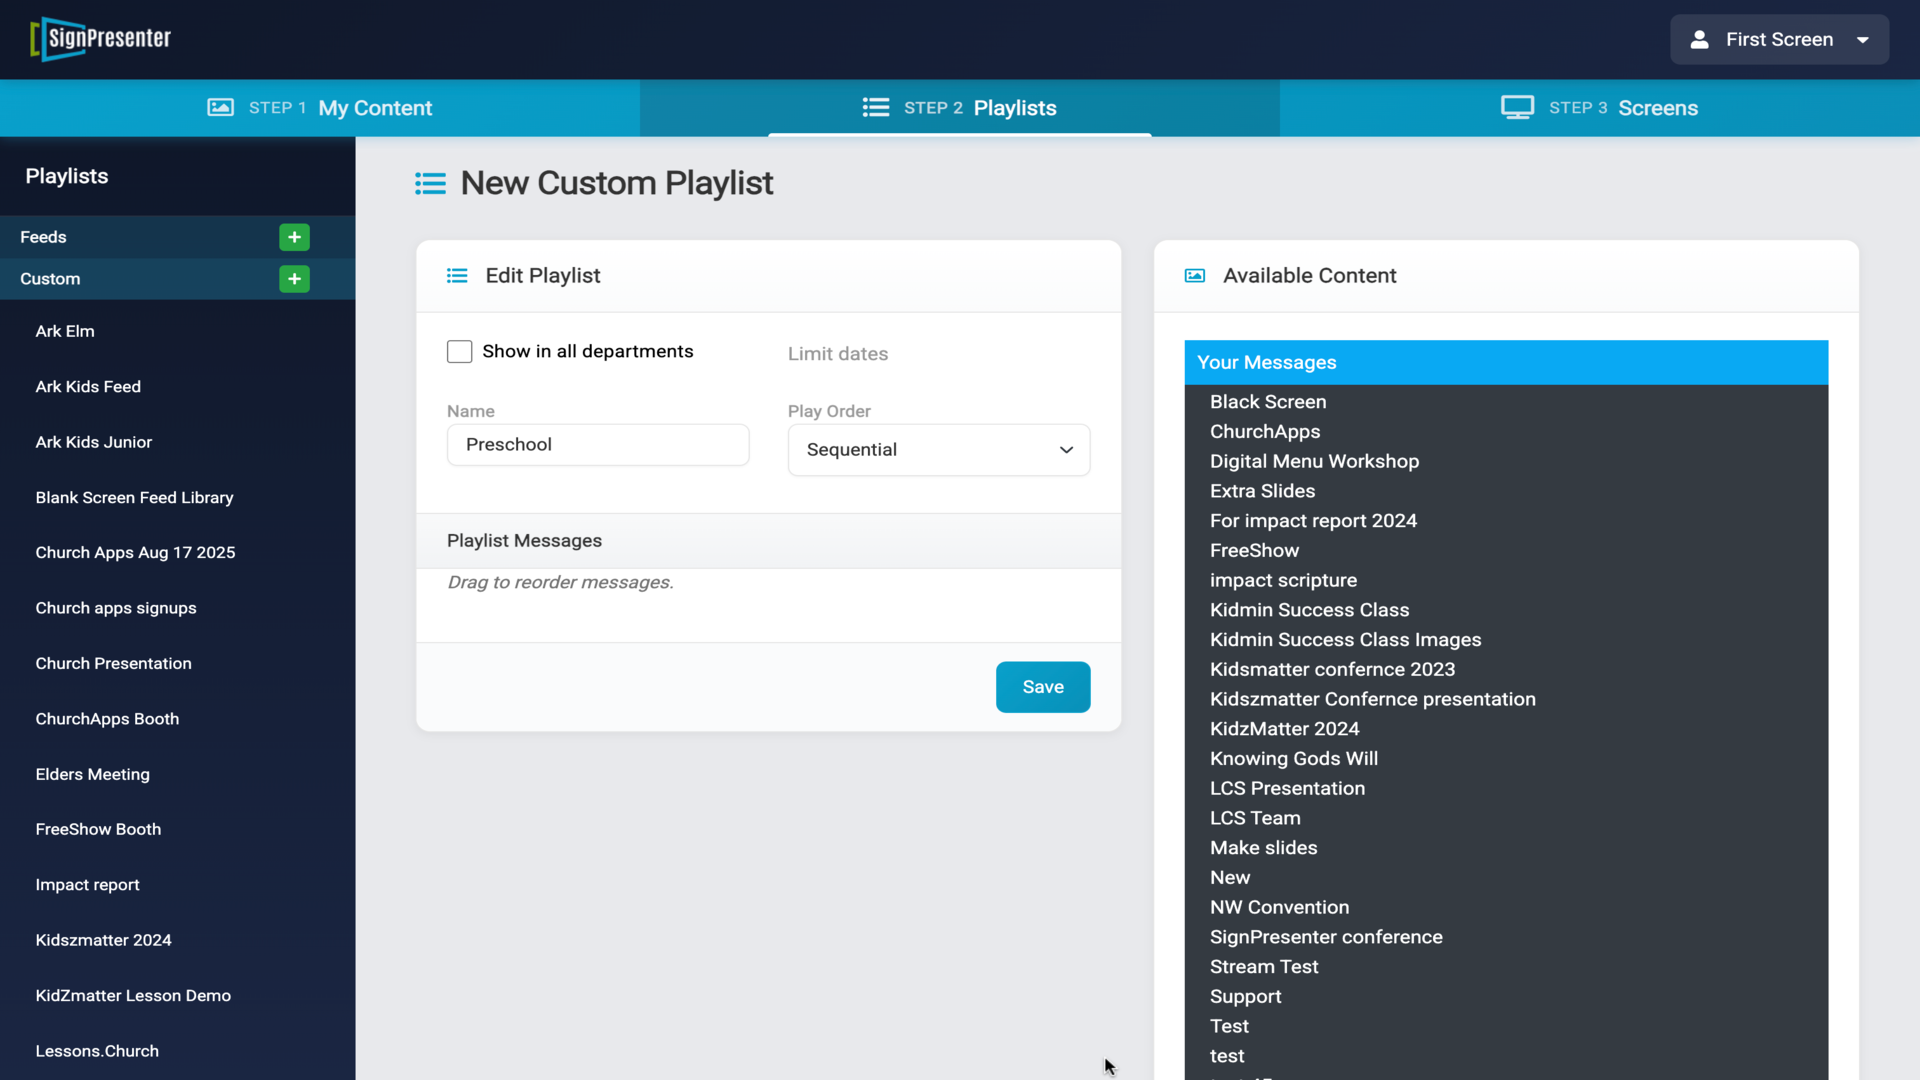
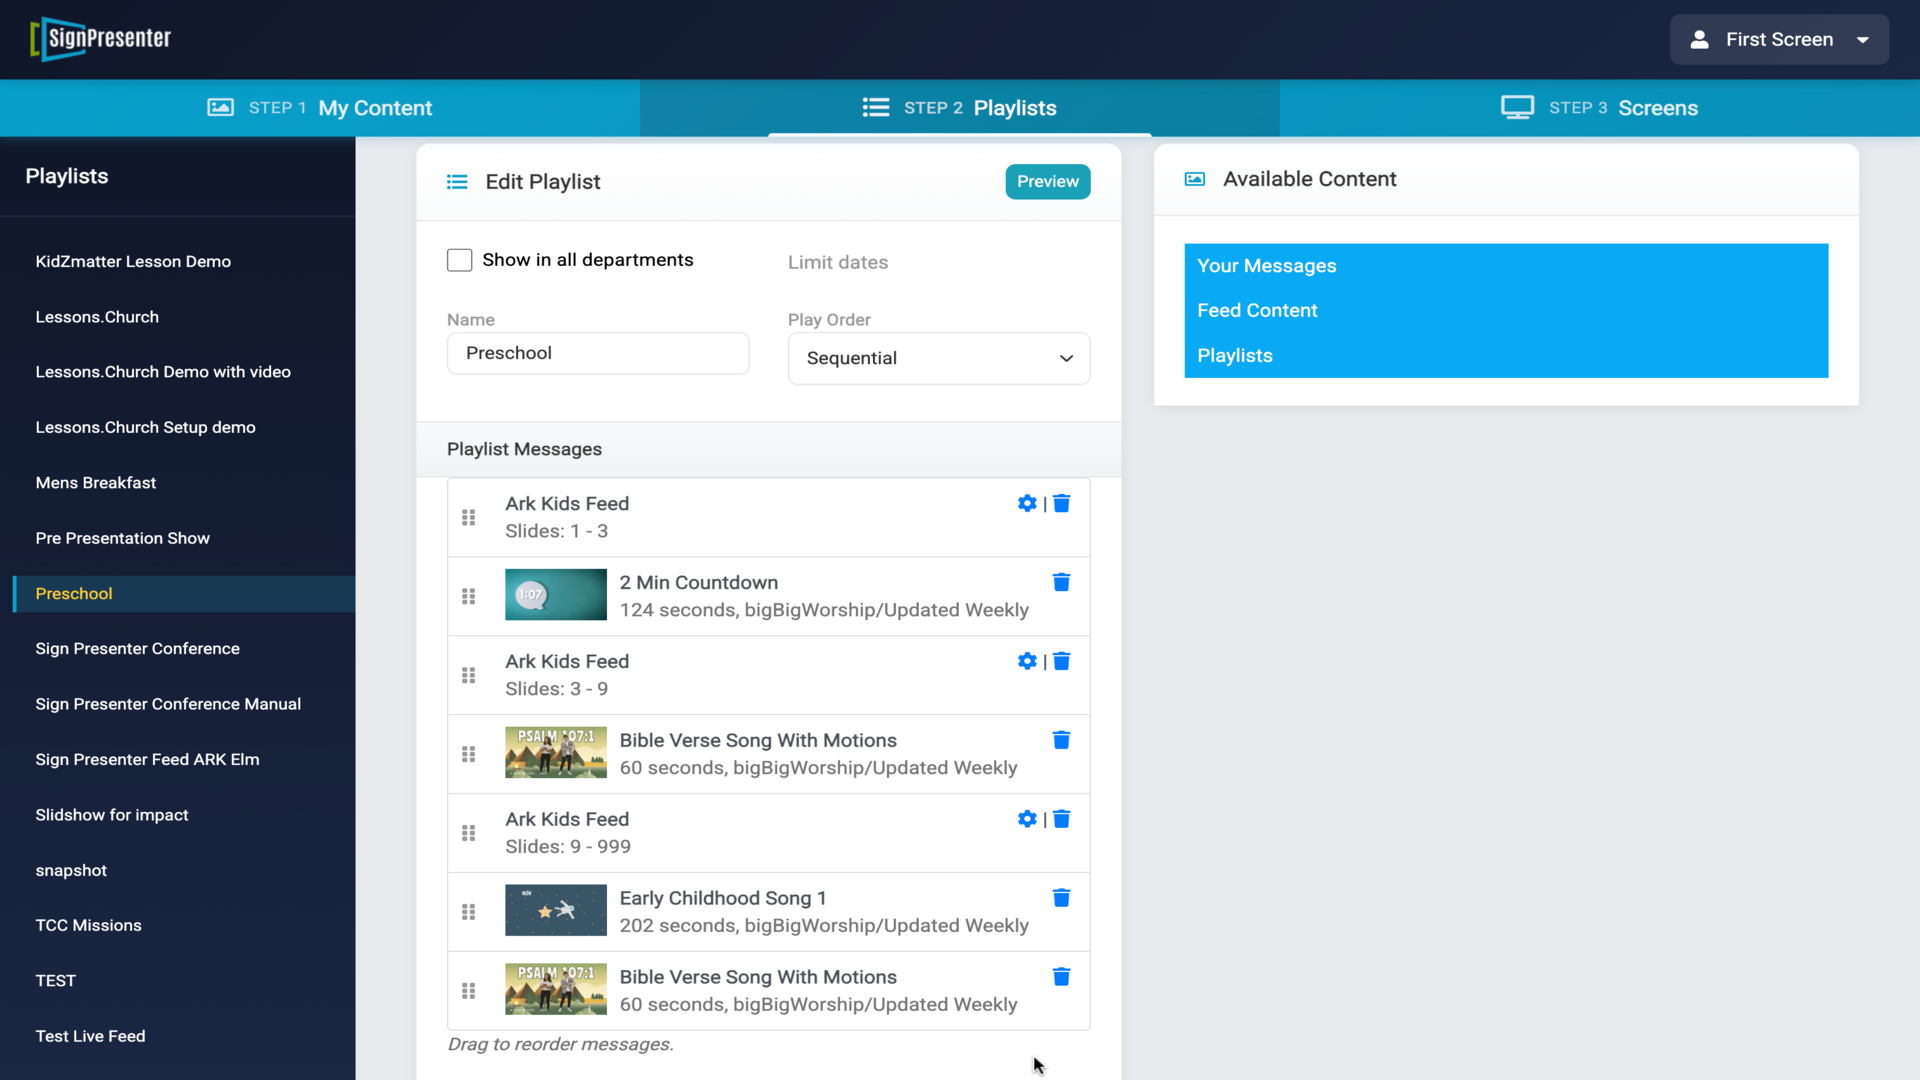
8.Click the Playlists tab in Available Content to see your saved playlists▼
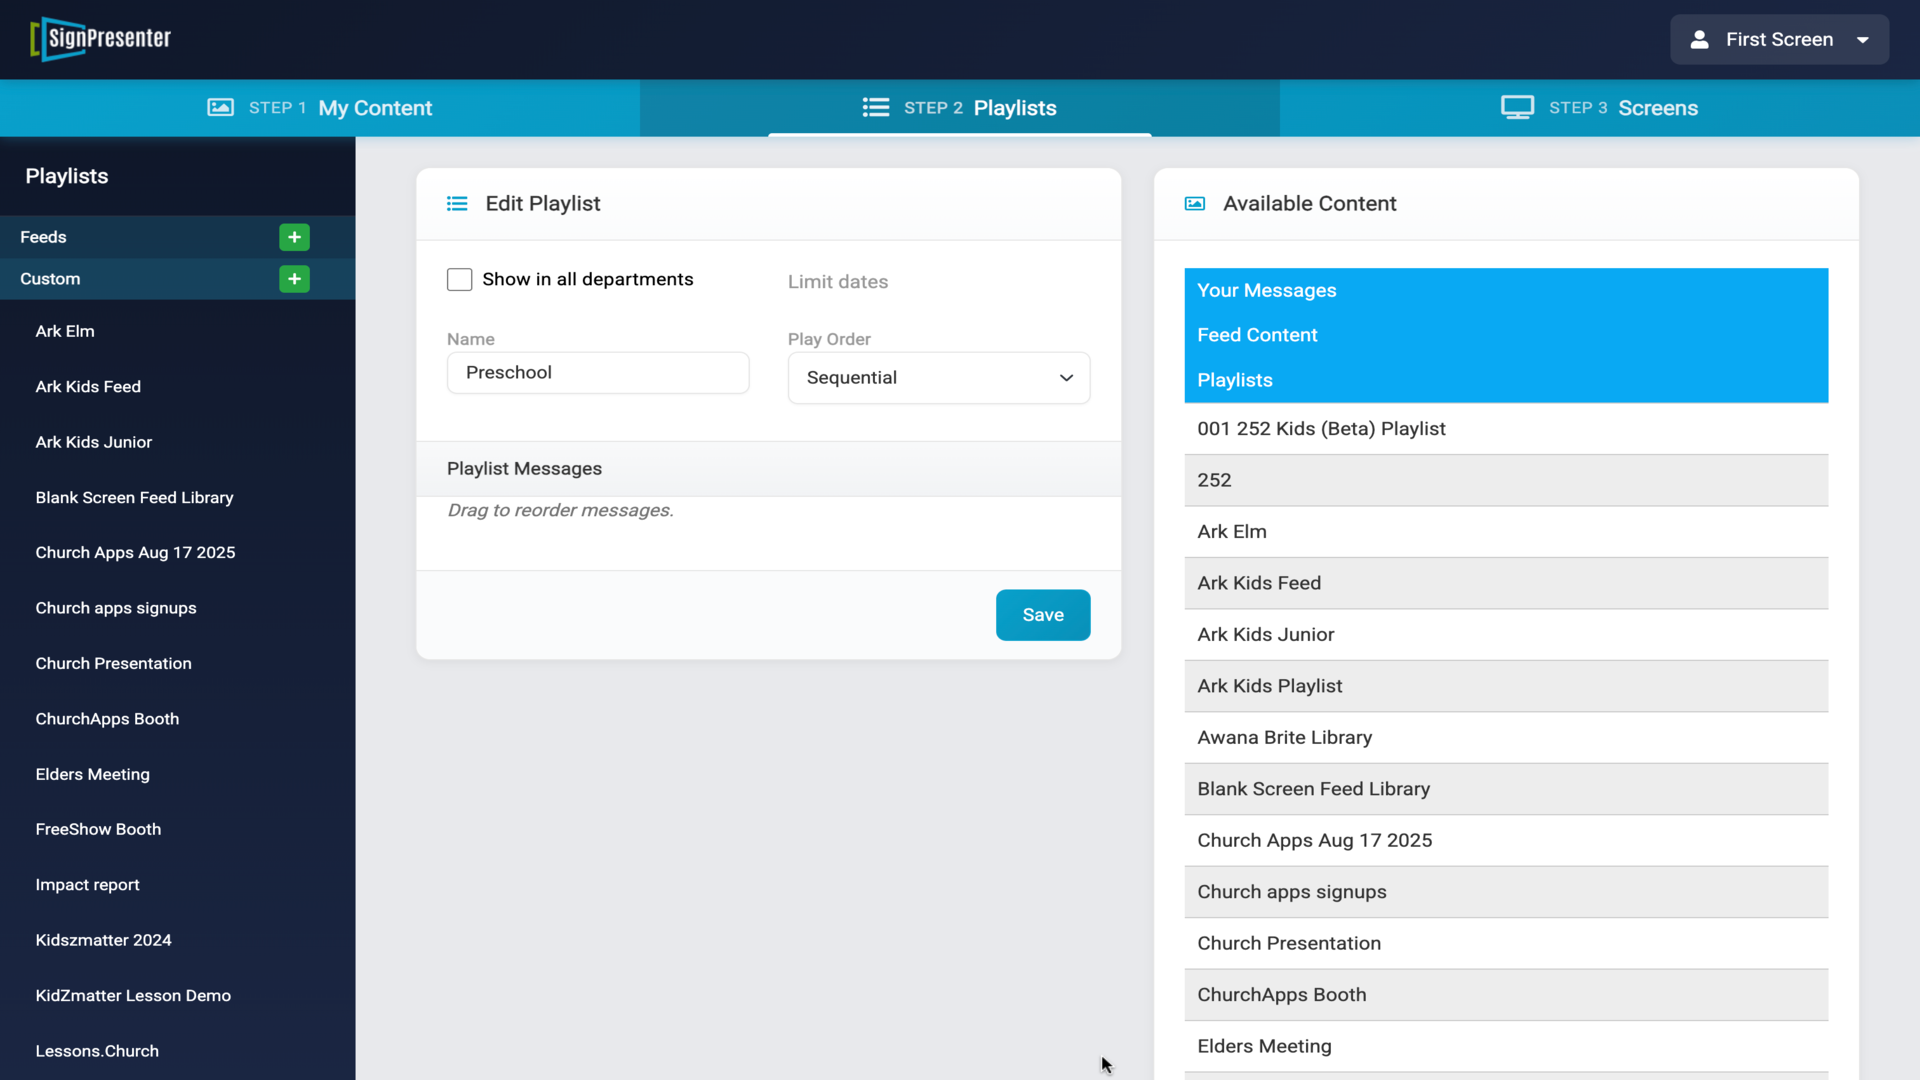
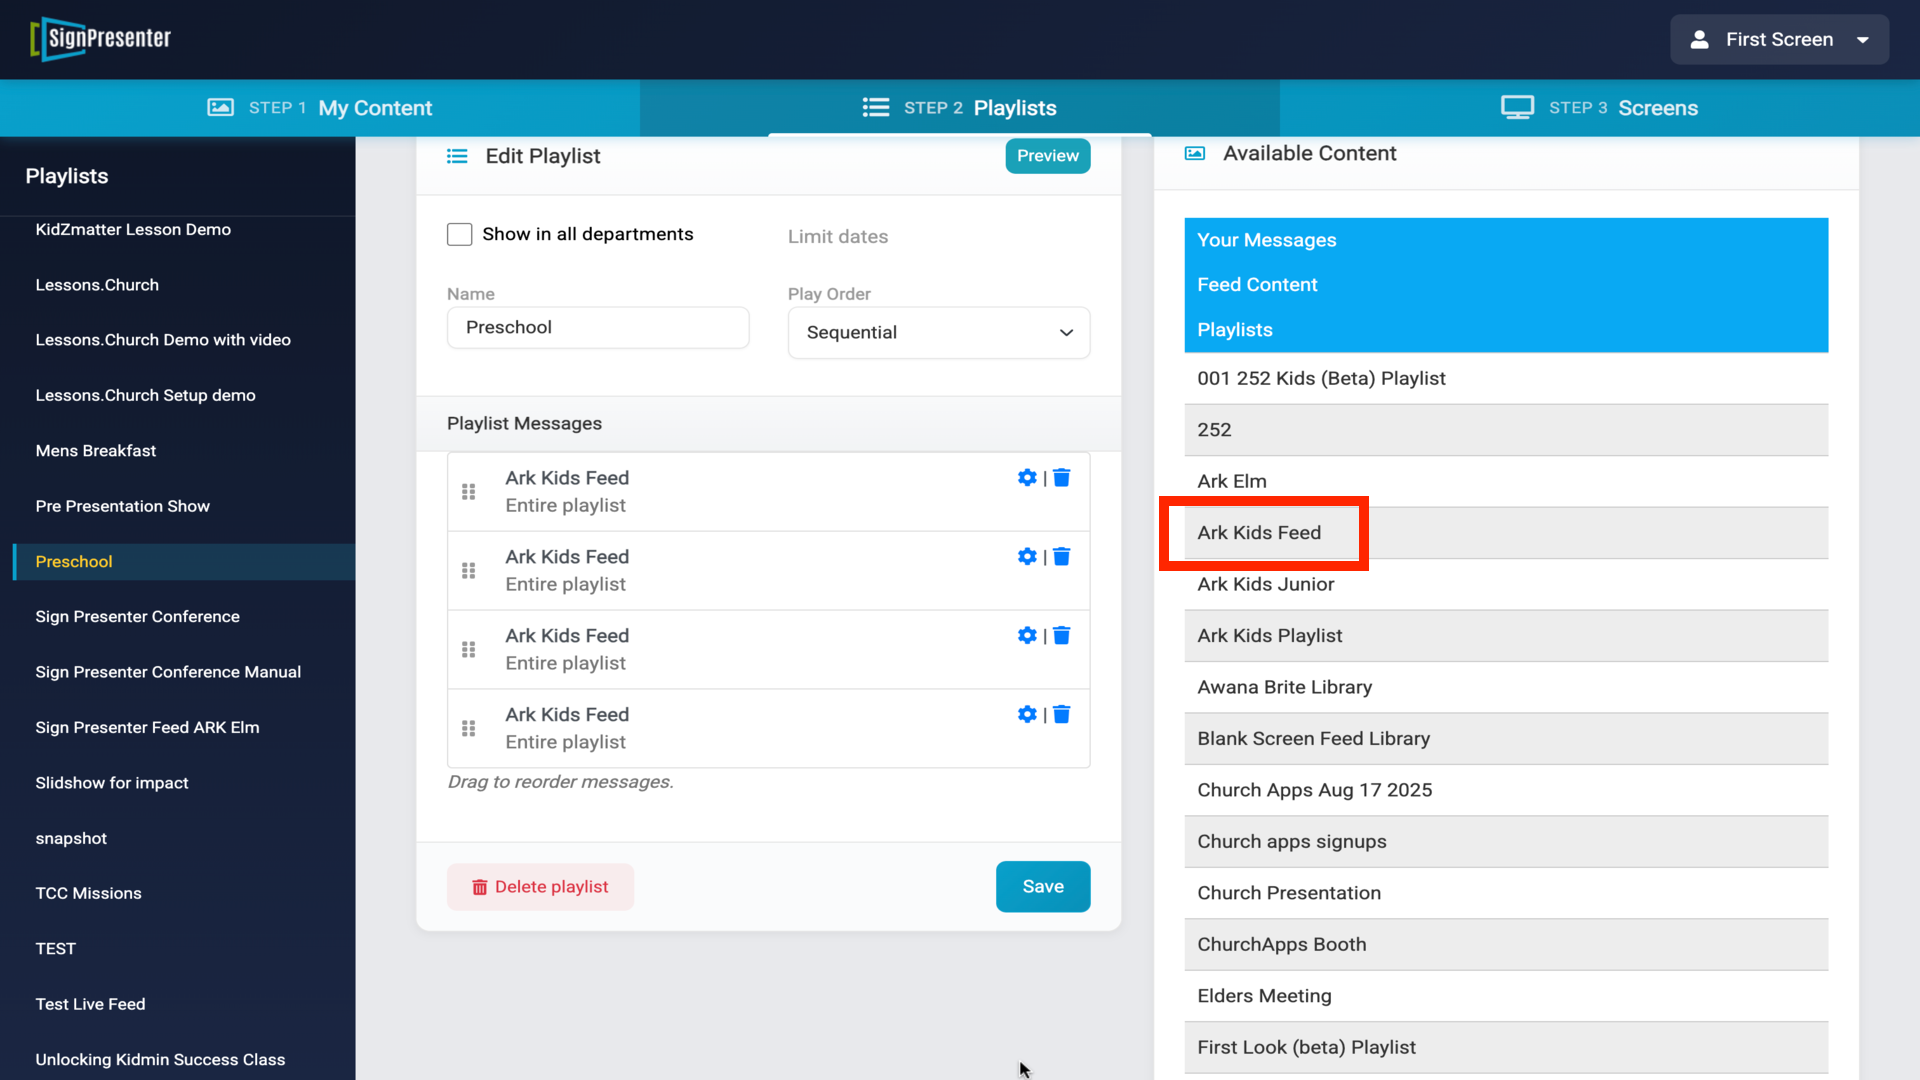
9.Click on a playlist like Ark Kids Feed to add it to your custom playlist▼
10.Add bigBigWorship content for countdowns, worship songs, and games (updated weekly)▼
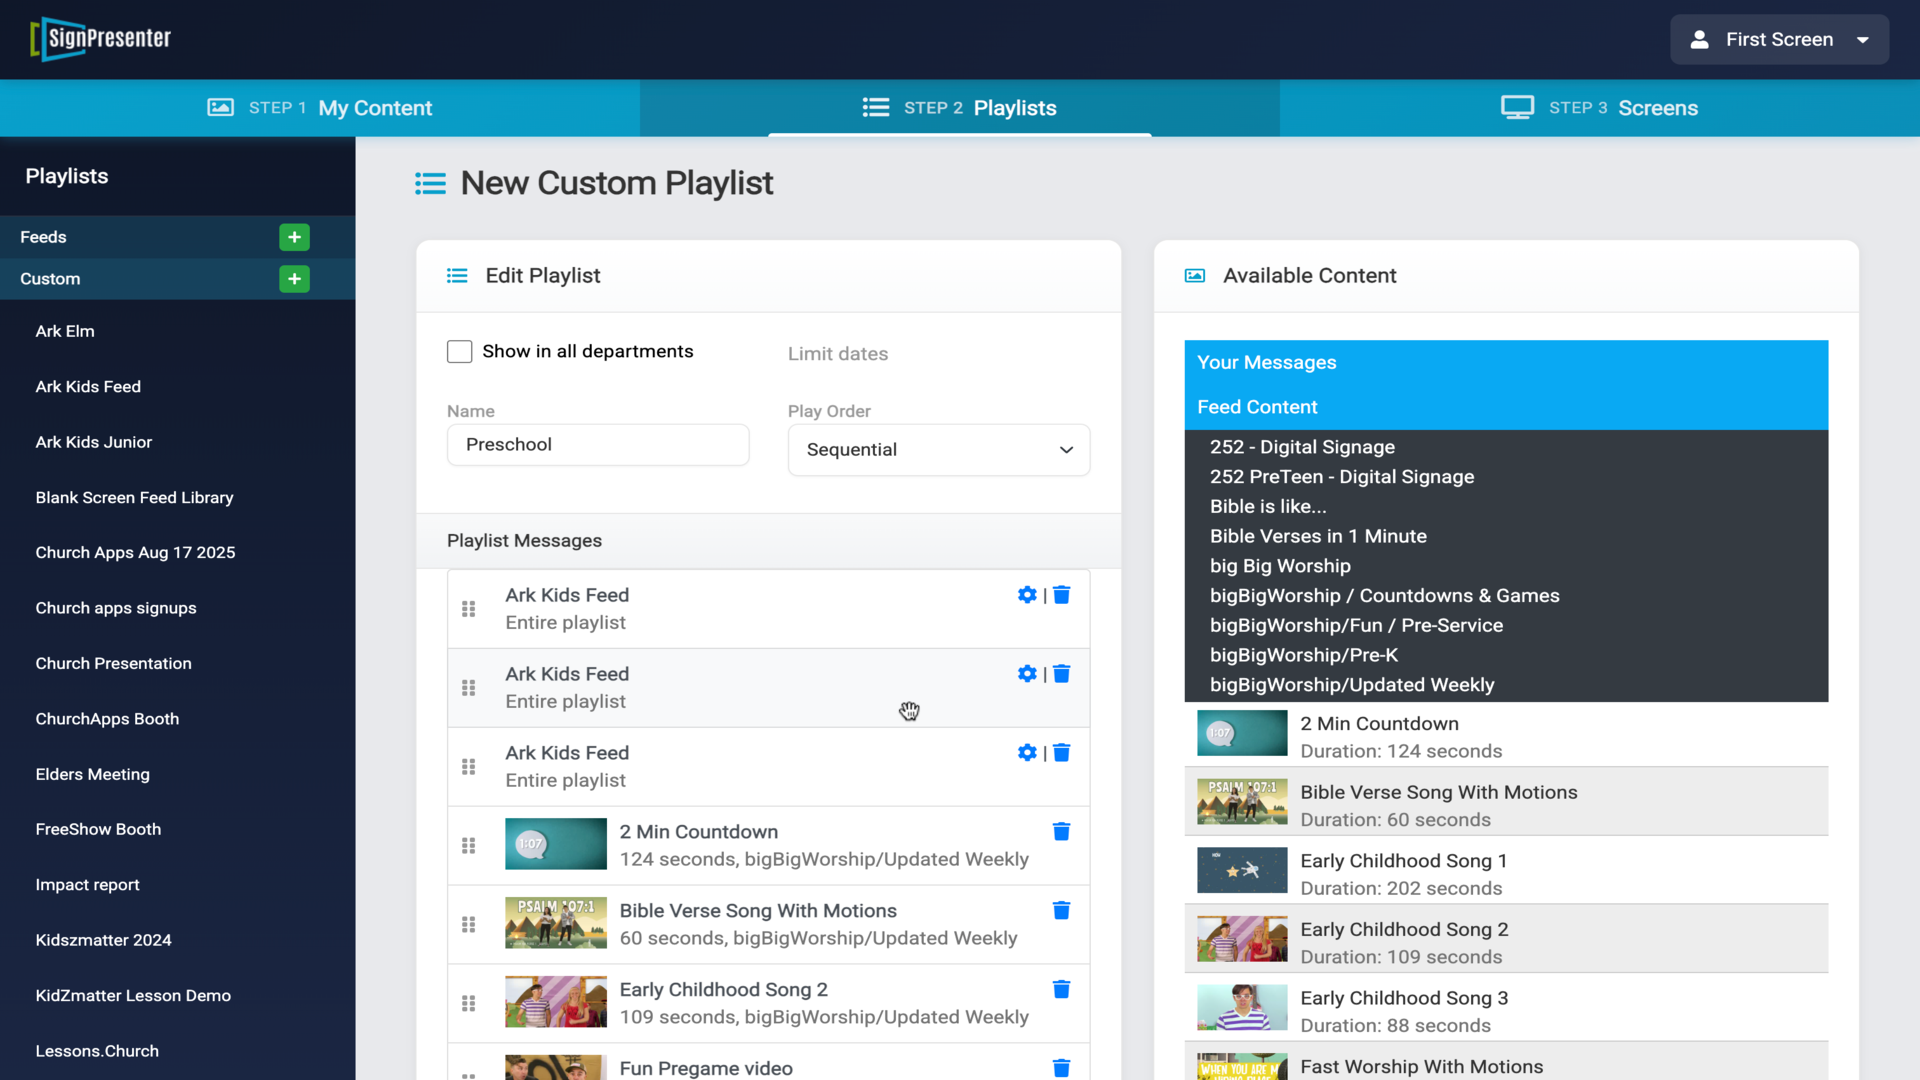
11.Click the gear icon to set start/end points for each feed▼
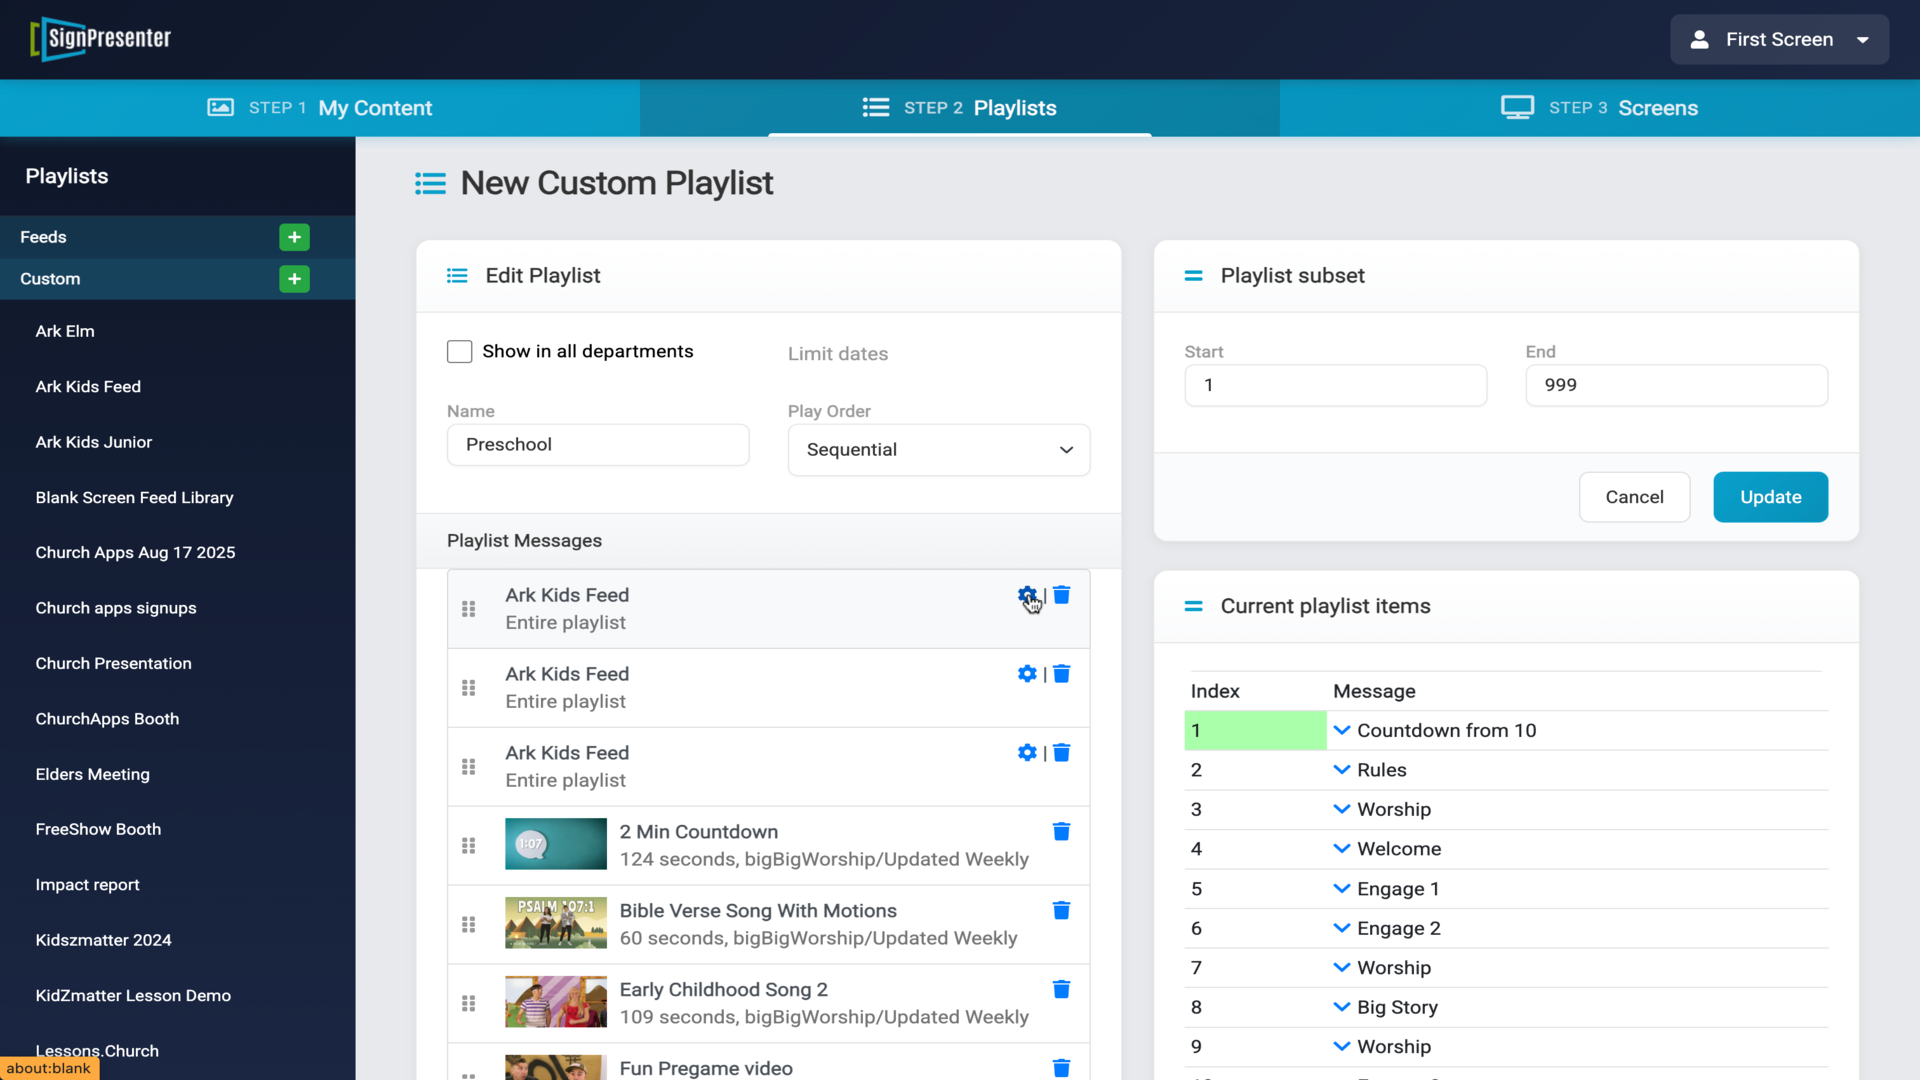
12.Break your playlist into sections (slides 1-3, countdown, slides 3-9, worship, etc.)▼
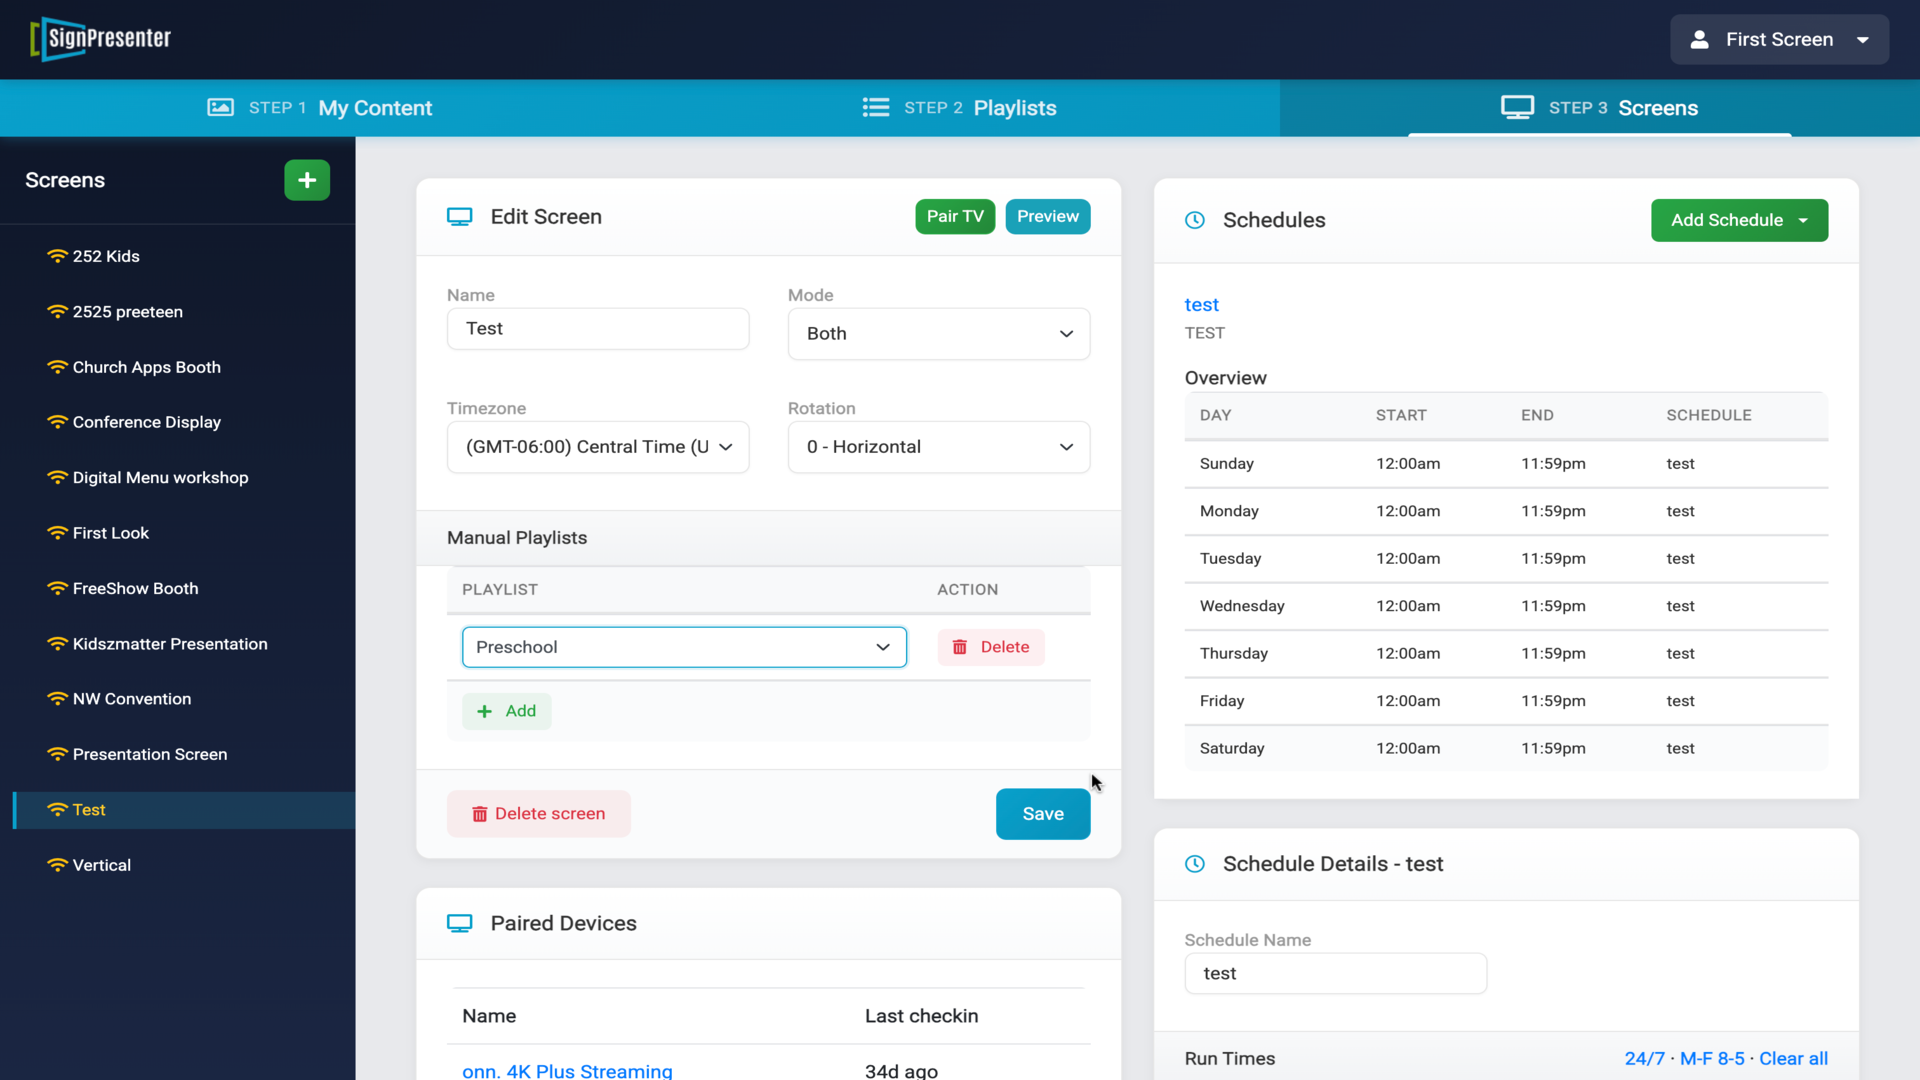
13.Go to Screens tab - add to Schedule (recommended, auto-advance) or Manual Playlist▼
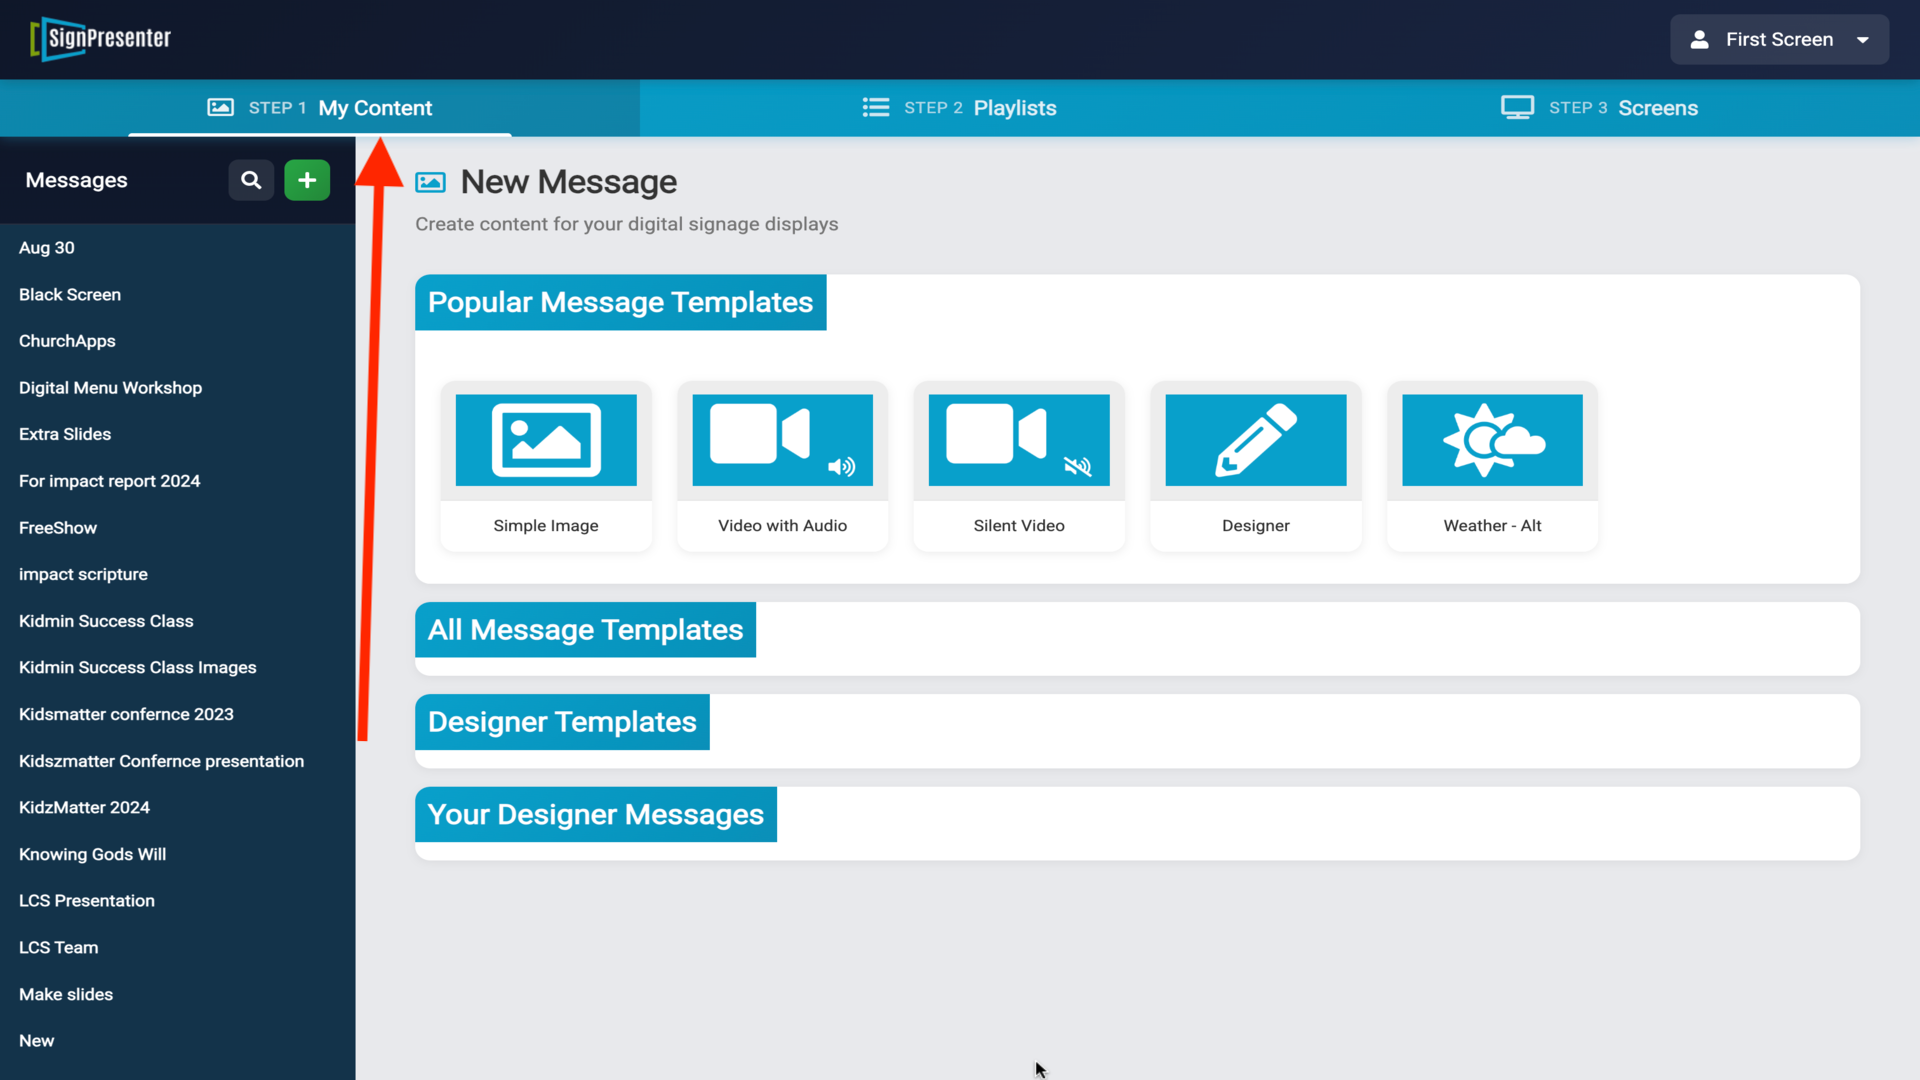
14.Upload your own videos or images in My Content > Messages▼